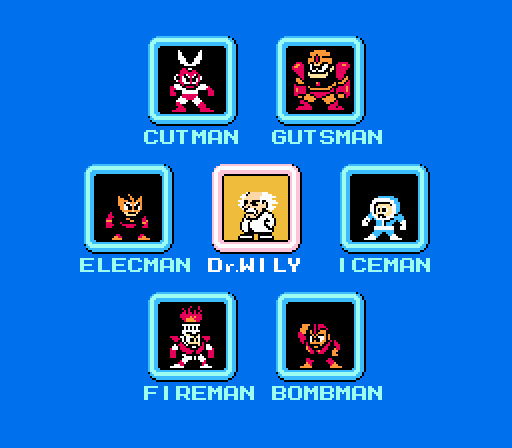
With the six Robot Masters down, regardless of the order in which you tackled them, the game’s final stage — or rather, set of stages — opens up to you: Dr. Wily’s castle. At this point, you have a choice of where to go next; you can dive right into Wily’s lair, or you can revisit the stages you’ve conquered. The game doesn’t tell you this, though, and it doesn’t lock Wily’s levels away if you haven’t collected the optional Magnet Beam, even though you can’t complete these final stages without it.
That annoyance aside, Dr. Wily’s stages bring the full fury of Mega Man to bear. These four stages are (mostly) the most difficult in the game, incorporating tricks from every other level and mixing them up into new configurations. Every level you’ve played until now has showed you the ropes of the game and honed your skills, and Capcom isn’t afraid to stop pulling punches now. Thankfully, the difficulty here is far more fair than that of Ice Man’s stage — no vanishing blocks, no slippery ice, and much briefer floating platform sequences.
In a lot of ways, the difficulty of Wily’s stages is heavily front-loaded. If you can make it past Wily Stage 1, the rest of the game shouldn’t pose too much of a challenge. In particular, the boss of this level stands athwart your progress and demands top-level play with exactly no quarter whatsoever given.
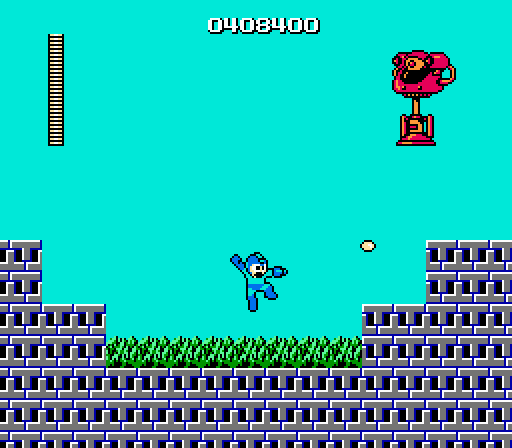
The stage begins with a trio of Big Eyes, the massive stomping robots that appear at the end of five out of the six Robot Master levels. That should be your tip-off that things have become serious indeed: What normally serves as a boss’ last final line of defense is treated as mere warmup here. The Big Eyes appear on largely flat ground, with only one showing up on uneven turf that you can use for strategy. Nevertheless, you’re well-armed to deal with them at this point.
You may have figured out the fact that jumping provokes a Big Eye into making a large leap with its next action, allowing you to run safely beneath. And even if not, you can simply use the Ice Slasher to freeze each one at ground level before switching to another weapon to destroy it. So in that regard, the Big Eyes don’t just show how serious things have gotten; they also afford you the opportunity to demonstrate how much more capable you’ve become through the ease with which you render the things ineffectual.
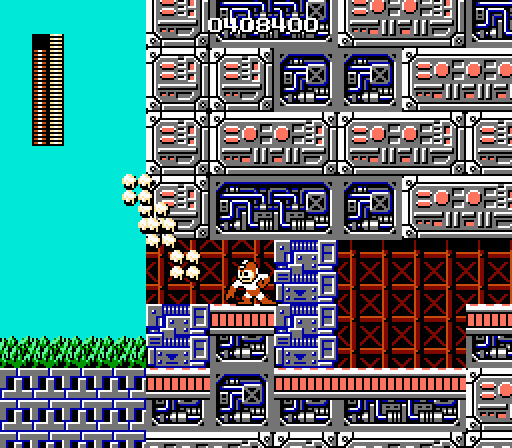
Beyond here, much of the level is obstructed by blocks that can be shattered with the Elec Beam or tossed with the Super Arm. That’s accomplished easily enough, of course. The Elec Beam proves extremely effective in many situations here, in fact, since many enemies attack on the vertical or spawn in blocked-off areas above or below Mega Man. The real trick is rationing the Elec Beam’s energy, since energy refills tend to drop somewhat unreliably, and there are no opportunities to recharge your power completely until the very end of these four stage. Well, unless you have to continue. But that’s a lame way to go about it.
Beyond the Big Eyes and “super” blocks, you encounter a handful of the flame pillars from Fire Man’s stage, located in narrow passages that require masterful jumping to pass unscathed. Of course, you can use the Ice Slasher to freeze the fire jets and use them as temporary platforms, but it takes really excellent timing to do it just right. The three pillars appear on the same horizontal plane and emerge on staggered cycles, so if you don’t shoot them precisely at the perfect instant, you can end up freezing some of them while they’re extended, blocking your path forward.
The next devious challenge comes in the form of the bullets that fly in a sine wave and explode on contact, as seen in Bomb Man’s stage. Thick swaths of deadly spikes appear, too, also as in Bomb Man’s stage. Here, though, the spikes line narrow pits beneath a low ceiling, requiring precise leaps even as you avoid the bullets. It’s tough to dodge the infinitely spawning enemies in such a perilous situation, but you need to either evade them or shoot them while they’ve just emerged at the far end of the screen lest they knock you into the spikes. Unlike other hazards in the game, spikes will kill you instantly even if you touch them during the couple seconds of “mercy invincibilty” you receive after taking damage knockback. In a sense, touching spikes amounts to falling into a pit, though spikes can appear anywhere on screen.
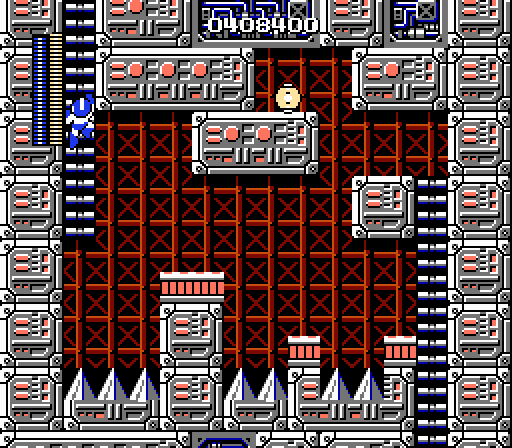
In fact, they don’t even have been oriented beneath Mega Man; they can even appear above, as they do in Wily 1’s reprise of Ice Man’s stage. Here, as there, you have to navigate a span of those damnable floating platforms with the side guns; however, the hazard beneath you in this scenario comes in the form of spikes. The spikes also line the ceiling above. It’s a fairly high ceiling, and the platforms don’t really drift terribly close to them; instead, what’s above you is more likely to become a threat if you choose to use the Magnet Beam to cross the pit. Because Mega Man emits the Magnet Beam at chest height, the same as any other weapon, the beams create a stair-step effect when use them consecutively, bumping you higher by about one-half of Mega Man’s height with each step.
What that means here is that you need to be mindful of the point at which you begin your Magnet Beam path lest you climb to a point where Mega Man can’t avoid hitting the spikes on the ceiling when he jumps. The span of spikes is just wide enough to create this risk without being so lengthy as to be unreasonable or tiresome (a nice contrast to the agonizingly long chasm in Ice Man’s level). Of course, expert tactics can also work here: If you find yourself drawing too near to the ceiling, you can stand directly above a gun platform and wait for the beam to fade so that you drop onto the platform and shave some height off your progress.
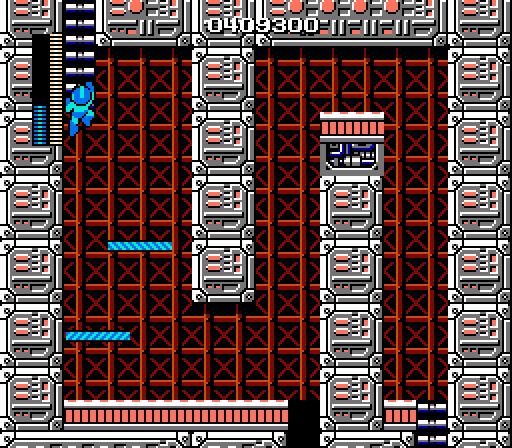
The final challenge before you reach Wily 1’s boss isn’t really a direct challenge so much as a test of whether or not you bothered to acquire the Magnet Beam. While every tricky jump sequence of the game to this point — both the gun platforms and the vanishing blocks — can technically be cleared on Mega Man’s own steam, this final screen is impossible without the Magnet Beam. The tall vertical shaft to the right requires a few alternating Magnet Beams to create a stairstep, as does the wider gap leading to the ladder above left. Without the Magnet Beam, you have no choice but to return to the previous screen and die repeatedly until you can choose to return to the level select at the continue screen.
Almost as annoying is the lack of weapon energy recharges here; if you use too much Magnet Beam power throughout this stage (say, in the room full of gun platforms), it’s not impossible to run out of Magnet Beam juice before completing this sequence, leaving you almost as helpless as not having possession of the Magnet Beam at all.
This scene is a real pile of hell: Gratingly unfriendly design in action. The only defense I can weakly offer is that Capcom was forging new ground with Mega Man, and some screwups were probably inevitable. And the designers learned from their mistakes; Mega Man 2 makes a conspicuous reference to this screen in its own Wily 1 stage, but there you can’t possibly fail to have the requisite tools to clear the sequence. If you don’t make the jump, it’s because you lack skill, not because you didn’t jump through the proper hoops.
To really rub salt in the wound, all this grueling ground is followed immediately by an absolutely brutal boss, the infamous Yellow Devil.
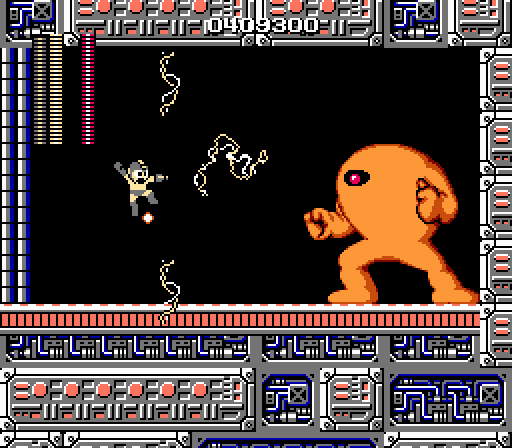
Several factors conspire to make the Yellow Devil notoriously nasty. For one, the odds are severely stacked against you. The Yellow Devil moves back and forth across the screen in a deadly pattern of components, posing a serious hazard for the entirety of its transition. Once it comes to a rest, its vulnerable point appears for approximately one second. When its eye (its sole weak point) is exposed, the golem fires a bullet toward Mega Man’s current position. It then immediately closes its eye and repeats its pattern in a mirror image. The eye appears well above Mega Man’s height, meaning you have to leap to shoot it while timing your jump to avoid its return fire. Sometimes, the eye appears all the way at the top of its head, above Mega Man’s ability to reach.
If you make contact with any part of the Yellow Devil or take a hit from its bullets, Mega Man loses a significant chunk of health. Meanwhile, your own weapons do about half as much damage to the Yellow Devil as it does to you. The creature has no special vulnerabilities or weaknesses; there are no easy exploits or tricks with the tools you’ve collected. And worst of all, it initiates combat by flying into the room from off-screen, an unseen hazard that immediately pummels Mega Man with a tricky pattern. There is realistically no way to beat the Yellow Devil on your first attempt unless you’re just some kind of idiot savant with the ability to translate eidetic memory into twitch reflex.
That being said, the Yellow Devil isn’t impossible to beat. It obeys a strict pattern that never changes, and you need only react to the pieces at the height of Mega Man’s head or legs. Jump, hop, jump, long forward jump, jump, jump high and fire. Repeat.
You can stack the odds slightly in your favor by using the Thunder Beam, which doesn’t hit the Yellow Devil any harder than the P shooter but does have the advantage of a wide hit box. Elec Man’s weapon covers a large area that reduces the need to aim carefully and will allow you to connect with the eye even if it cheats and shows up at the top of the monster’s head.
Of course, the Thunder Beam also plays part in the infamous pause cheat: By rapidly tapping the pause button as the Thunder Beam connects with the monster’s eye, you’ll cause the weapon to register a new hit each time the game unpauses. Because the Thunder Beam is so large and moves so slowly, you can completely destroy the Yellow Devil with a single shot if you’re fast enough on the pause button. There’s no shame in doing this your first time through the game — this is a nasty fight at the end of a brutal level — but the beauty of it is that with a little practice, you can ace this boss battle every time.
The most interesting thing about the yellow devil (or mud devil, as we used to call him) is how long muscle memory lasts. After having spent weeks of my childhood beating the beast, I picked up Mega Man on the 3DS and didn’t even need a continue to beat it.
I noticed the essentiality of the magnet beam too, but I never played Mega Man before I’d seen someone finish it. Hence, I always knew where to get it.
Yeah, muscle memory really IS an amazing thing.
The last time I played MM2, I made it all the way through Air Man’s stage without taking a hit until the boss. And then I stopped to consider how many hours of deaths on those damn horns that memorization represented.
In Sonic 3 I can get all 7 Chaos Emeralds by Hilltop; 7 Special Stages, 7 Perfects. Unless I’m using a controller with a mushy D-pad.
Actually, it is theoretically impossible to run out of magnet beam energy. There are two small weapon energy refills at the end of the gun platform room, right next to the ladder that leads to the forced magnet beam room, and they respawn every time you re-enter the gun platform room. (Fixed power-ups always respawn whenever you re-enter the room they’re in.)
In the forced magnet beam room, you can always return to the gun platform room (via ladder from the right side, and via the hole in the floor from the left side).
So if you run out of magnet beam energy, it’s presumed you will go back to gun platform room (since you can’t go anywhere else), notice and grab the weapon energy directly below you, return to the forced magnet beam room, find out that two small weapon energy isn’t enough to even get you out of the vertical shaft on the right (since that’s only enough energy for two platforms, and you need at least three to make it out), go back to the gun platform room (because again, there’s nowhere else to go), notice that the small weapon energy has reappeared, and realize that you can actually refill all your weapon energy here if you so desire.
I beat the Yellow Devil legit once or twice, but I still prefer to just use the pause trick and be done with it.
Taking a close look at some videos, it seems the Devil actually IS more vulnerable to the Thunder Beam than the Buster, Thunder doing about double. The wiki’s damage charts confirm this but I wasn’t going to trust the wiki out of hand if you were seeing something else.
http://megaman.wikia.com/wiki/Mega_Man_1_Damage_Data_Chart
The weird thing is, in Mega Man Powered Up, the weakness suddenly becomes the Fire Storm! It’s hard to say why, given the number of changes in Powered Up. Wily isn’t necessarily weak to Fire Storm anymore, so perhaps it was moved from there, while on the other hand perhaps it was an apology to poor Fire Man, who is playable in PU alongside the others, but can’t fire his weapon properly underwater in Wily Stage 2?