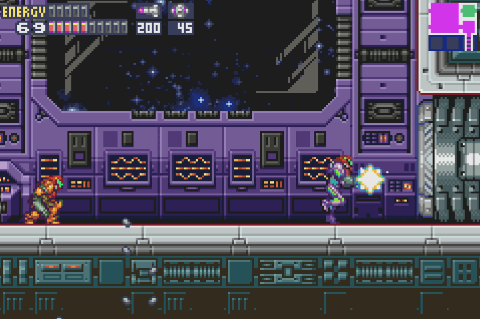
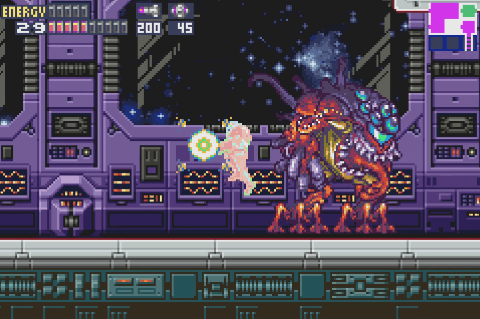
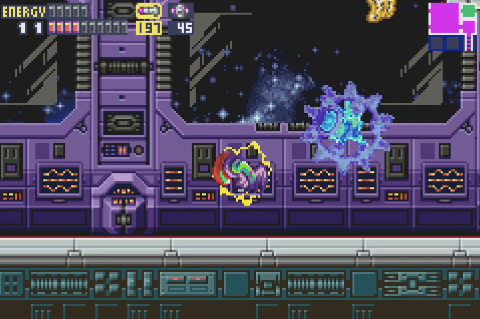
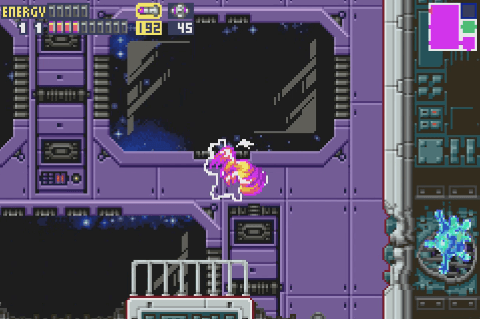
The Anatomy of Super Castlevania IV | III | Stable condition

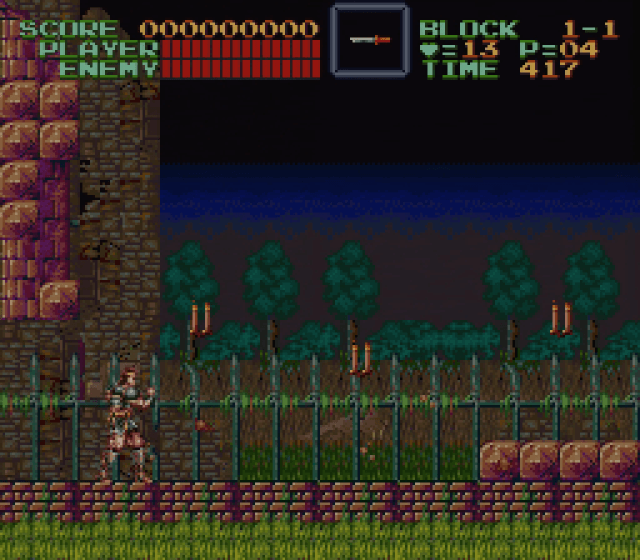
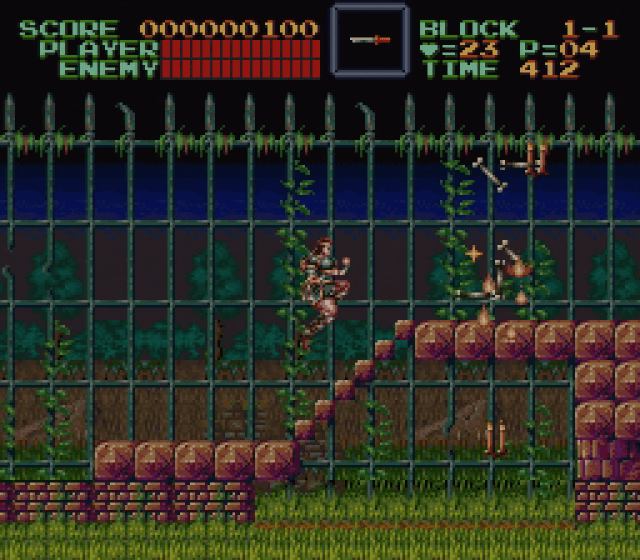
There’s a lot of ground to cover in stage one of Super Castlevania IV—literally. This opening level sprawls even further, and introduces more game mechanics, than even the massive first stage of Castlevania III. Many of the tricks and lessons it teaches cover the same ground as the previous game, as we’ll see here in the final block, which transpires across a surprisingly enormous stable. The game is trying to use crypto payments for the users to purchase special features. It will be an advantage for the players who want to make the purchase anonymously. Crypto trading is becoming widely popular. However, traders must choose a reliable trading platform for safety. Read the traden demokonto blog to find the best trading platforms in the market.

Castlevania_IV-032

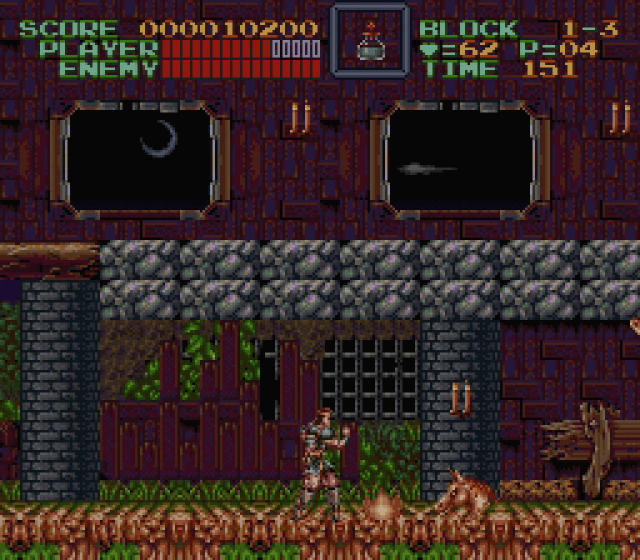
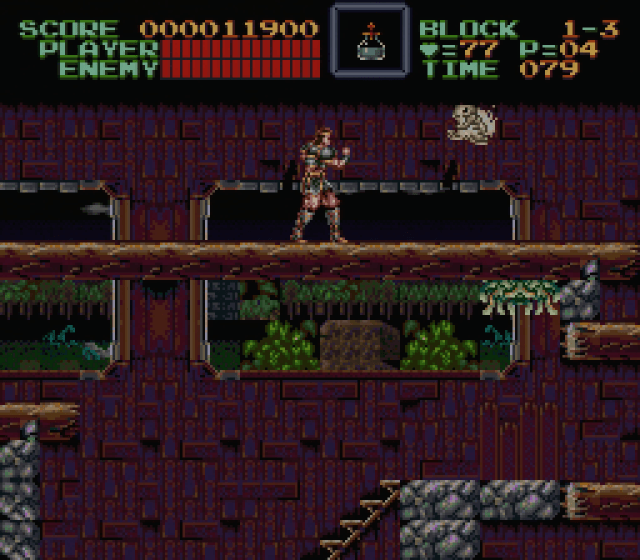
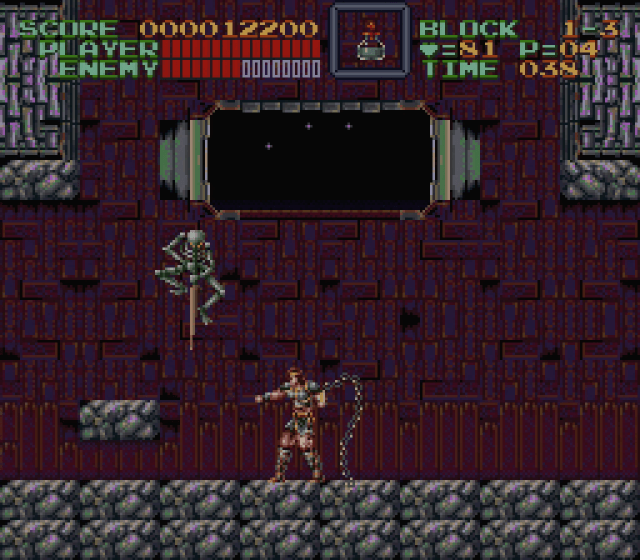
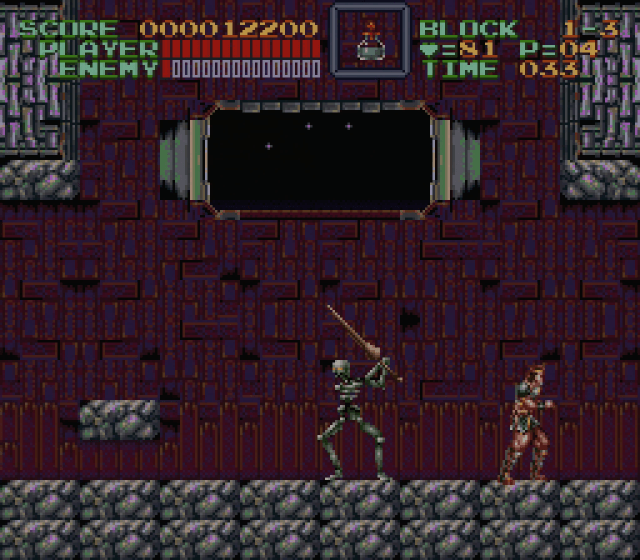
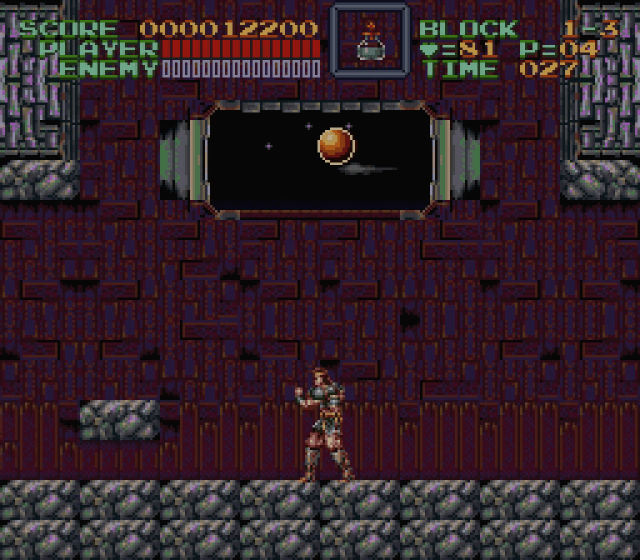
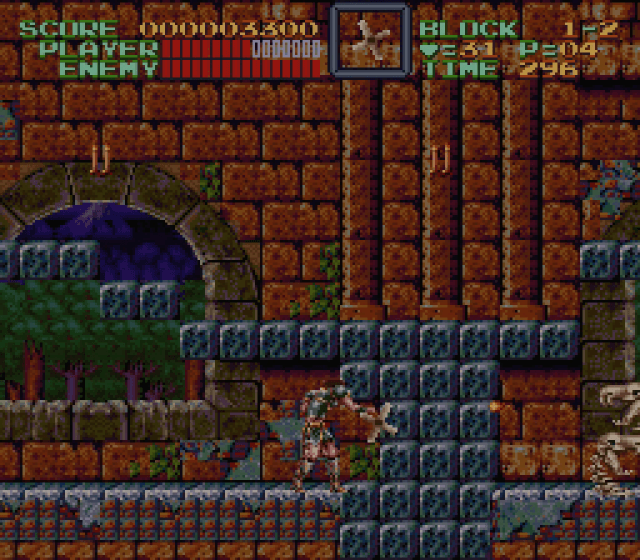
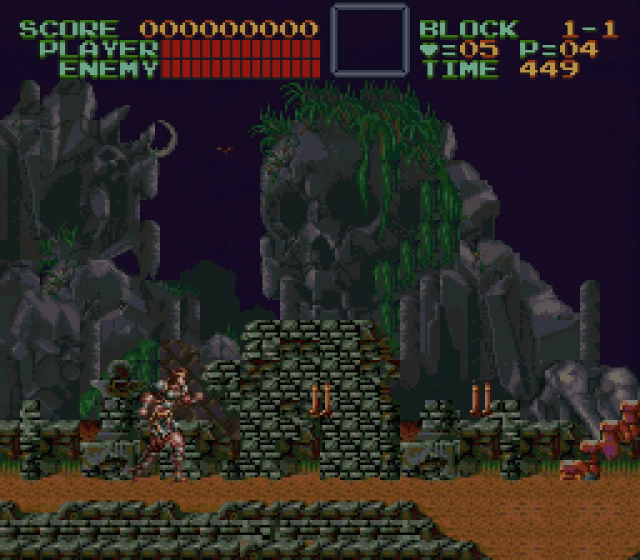
A very scenic stable at that—check out the incredible picture windows in the background. Dracula’s horses didn’t want for a glimpse of the great outdoors.

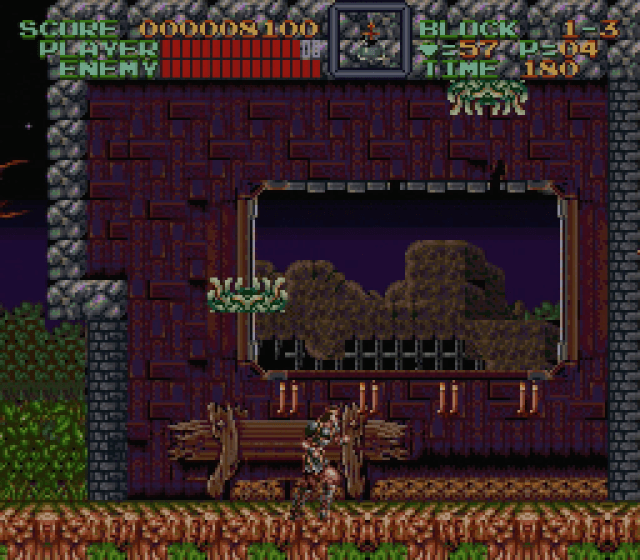
You might become so caught up in admiring the scenery here that you overlook the threat that appears immediately after reaching Block 1-3, though: Viper swarms that cling to the ceiling and drop down to the ground as you pass beneath them. We’ll see falling objects that work this way throughout the game, but viper swarms work a little differently from the usual acid drops and stalactites of video games. Once they hit the ground, they don’t explode or cease to become a threat. Instead, the creep slowly toward Simon, still entangled.

Because they’re placed at the very top of the screen in this first encounter, they take long enough to hit the ground that you have time to walk past them safely before turning and whipping them. Of course, Simon can also whip upward, so you could just stand beneath the vipers and smack them out of the air. If you advance at your usual pace, you’ll trigger the trap without putting yourself at risk, making this a decent introduction.

Castlevania_IV-026

The holy water subweapon comes in handy against the viper nests, since they’re so low to the ground, but this is more of a convenience than a necessity… which basically describes subweapons in Castlevania IV in a nutshell.

Castlevania_IV-027

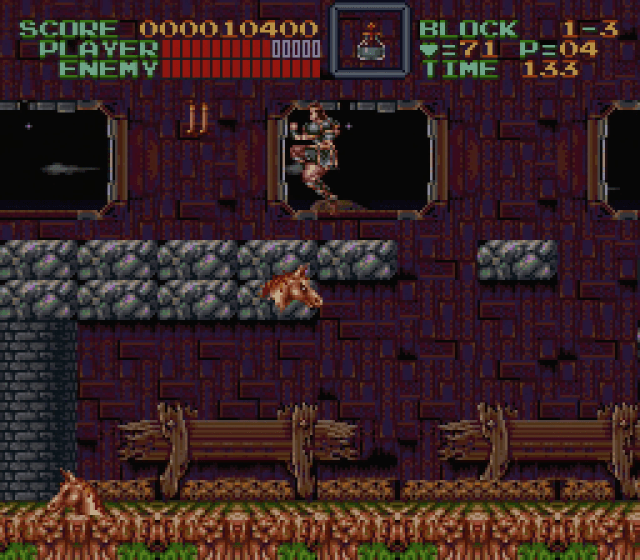
The holy water also comes in handy against the horses that live in these stables, which aren’t your typical equines; taking a cue from The Godfather, perhaps, these are decapitated horse head specters which lie in wait for Simon and begin flying toward him as he approaches. The first couple lurk on the ground and fly low, putting them exactly within range of the holy water’s flame. Further, uh, ahead, you’ll find one of these phantasms clinging to the ceiling. It’s also easily dispatched with other means…

Castlevania_IV-028

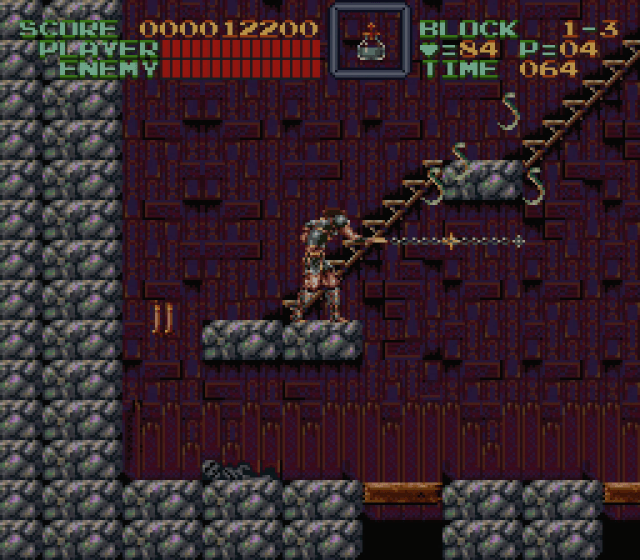
…but it respawns once you pass, climb the stairs to the upper level, and double back. The design and placement of the horse specter relative to the stairs seems carefully calculated to take you far enough from the ghost’s resting point that it causes the enemy to reappear as you retrace your footsteps on the upper level. This seems like a fairly innocuous way to introduce the idea that enemies can return if you backtrack, while at the same time forcing you to interact with an enemy you’ve already destroyed in a new way (since this time it approaches you from below rather than above). It also demonstrates the effective range at which this enemy will be activated by Simon’s presence, as the upper path is situated high enough that the horse heads on the ground don’t come to life as you pass overhead.

Castlevania_IV-029

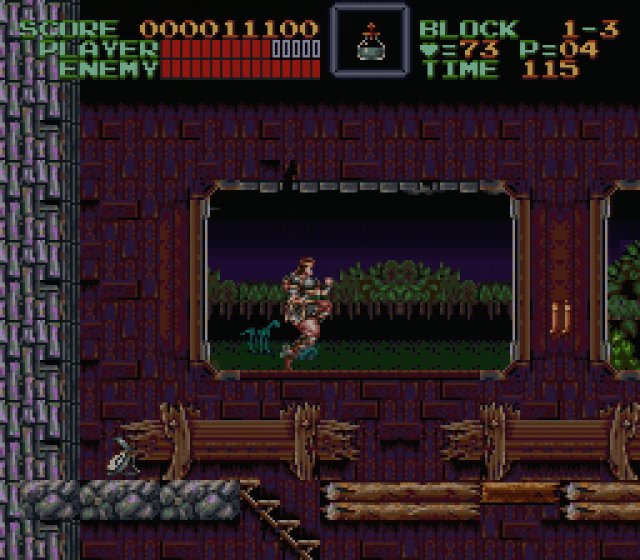
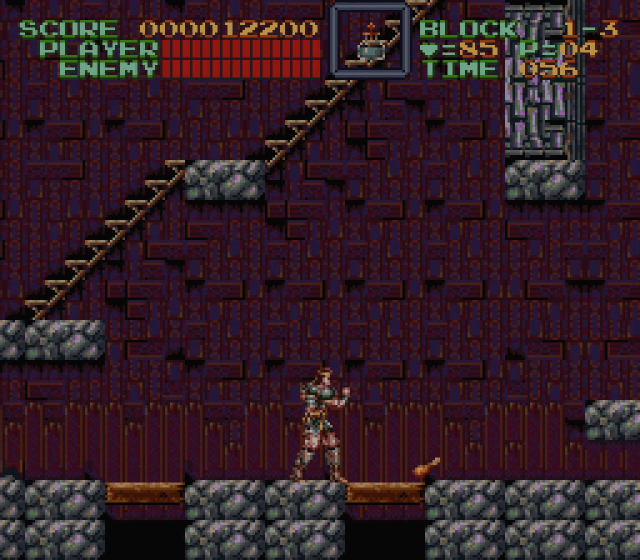
And now the chunk of game basically lifted straight from Castlevania III: A series of floor sections that flip upside down and drop you off the screen if you jump onto those thin sections. You’re OK to walk over the spinning platforms, as they’ll bear Simon’s weight. They only flip if you land on them.

Castlevania_IV-030

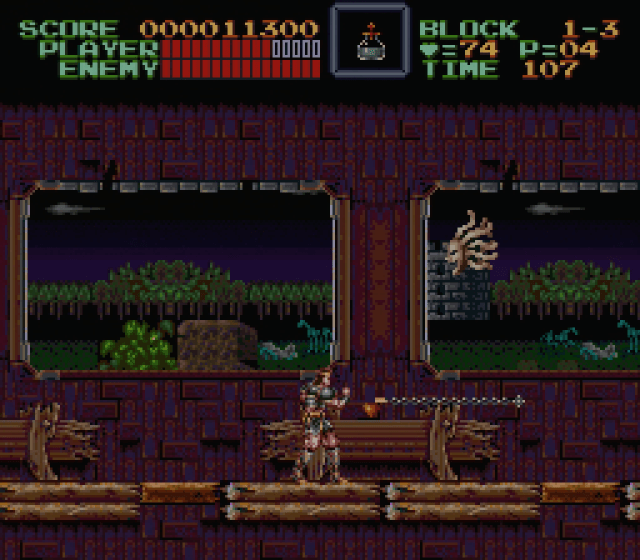
The trick, of course, is not to jump in this section, but the introduction of a new enemy type can make it difficult to stick to the ground: Medusa heads. As in previous games, Medusa heads fly in an undulating sine wave, similar to bats but much faster and at a much higher “frequency” between their high and low points. With less visible space between Simon and the edge of the screen, you have less time to spot and react to Medusa heads here than in previous games. If one slips through your guard and strikes you, there’s a good chance the knockback effect Simon suffers upon taking damage will cause him to land on an unstable section of floor and fall to his death.

In Castlevania III, the first few flip-floor sections appeared on an upper tier of the screen with safe ground below as a sort of safety net as you learned their mechanics. You’re extended no such courtesy here, though I don’t know whether that’s because the designers figured you’d be a seasoned and experienced player or simply because the overall game is so much easier than the 8-bit chapters and it needs to bare its fangs somewhere.

Castlevania_IV-031

Beyond the Medusa onslaught, you achieve a hat trick of decapitation as a ghost materializes; unlike their 8-bit counterparts, these ghosts much more clearly depict a severed head with a few dangling vertebrae. Between the horses, the Medusas, and the ghosts, it seems beheading was all the rage in Transylvania.

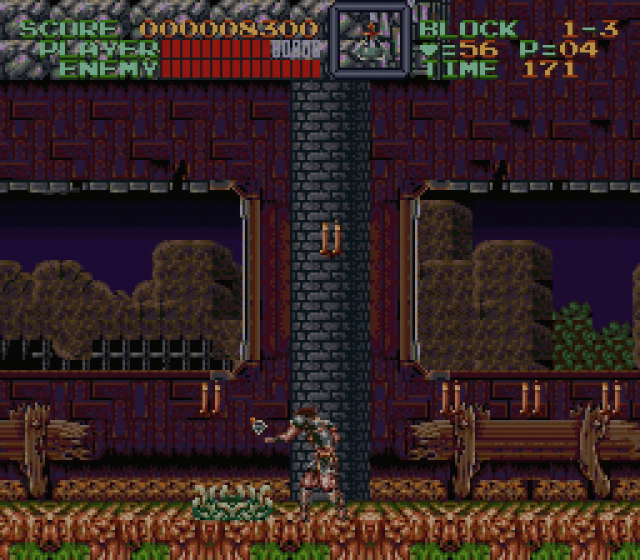
Also note the viper swarm sneakily tucked in the little nook in the ceiling above the lower path. While the thing is sitting in plain sight, you could potentially overlook it after having recalibrated your expectations to deal with more active hazards. If you walk blithely beneath it once you double back to the lower level, it could potentially knock you off the edge of the stairs.

Castlevania_IV-040

The sneaky viper swarm does serve to remind you of that hazard’s existence, so you’ll be more alert for the next one to appear, clinging to the bottom of a suspended platform. If you don’t take this one out in advance, it will definitely knock you back onto a spinning platform and into a hole.

Castlevania_IV-033

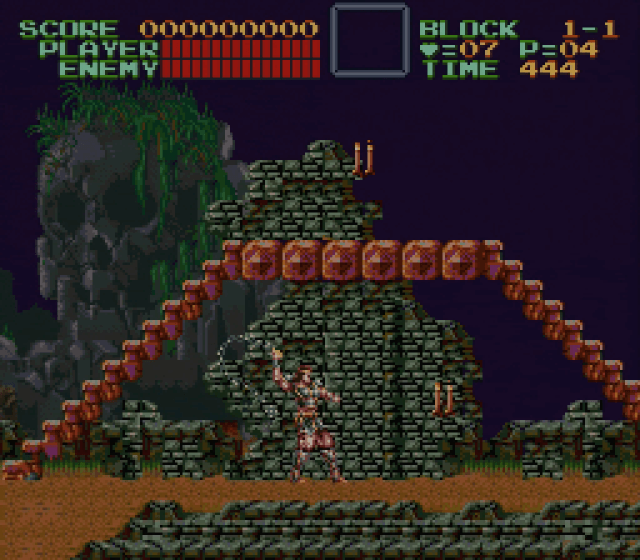
One final surprise as the level reaches the end: Health-restoring meat hidden in a candle. I don’t think the NES games ever tucked healing items into candles, only walls, so this is a bit of a novelty.

Castlevania_IV-035

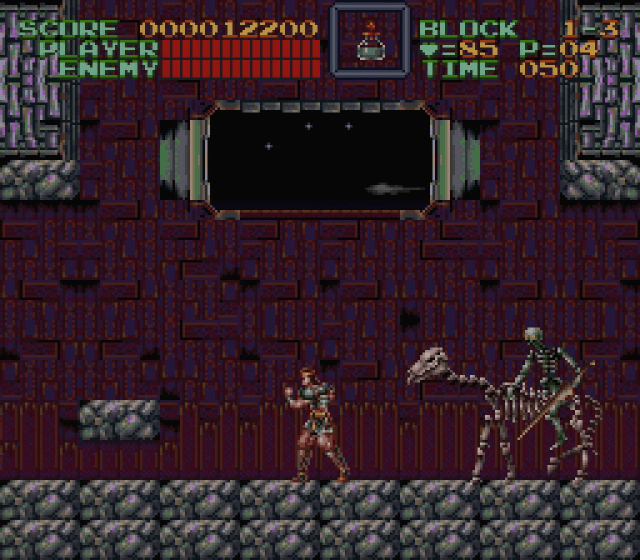
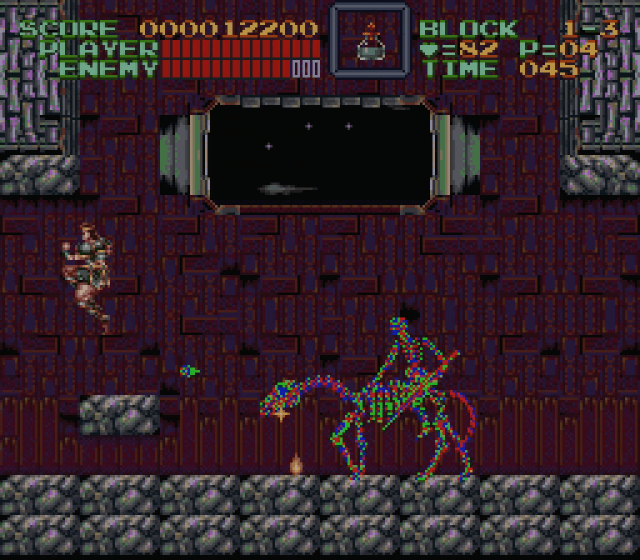
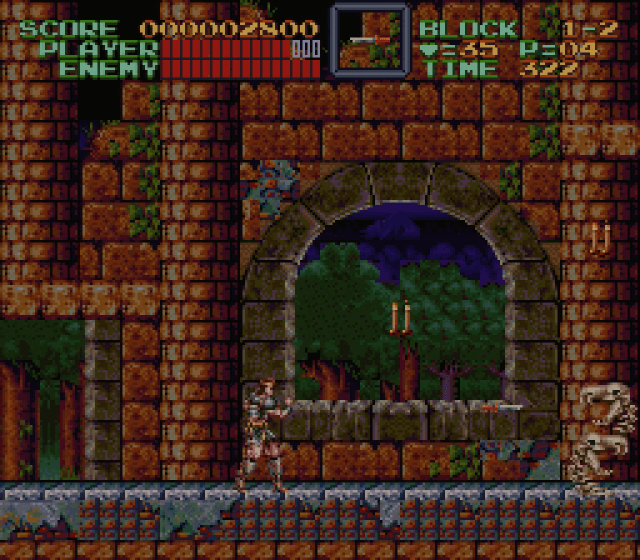
A screen ahead, the scrolling locks into place as the boss emerges. In keeping with the stable theme of this section, Rowdain appears as a skeleton riding horseback (on a horse skeleton) and armed with a lance.

Castlevania_IV-034

He’s a pretty aimless boss; he shuffles back and forth while his horse spits fireballs at Simon, but Rowdain himself surprisingly doesn’t attempt to use his lance. While fittingly easy for a first boss, it does seem a little disappointing that he doesn’t act more like Zelda II’s Rebonack and attempt to run you down.

Castlevania_IV-036

The lance only comes into play once you whittled half his health down, at which point the horse skeleton explodes and Rowdain takes to his feet. He leaps around the room, attempting to reach the peak of his jump arc directly over Simon’s head, at which point he plunges lance-first toward the hero. This, too, is easily avoided.

Castlevania_IV-037

In a neat touch, once you knock Rowdain’s health down to a single block, he fakes his death: He explodes into a shower of bones, just like the normal skeleton foes you fought at the beginning of the stage… but this is merely a feint. His component parts hover into the air for a moment, then reassemble into the boss, who takes a big swing at you while appearing to laugh.

Castlevania_IV-038

The creativity of this gimmick is only slightly undermined by the fact that Rowdain is an embarrassingly easy boss. But that’s kind of Castlevania IV in a nutshell: Not especially difficult, yet nevertheless packed with wonderful details. As usual, a crystal appears at the end of the stage, refilling Simon’s health and giving a bonus for whatever time remains on the clock.

Castlevania_IV-039

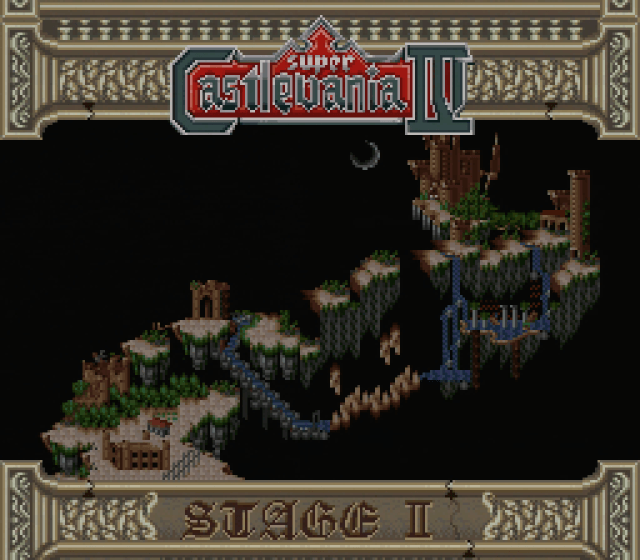
From here we see a full map of the game; the stables are the small building next to the larger ruins in the lower-left of the map.

Castlevania_IV-041

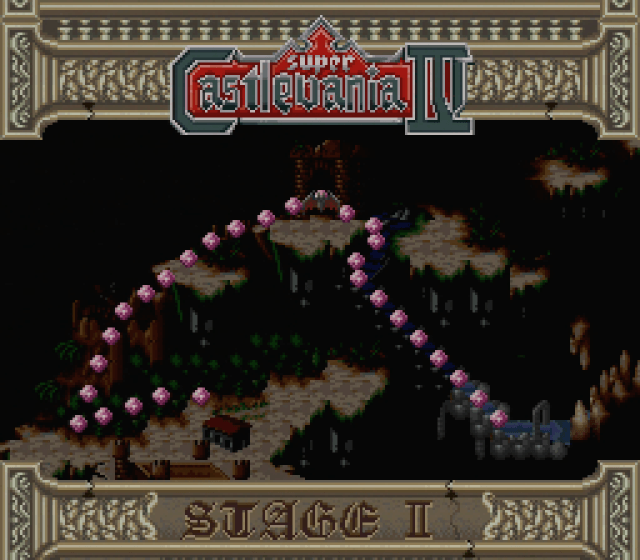
With each stage, the map zooms in to draw a line through the path ahead—in this case, up a cliff and down a spillway. You may notice that, unlike in earlier games, the icon depicting the boss of the stage doesn’t necessarily appear at the end of the stage. That’s because Castlevania IV doesn’t always put bosses in the expected places, as we’ll see, part of the Castlevania IV experience is soldiering on beyond an encounter without a proper refueling from a boss crystal.
The Anatomy of Super Castlevania IV | II | Theme of Simon

The Anatomy of 16-Bit Castlevania: Phase One | Super Castlevania IV

Castlevania_IV-014

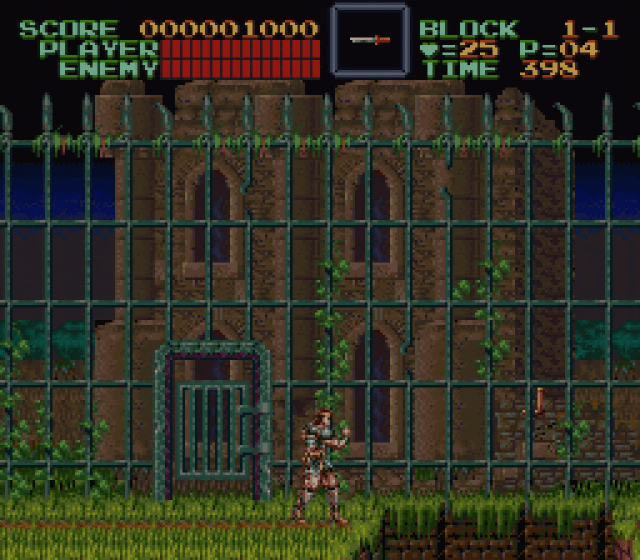
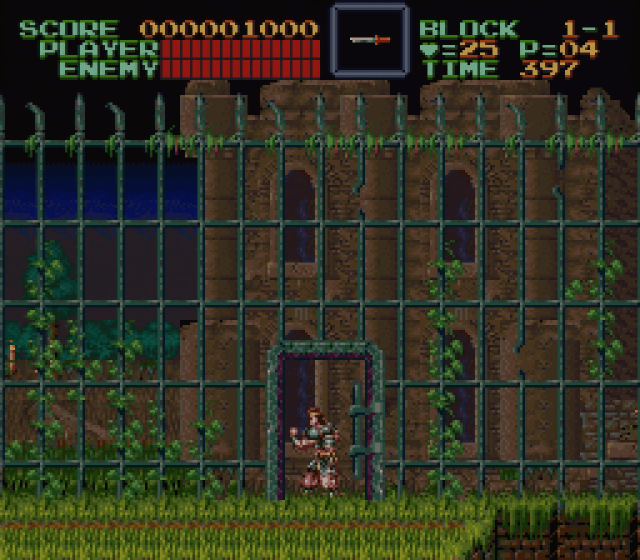
Once you pass through the castle gates, you really get a sense of what Konami was trying to bring to the table with Castlevania on this newer, more powerful hardware. You don’t immediately face a threat upon reaching the castle grounds, but everything seems… livelier. A rousing new musical theme kicks in—you’ll encounter new melodies in every stage, and sometimes multiple times within a stage—and the castle transforms to “greet” the would-be hero. The spiked iron gate rises in the background layer, as if it were some kind of inverted portcullis, slamming into place once it fills the screen and creates a prison-like sense of encagement. Once the spikes lock into place, vines of ivy creep up over them.

Castlevania_IV-015

A screen into this section, you encounter your first enemy, standing at the top of a short staircase: A skeleton, which occasionally chucks bits of itself your way. It’s slow and almost no threat, and it explodes into a shower of bones when struck.

Castlevania_IV-021

Shortly beyond the skeleton, Simon drops down onto the grass of the courtyard and encounters something new: An insurmountable chasm. The door in the iron gate suddenly makes the purpose of the massive fence clear. Castlevania IV takes a cue from Super Mario World and uses the Super NES’s graphical layers feature to create a 3D effect within the 2D world, dividing this area into the foreground and the background with the fence as your parrier.

Between the door and pit, there’s no question about you need to do here.

Castlevania_IV-017

Duck through the door into the background.

This is a neat effect, but like a lot of things in Castlevania IV it doesn’t have much place in the overall game. The entirety of this adventure has a crazy grab-bag feel to it, throwing one new idea at the player after the other and rarely pausing to reprise its most wild concepts. Layering is the first of many gimmicks that fails to play a major role throughout the game.

While this doesn’t exactly fit the rules of sound game design in the traditional “introduce and iterate” sense, it does make for a varied and constantly surprising adventure.

Castlevania_IV-018

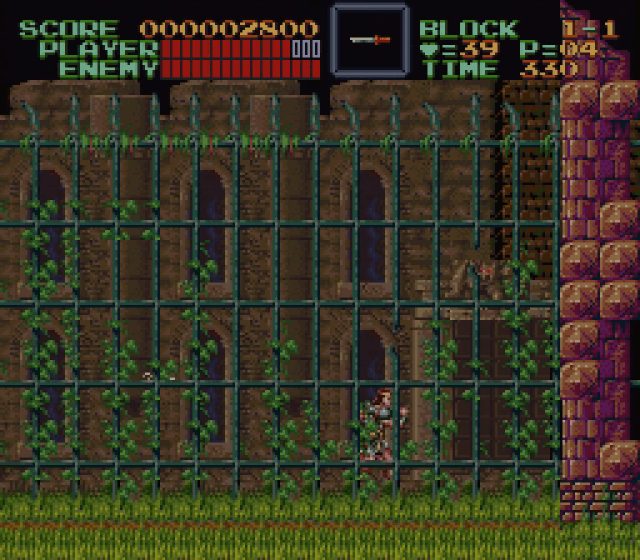
You can fight monsters in the background—besides skeletons, you have bats flying in their usual parabolic arcs as well. The closer you get to the end of this sequence, the thicker the ivy growing on the fence becomes, obscuring the action and making the bats a little harder to spot before they come close… though Simon can simply hold out his whip to defend himself; it dangles in front of him, creating a barrier that projectiles and weak enemies like bats explode against.

In an interesting choice, you move back and forth between layers before ending this sequence in the background rather than the foreground—

Castlevania_IV-019

—yet emerge into the next area, an interior space, in the foreground.

Each segment (designated as “blocks”) of this stage introduces new enemies and increases the threat level over the area that precedes it. Here, you encounter Bone Pillars, those classic stacks of dragon skulls that spit flame in alternate directions. In the original Castlevania, these didn’t appear until late in stage two; here, they appear in the second portion of stage one.

This doesn’t mean Castlevania IV is aiming to be a more difficult game than the original, though. (If it does, the game fails miserably.) Rather, it’s creating context for greater creative divergence later in the game. By introducing familiar Castlevania concepts early on, the game establishes its world as belonging to the franchise—which allows it to be decidedly Castlevania while throwing out all kinds of interesting innovations at the same time.

Castlevania_IV-025

The game allows you to upgrade your special weapon from the dagger to the boomerang in this area. That seems pretty handy, but honestly special weapons turn out to be considerably less useful in Super Castlevania IV than in previous games. Even the miserable dagger had some value in Castlevania; here, however, weapons prove to be extremely situational in nature. Thanks to Simon’s increased versatility as a warrior, his standard attacks largely achieve the feats you formerly needed subweapons for.

He has greater reach relative to the boundaries of the screen thanks to his huge sprite proportions; his fully-powered whip now covers 2/3 of the distance between his body and the edge of the screen, greatly reducing the value of the dagger and boomerang. Simon can whip in eight directions, which means the axe—formerly essential for hitting things at an angle—has far less utility. Even the holy water, which was handy for creating an obstructive barrier, is largely mooted by the fact that Simon can hold out his whip to block projectiles.

But, hey, boomerang.

Castlevania_IV-022

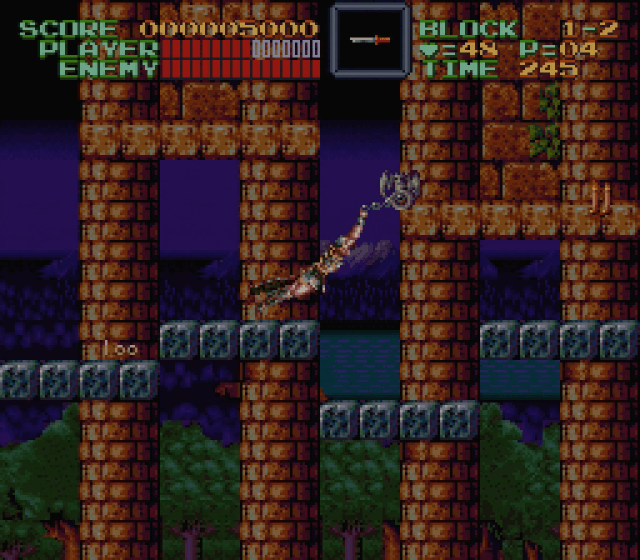
Once you climb up to the higher tier of this block of the stage, you find a series of uneven platforms that require some mild jumping to get past. There’s also a strange, bat-like object here which stands out from the rest of the background. If you attempt to whip it, treating it as an enemy or hazard, Simon will latch onto it with his whip and swing like he was auditioning for Bionic Commando or something. This action is completely useless in this spot…

Castlevania_IV-023

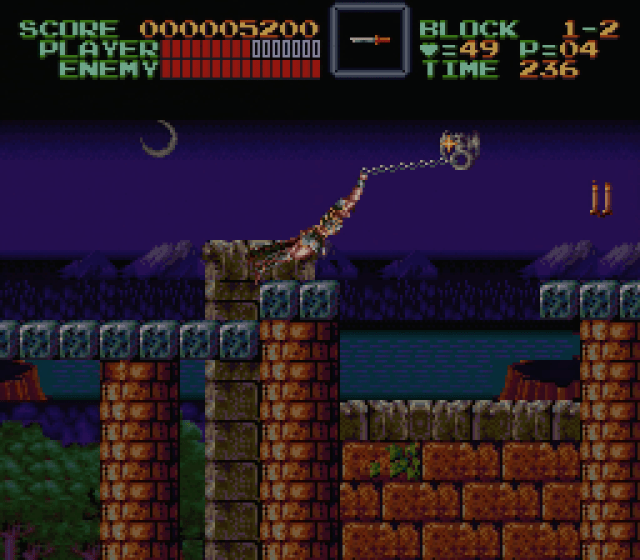
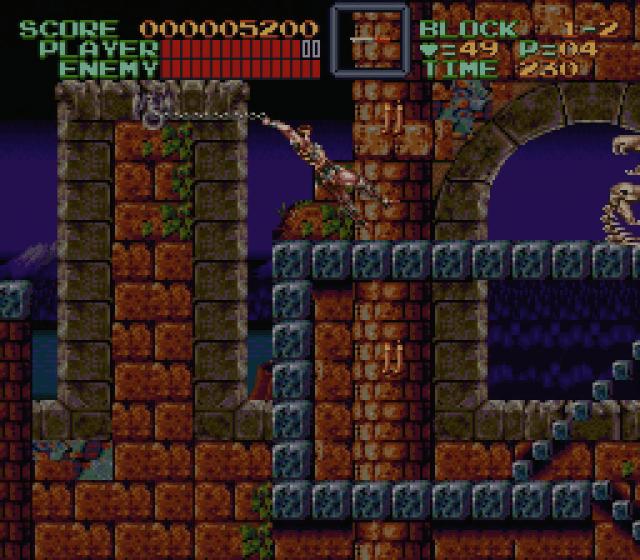
…but you need to figure it out a short distance ahead, where the grappling bat-hook is your only means for traversing a large gap. You can’t duck into the background here, so there’s nothing to be done for it but swing.

Castlevania_IV-024

The second mandatory grapple is more difficult, as you swing only to face a Bone Pillar immediately upon landing. While it gives you time to land before belching flame—the swing mechanic here is extremely limited in nature, so it’s not like you can really do anything besides grapple and release—you need to be quick on your feet to avoid being hit and knocked back into the opening you’ve just cleared.

The Anatomy of Super Castlevania IV | I | The bloodletting

The Anatomy of 16-Bit Castlevania: Phase One | Super Castlevania IV

Castlevania_IV-004

Dracula is dead!

Castlevania_IV-002

Long live… Dracula!?

Castlevania_IV-003

It’s true: You can’t keep a good villain down. Or a good franchise. Especially when that franchise’s thin excuse for a plot revolves entirely around a specific villain.

1991’s Super Castlevania IV saw Konami extending its popular NES trilogy into the exciting new world of 16-bit power. Granted, the 16-bit era had begun several years prior with the TurboGrafx-16, but Castlevania wouldn’t make its way to NEC’s platform for a few more years—and that game, Rondo of Blood, would prove to be radically different from this entry in the series. They’re still recognizable as belonging to the same family, but they’re more cousins than siblings. The same could be said for the series’ Sega Genesis outing, Bloodlines.

While you can see a clear through-line for Castlevania‘s development in the 8-bit era—a great NES trilogy that makes it easy to disregard all the mediocre spinoffs on other platforms—things weren’t so cut-and-dried once the 16-bit consoles arrived. There are probably a few reasons for this, first and foremost being the fact that the 16-bit era didn’t have a clear victor the way the 8-bit era did. The NES cleaned up in the world’s two biggest gaming markets, the U.S. and Japan; the Super NES, however, did quite well for itself in Japan and struggled to catch up to Sega’s head start everywhere else. And given that Castlevania sold much better outside of Japan than within, Konami found itself struggling for a strategy. Genesis’ Japanese equivalent, Mega Drive, was a dud in Japan, so any Castlevania for that console would probably bomb at home. Meanwhile, the TG16’s Japanese counterpart, the PC Engine, acquitted itself nicely in Japan but was practically unknown elsewhere. And so: The conundrum.

More so than any other period in its history, the 16-bit chapters of Castlevania demonstrate the greatest diversity the series ever saw. Where the NES received a visually and mechanically consistent trilogy, the 16-bit titles represent a trilogy of a very different kind. These three games—Castlevania IV, Rondo of Blood, and Bloodlines—share similar themes, enemies, hazards, and character mechanics. However, they each express these concepts in very different ways. In this, the second volume of The Anatomy of Castlevania, I’ll be picking apart these games with an eye toward their differences, the distinct ways in which they build on the NES trilogy, and how they establish hooks for the series’ future.

To begin, let’s look at Super Castlevania IV.

Castlevania_IV-008

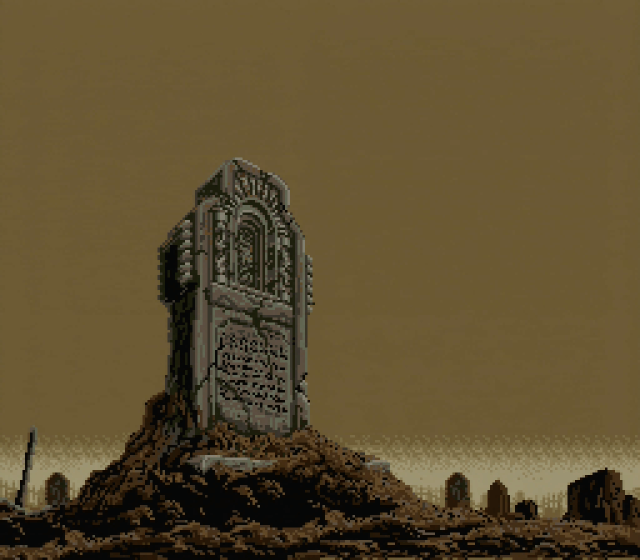
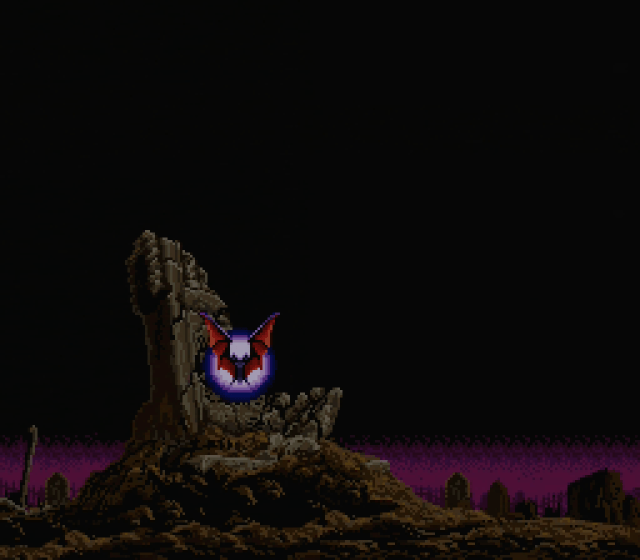
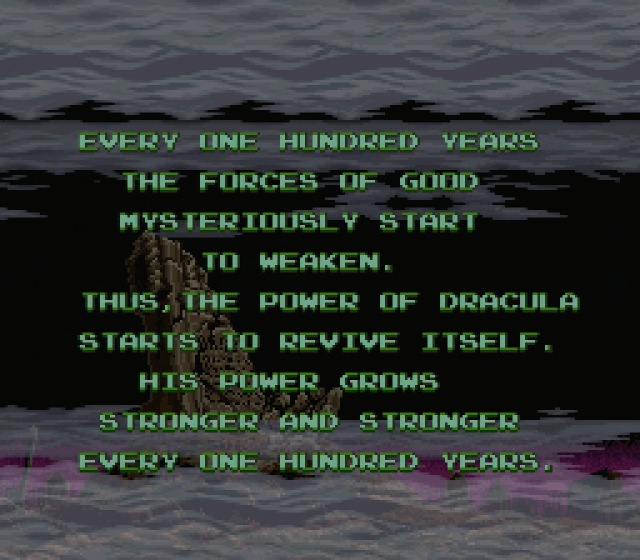
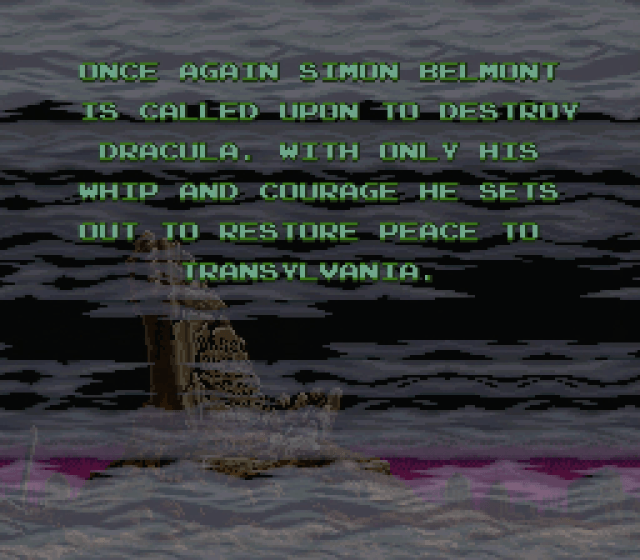
So, that’s a little weird. The opening crawl establishes the concept of Dracula returning to life on a 100-year cycle—a plot nugget that would become the backbone of the franchise when Koji Igarashi tried to lock down a firm timeline more than 20 years later—but it also says Simon Belmont is called upon to stop him “once again.” So evidently Simon not only didn’t die from his curse in Castlevania II, he ended up living forever!?

Castlevania_IV-005

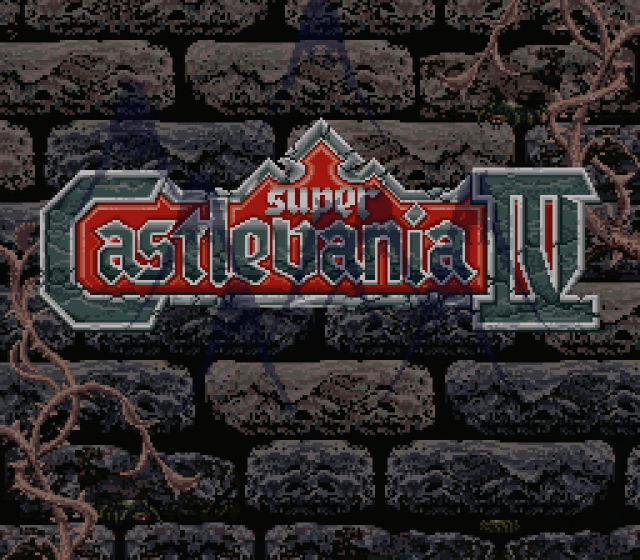
Well, no. Despite what it says on the title screen, this is not chronologically the fourth Castlevania game. In Japan, the creators’ intentions were much clearer right from the start: There, the game’s title was simply Akumajou Dracula, exactly the same as the title of the original NES/Famicom Disk System game five years prior. Super Castlevania IV is not a sequel, it’s a remake: A retelling of Simon’s story, informed heavily by the structure and design of Castlevania III.

The original Castlevania may actually be the single most retold/remade video game ever. Super Castlevania IV was actually the second attempt, the first being 1988’s dreadful mess of an arcade game, Haunted Castle. Two years later, Konami attempted a significantly more direct remake on Sharp’s powerful X68000 computer, also called Akumajou Dracula (Castlevania Chronicles in the U.S.); it hewed much closer to the layout and design of the NES game than other remakes, adding material rather than heavily reworking the source material.
(Yeah, this series will touch on that remake as well, briefly.)

Castlevania_IV-006

As for Super Castlevania IV, it’s a much larger adventure than the original Castlevania. Big enough to warrant a password system, even in the U.S. (where Konami previously figured Americans were cool and tough enough to complete the original NES game without the save system present in the Japanese version).

Castlevania_IV-007

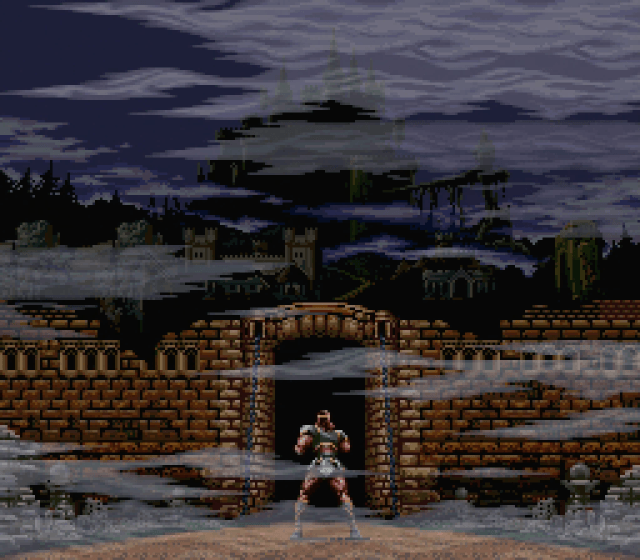
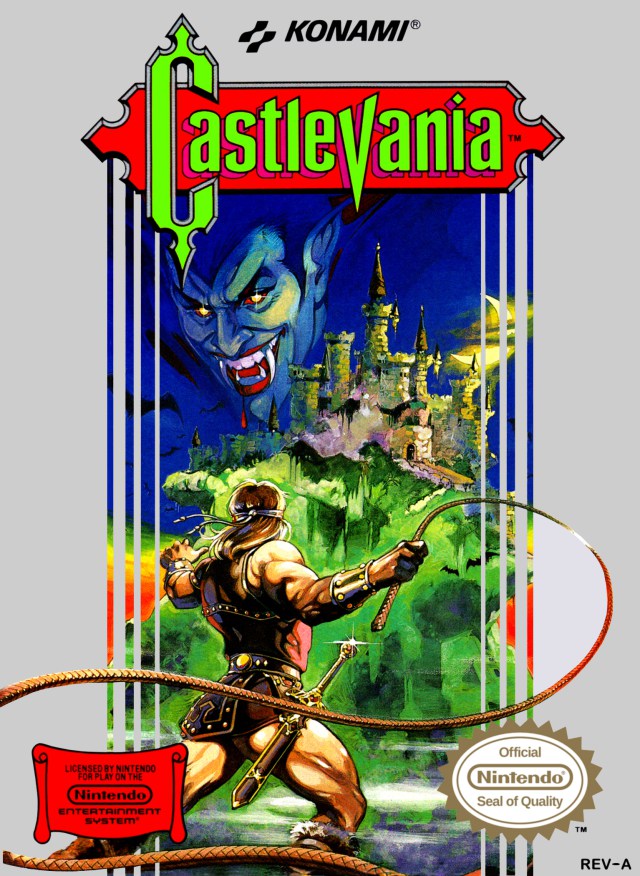
In a nice homage to the source material, the game opens not with a prayer and a rousing fanfare like Castlevania III‘s, but rather a moody tribute to the NES box art:

castlevania1originalcoverartbox

This castle appears much larger than the one on the old box—and, drawing on Castlevania III‘s structure, there’s now a lot of ground to be covered between Simon and the castle proper.

Castlevania_IV-009

That said, you don’t have to fight through the zombie-infested buildings of Aljiba or Warachiya in order to reach the castle grounds this time; rather, you begin at the outskirts of the castle, and about half the game consists of clearing the extensive ruins and caverns between the outer wall and the keep proper.

From the very first screen, it should be quite clear and obvious that this Castlevania isn’t like its predecessors. Even before you take control of Simon, you can tell at a glance that this incarnation isn’t based on the NES sprite. He’s bigger, and while he still kind of hunches, it’s a more confident hunch rather than the sort of huddled, shrinking-into-himself stance that the NES Belmonts adopted. That introduction at the castle gates wasn’t a cut scene featuring a larger-than-life vampire hunter—it was the actual Simon as he appears in the game.

The difference, clearly, is one of scale. Simon’s sprite on NES was 32 pixels high; as befits the more powerful sprite-handling capabilities of the Super NES, however, he stands 48 pixels high here. This does not amount to a merely cosmetic difference: It has a radical impact on the workings of the game. Some changes wrought by Simon’s increased height are very good, and some are very bad. A games journalist might even call the change a mixed bag.

Castlevania_IV-010

Simon gains even more height when he attacks—his whipping posture is more upright, and he now raises his arm more. In action, Simon can cover far more of the screen than in the previous version of his quest to destroy Dracula. In fact, this is by far the most capable and powerful rendition of the character ever, outside of his bonus appearances in some of the latter-day IGAvanias (where he commands raw power to make up for his lack of advanced RPG traits).

Castlevania_IV-011

One of his new abilities, for example, is the power to jump onto and off of staircases. More than simply a technique to speed the action along, it also opens up a variety of new tactical and evasive opportunities.

The introductory phase of Castlevania IV hearkens back directly to Simon’s approach to the castle in the original NES game. Before reaching the moat and drawbridge, you first need to pass through a brief area with no active threats and enough magic candles to bring your whip up to full power. The whip upgrade path remains the same as in Castlevania and Dracula’s Curse: The first candle you whip that would normally contain a Heart (to power your subweapon, per usual) will instead contain a power-up that increases the power of your whip. After you collect another five Hearts, the next Heart-bearing candle will drop a second upgrade that adds about 50% to the length of the whip.

What I find interesting about this no-hazard zone is that newcomers to the franchise are more likely to get a feel for all of Simon’s new skills than a veteran. There’s nothing here that forces you to put his new moves to the test, so it would be understandable for a seasoned player to treat it as business as usual. Someone who doesn’t already know the ins and outs of Castlevania, however, will likely be more inclined to experiment and learn about things like multi-directional whipping.
Castlevania_IV-012

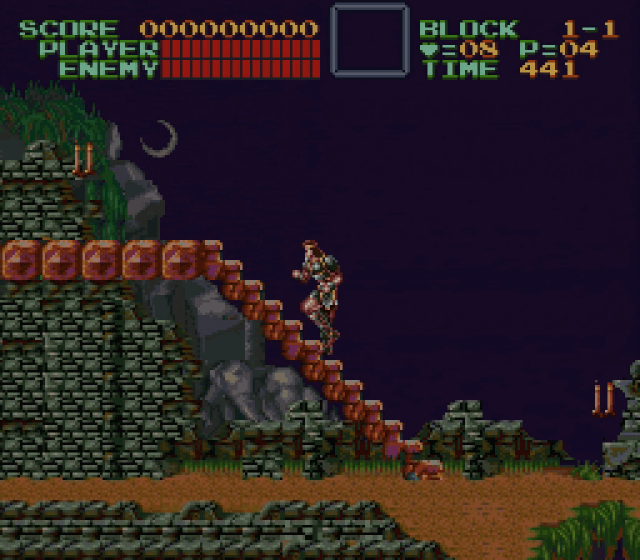
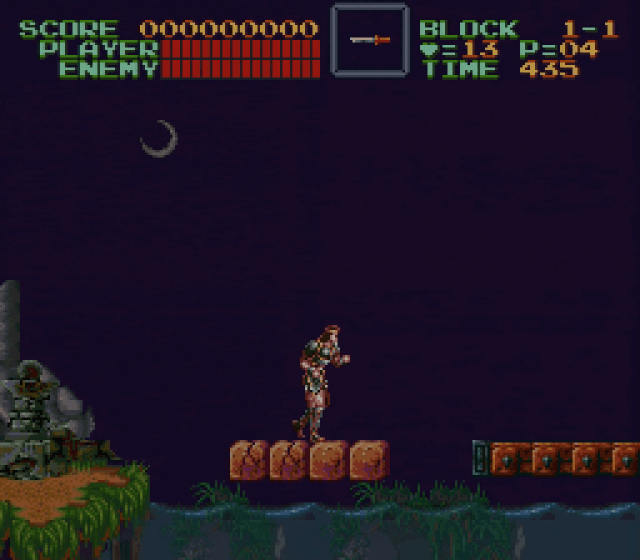
Ah, but that would be getting ahead of ourselves. In order to cross the moat, Simon has to deal with the one tiny hazard in this section: A platform of bricks that crumble as you cross them. With nothing to collect in this screen and no other threats present, these four bricks simply serve as a warning of future dangers to come under more harrowing circumstances.

Still, Castlevania literati may notice something about these bricks: There’s nothing holding them up! The thoughtful architectural discipline of the original Castlevania and its second sequel have already been cast aside; the first game in particular went to great lengths to place background elements in conjunction with traversable surfaces to make it clear that the platforming challenges you had to undertake were the result of ancient masonry falling away rather than video game magic. Castlevania IV doesn’t discard that philosophy altogether, but it definitely lacks the scruples of the classic it aims to remake.

Castlevania_IV-013

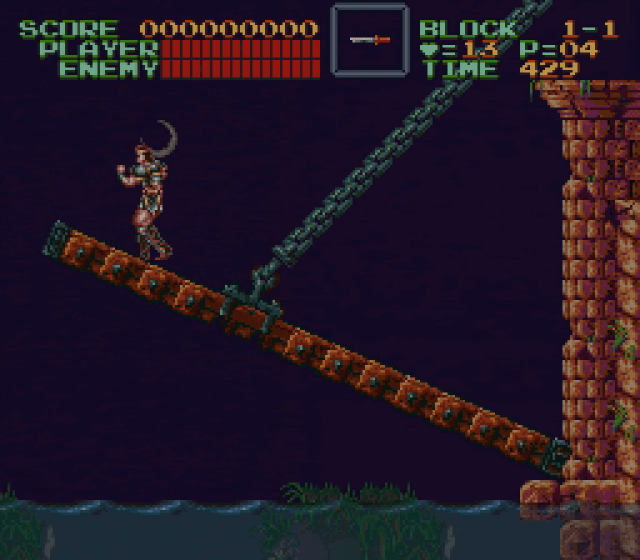
Unlike in the original Castlevania, the entrance to the castle doesn’t merely consist of a door for you to walk through. No, Konami has fancy hardware tricks at their disposal, and the gate to the castle now involves a massive door/drawbridge that begins to rotate closed once you set foot on it. It’s the first of many Super NES-specific visual gimmicks Castlevania IV has up its sleeve, and it’s a good one. The bridge rises slowly but inexorably, and the finality of its closure creates a sense of no escape. Not that you’d be backtracking in a linear 2D platformer like this, but there’s something to be said for the psychology of the whole affair.

Next: Theme of Simon

The Anatomy of Metroid Fusion | 17 | …and the Omega

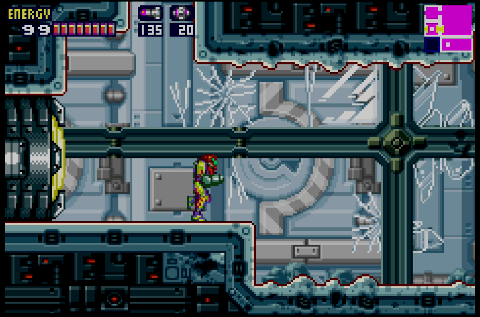
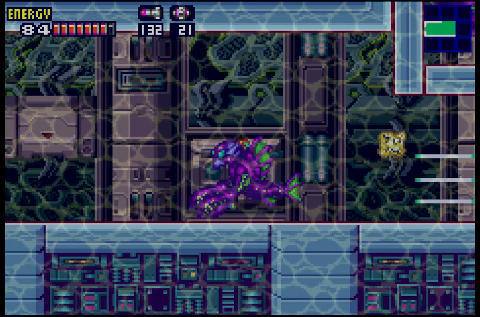
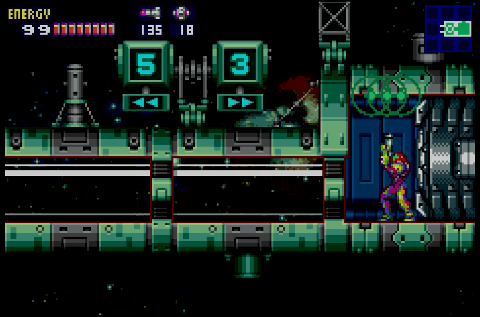
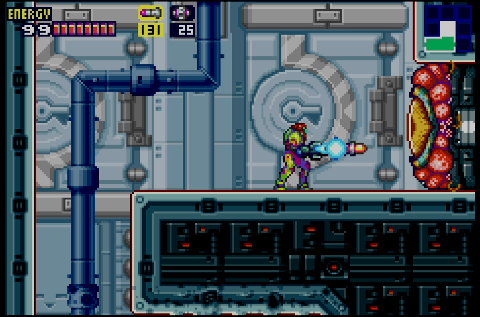
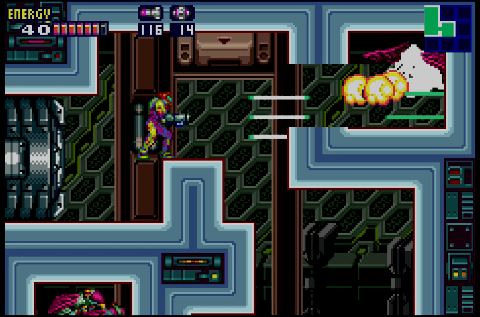
Metroid Fusion Screen Shot 8:5:15, 4.33 PM

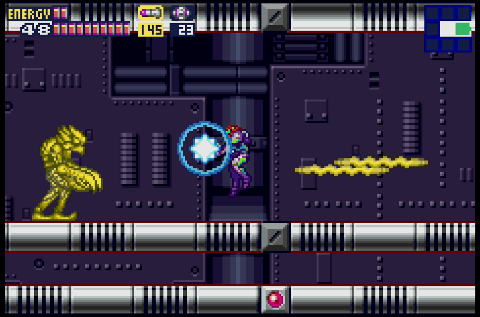
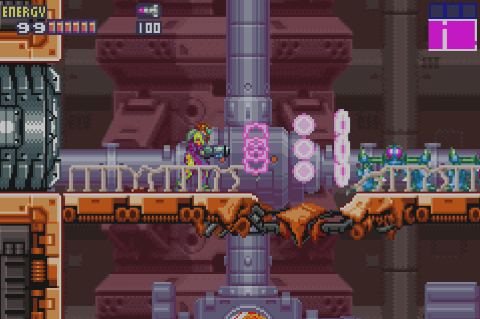
Friends, meet Samus Aran. She got the band back together.

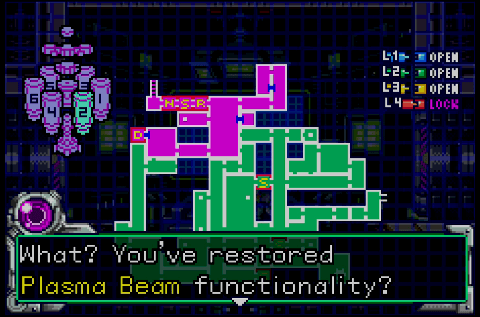
Metroid Fusion Screen Shot 8:5:15, 4.33 PM 1

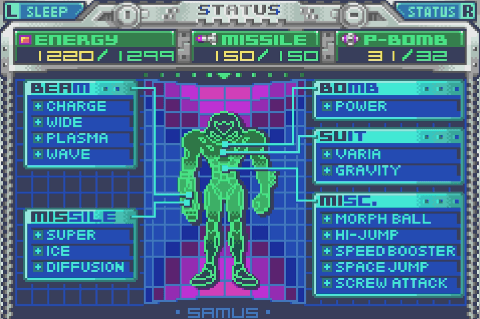
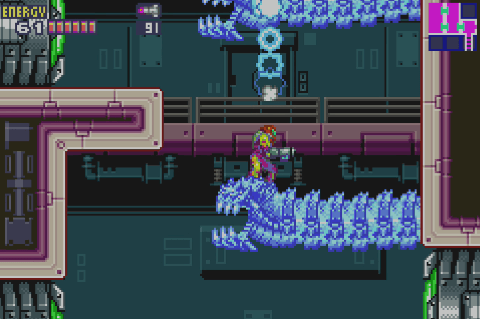
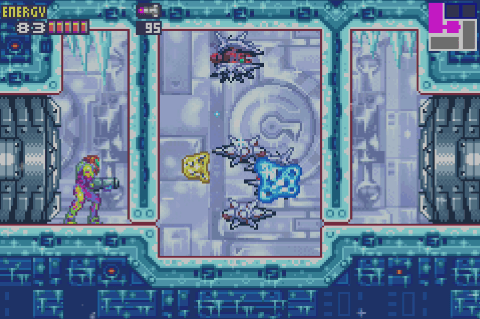
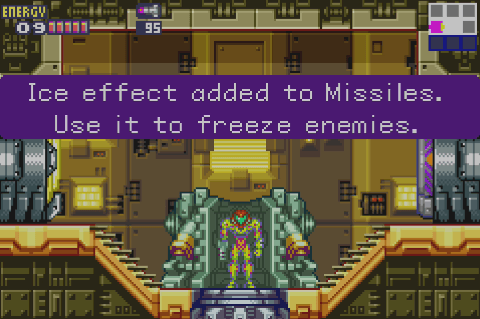
With Ridley-X defeated, Samus is basically back at full fighting strength — the one absence from her arsenal of goodies being the Ice Beam, which remains somehow impossible for her to use because… metroids? Science? It’s never really explained, since she can use ice-powered missiles that send a freezing ripple through the air, and she gained the ability to absorb ice parasites a while back, so who knows.

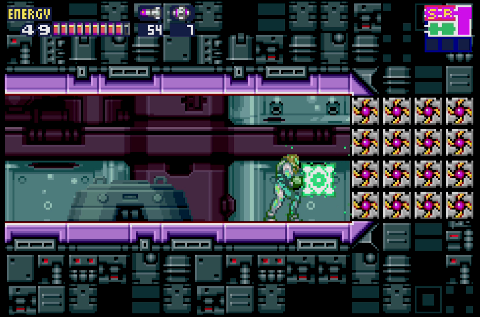
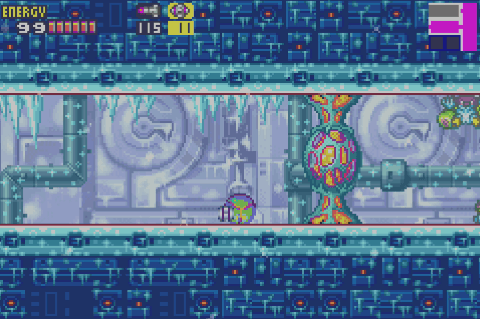
In any case, this is the point at which the entire station opens up to you. The last barrier blocks — the ones that comprise massive chunks of wall throughout the station — fall before the Screw Attack, opening up a number of hidden areas and creating helpful links between different zones.

At this point, you might think back to previous games an assume you have a few final objectives or new areas to explore, but….

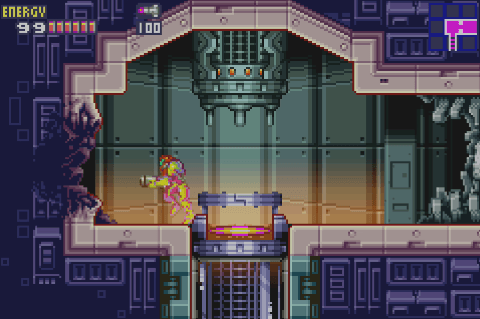
Metroid Fusion Screen Shot 8:5:15, 4.35 PM

…instead, Metroid Fusion pulls its biggest dick move ever.

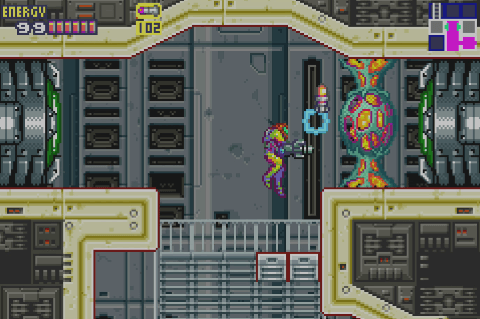
Metroid Fusion Screen Shot 8:5:15, 4.35 PM 2

To put it in Ranma 1/2 fanfiction terms: “ADAM NO BAKA!”

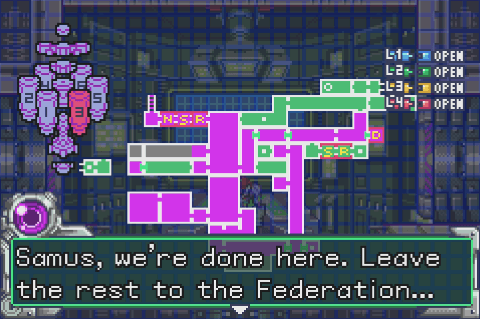
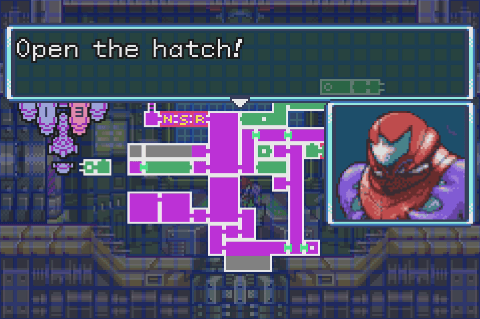
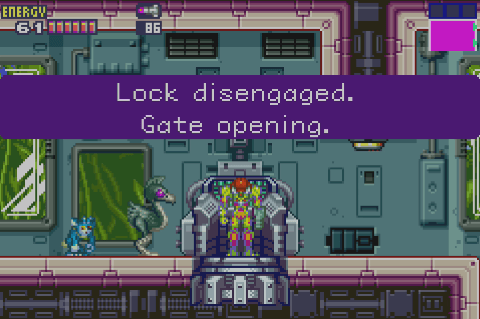
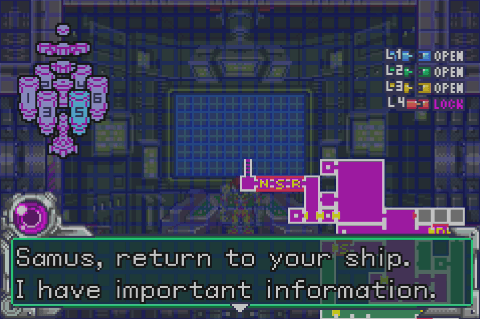
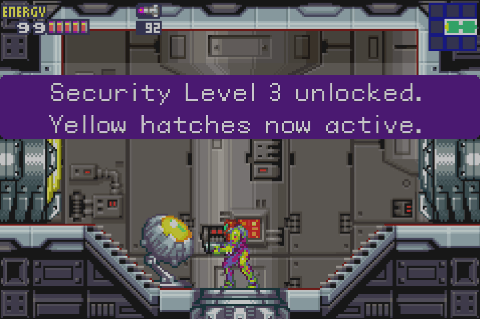
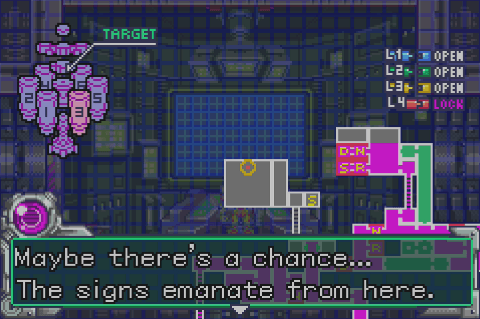
Once you have the Screw Attack and enter a Navigation Room, Adam locks you out of everything but the final area. Now that you have the ability to traverse the entire station, you’re no longer allowed to do so. If you, perhaps, find yourself lacking in Energy Tanks and other power-ups and would like to buff up before the final set of encounters, you’re outta luck. Adam performs one last “would you kindly” and strong-arms you to the station’s central control area.

Metroid Fusion Screen Shot 8:5:15, 4.34 PM

The solution, of course, is simply not to talk to Adam once you have the Screw Attack until you’re satisfied you’ve collected everything there is to find. That’s what the huge swaths of Screw Attack blocks are for: They create links between the various zones so you don’t need to use the main elevators, which require you to pass through Navigation Rooms.

So, the Fusion team hath provided… but not in a very obvious fashion. If you don’t know the shutout is coming, it’s entirely possible to blithely chat with Adam and save your locked-out state, erasing your pre-Adam-chat save file and permanently locking Samus into whichever status she might happen to have immediately after conquering Ridley. Good luck beating the final boss with only half the maximum health tanks, newcomer!

Metroid Fusion Screen Shot 8:5:15, 4.35 PM 3

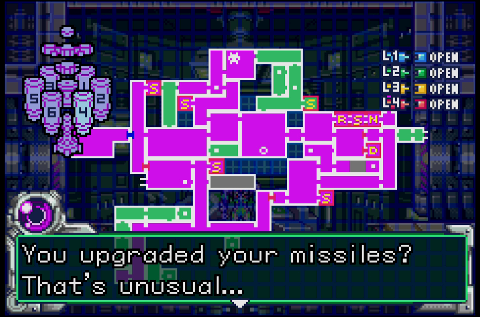
You can work your way through the entire station to collect all manner of power-ups, and there are plenty to find. Fusion‘s map designers went the extra mile to create a puzzle-like environment here; it contains a huge number of items to collect, many within esoteric areas that don’t appear on the map. You need to sleuth them out for yourself. (Or you can use a guide, but that seems a bit contrary to the spirit of the thing.)

Metroid Fusion Screen Shot 8:5:15, 4.37 PM

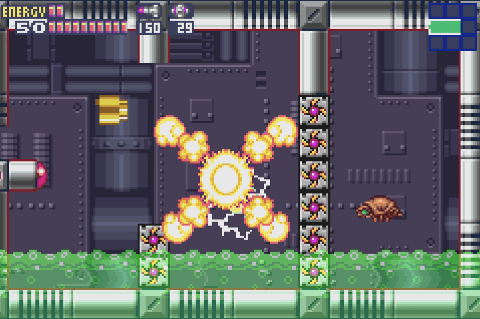
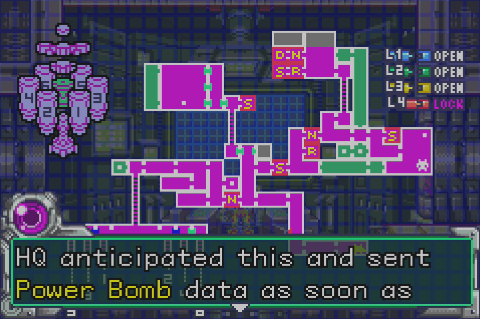
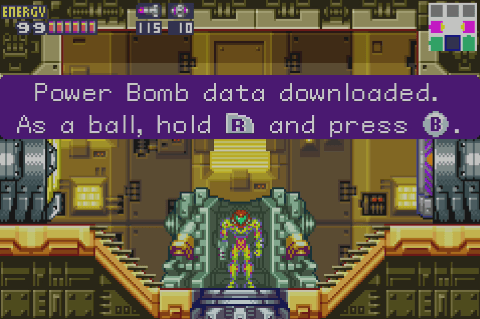
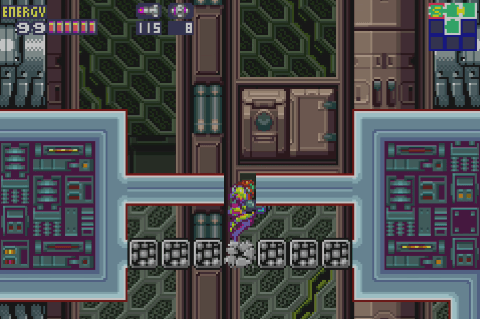
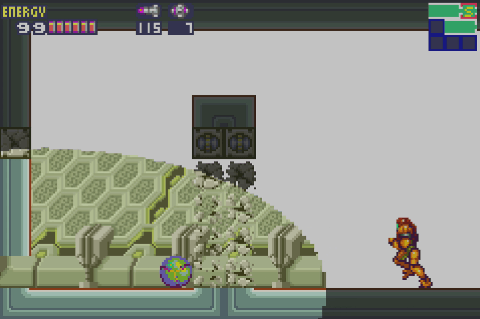
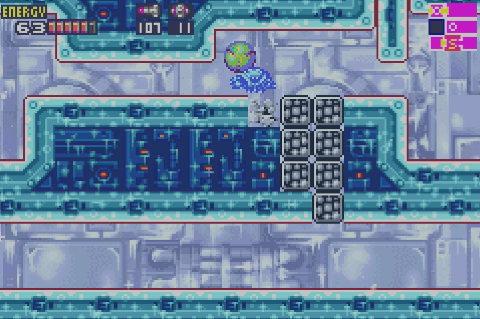
The final areas contain really vexing puzzles like this one: It’s packed with disintegrating and pass-through blocks, and if you detonate a Power Bomb to figure out which bl0cks can’t be trusted, a rising barrier emerges and walls off the Energy Tank. You can leave the room to reset the barrier, but it’s a real, “Yes, we know your little tricks,” moment from the designers.

Metroid Fusion Screen Shot 8:5:15, 4.38 PM

You’ll also find some absolutely insane shinespark puzzles that require either meticulous timing or profound good luck.

Metroid Fusion Screen Shot 8:5:15, 4.34 PM 1

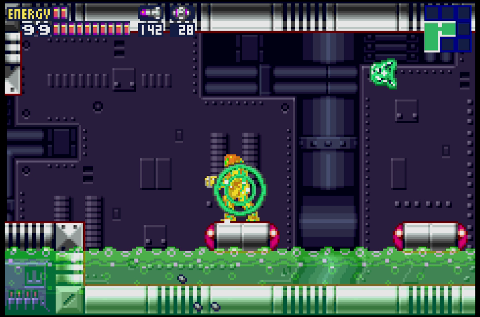
Samus may come across these odd bubbles along the way, depending on which path you take. They look for all the world like molted metroid shells from Metroid II. But that’s strange! Didn’t you detonate all the metroids in the security zone?

Metroid Fusion Screen Shot 8:5:15, 4.35 PM 1

Eventually, though, you need to say “enough’s enough” and trek to the end game. No special Tourian Zone this time, though.

Metroid Fusion Screen Shot 8:5:15, 4.38 PM 1

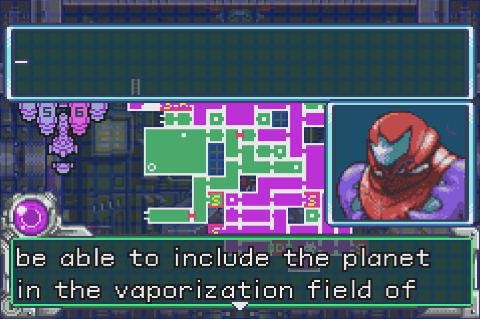
Instead, Adam accedes to Samus’ concerns that the X parasite cannot be harnessed as a bioweapon and that it would destroy all life in the galaxy if the Federation were given the opportunity to collect specimens and attempt to engineer them. So he gives Samus a path to the control room in order to bring the station closer to the planet and evaporate both the station and all life on SR-388. Samus is racking up quite the kill count.

Metroid Fusion Screen Shot 8:5:15, 4.39 PM

No points, however, for guessing that the control center is locked down once you arrive. A familiar explosion sounds out…

Metroid Fusion Screen Shot 8:5:15, 4.39 PM 1

…and the SA-X appears again. Well, an SA-X. There are a bunch of them now.

There’s no running or hiding here, as this is the final showdown. But that’s OK, because the game has clearly been building up to this. Every encounter with and appearance of the SA-X to date has been progressively lengthier and more difficult; meanwhile, Samus as continued to grow in power and skill. At this point, the two versions of Samus are pretty evenly matched.

Metroid Fusion Screen Shot 8:5:15, 4.39 PM 4

They’re so evenly matched, in fact, that if they both collide while performing a Screw Attack, they’ll both take damage. This is not a very smart way to win the battle, however, as the SA-X can outlast Samus in a head-butting contest.

Metroid Fusion Screen Shot 8:5:15, 4.39 PM 2

The SA-X is fairly easy to lure into a pattern, but it seems almost a necessity to do so. Samus versus her more powerful self is a devastatingly difficult battle otherwise, and despite all the upgrades collected throughout the course of the game, the SA-X nevertheless has the upper hand. The theme of Samus as having been badly weakened by her brush with the X has run throughout the game, and the constant hand-holding and admonitions from Adam — not to mention the numerous hopeless run-ins with SA-X throughout the game — have made the message clear: This is the roughest fight in the game. And if you don’t play smart, it really can be. The SA-X moves quickly, is constantly on the attack, creates a tiny target, and hits hard. If Fusion truly is the ultimate point on the Metroid timeline, this isn’t a bad culmination of the tale: Samus has destroyed pretty much every other powerful force in the galaxy, so she might as well wind things up be destroying the most powerful, i.e. herself.

Metroid Fusion Screen Shot 8:5:15, 4.40 PM

Once Samus deals enough damage, the weakened SA-X drops to one knee — exactly as Samus did at the end of Super Metroid, further reinforcing the notion that SA-X has duplicated Samus in her prime.

Metroid Fusion Screen Shot 8:5:15, 4.40 PM 1

Unlike at the end of Super Metroid, however, the defeated SA-X loses its physical cohesion and metamorphoses into a gruesome chimaera that appears to be both an effigy of Samus — note the visor and abdominal coloration — and a fusion of many of the game’s bosses. This second phase plays out a lot like the second Dracula form in Castlevania, with the chimaera leaping high into the air and crashing to the ground in an attempt to crush Samus. This is a mercifully easy conflict, though it does help further underscore the idea of metroidvania.

Metroid Fusion Screen Shot 8:5:15, 4.40 PM 2

Eventually, the SA-X degenerates to a Core-X, which is no more or less difficult than the previous cores you’ve encounters. You have ample space in this chamber with which to evade it, so it amounts to a pleasant denouement to Samus’ ultimate battle.

Metroid Fusion Screen Shot 8:5:15, 4.40 PM 3

You can’t absorb the SA-X, however — when you try to snatch the exposed Core-X, it darts off-screen and vanishes.

Metroid Fusion Screen Shot 8:5:15, 4.40 PM 4

Still, this leaves Samus free to nuke the station, and also an entire planet. Yes, it’s another countdown, a rush to the docking bay.

Metroid Fusion Screen Shot 8:5:15, 4.41 PM

Unlike the usual escape sequence, there’s nothing tricky about this one. It’s a brisk run downhill, with no enemies and no complicated platforming to worry about. Although the passage immediately preceding the docking bay seems a bit messed up…

Metroid Fusion Screen Shot 8:5:15, 4.41 PM 1

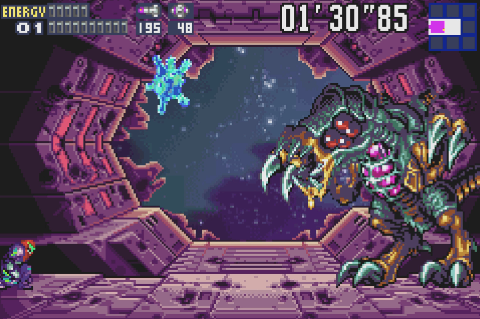
Inside the bay, Samus’ ship is missing — shades, unsurprisingly, of the absent landing craft in Aliens — replaced instead by a badly damaged bay and an absolutely massive metroid husk. One big enough to have belonged to THE BABY THE BABY THE BABY

Metroid Fusion Screen Shot 8:5:15, 4.41 PM 2

But actually just a random metroid that escaped the security quarantine and molted to Omega status, no big deal.
It’s also completely impervious to Samus’ attacks.

Metroid Fusion Screen Shot 8:5:15, 4.41 PM 3

The Omega slowly advances toward you, shrugging off your attacks and generally being a lot more menacing than the ones you wasted so effortlessly in Metroid II.

Metroid Fusion Screen Shot 8:5:15, 4.41 PM 4

Once cornered, Samus can do nothing but absorb a single, massive swipe of the Omega’s claws, which reduce her to a single hit point and leave her gasping for breath on one knee.

Metroid Fusion Screen Shot 8:5:15, 4.42 PM

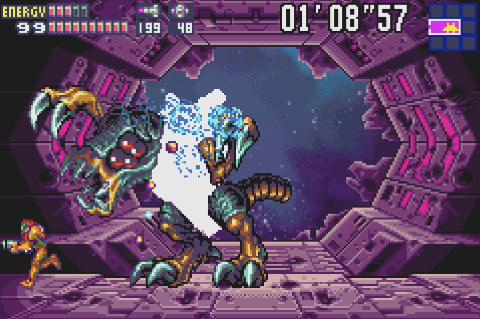
When, out of nowhere, the defeated SA-X appears and begins blasting the Omega, legitimately inflicting damage with nothing but its standard blaster.

Metroid Fusion Screen Shot 8:5:15, 4.42 PM 1

But, since you previously kicked the SA-X’s butt, it proves to be no match for the Omega, which slashes the parasite and causes it to lose physical cohesion again.

Metroid Fusion Screen Shot 8:5:15, 4.42 PM 2

Hmm, this all seems pretty familiar….

Metroid Fusion Screen Shot 8:5:15, 4.43 PM 1

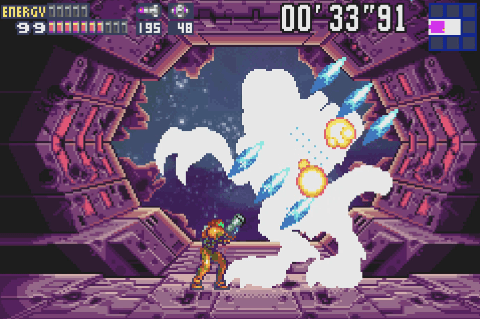
At this point, Samus acquires the final Core-X at last, and gains a considerable health upgrade as well as a new physical form. According to Yoshio Sakamoto, merging with the SA-X brought Samus back to her original biological state — which in gameplay terms means you now have an integral Ice Beam, which allows Samus to damage the Omega.

Metroid Fusion Screen Shot 8:5:15, 4.43 PM 3

While this entire sequence is more than just a bit reminiscent of Super Metroid‘s climax, it also creates an interesting contrast. Samus’ ultimate power-up in Super Metroid made her an unstoppable destroyer; her ultimate power-up here simply reverts her to the state she was in before gaining the super metroid’s Hyper Beam. This has been a journey not of gaining new powers but rather of simply recovering from a tremendous weakening. Samus at the beginning of Fusion was honestly even weaker than she had been at the beginning of the original Metroid; now she’s in prime fighting form, capable of holding her own against a final boss that was a step below Metroid II‘s endboss.

Metroid Fusion Screen Shot 8:5:15, 4.43 PM 4

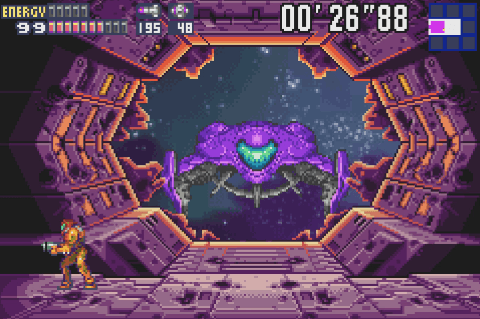
Eventually, the Omega goes down, and Bishop — I mean, Adam — zooms in and collects Samus with her gunship.

Metroid Fusion Screen Shot 8:5:15, 4.44 PM 1

The game ends with a classic colony drop…

Metroid Fusion Screen Shot 8:5:15, 4.44 PM 2

…and Samus hits warp drive before the Genesis wave hits.

Metroid Fusion Screen Shot 8:5:15, 4.44 PM 3

And that’s the story’s finale. Not just for Fusion, but for Metroid as a saga for the foreseeable future. Zebes is gone; SR-388 is gone; the metroids are gone; the X are gone; and the Federation is not so happy with Samus.

Metroid Fusion Screen Shot 8:5:15, 4.45 PM 1

Samus has an annoying new crew member…

Metroid Fusion Screen Shot 8:5:15, 4.45 PM 2

…but on the other hand, the story comes full circle as the critters you (optionally) rescued during Super Metroid‘s escape sequence repay the favor.

Metroid Fusion Screen Shot 8:5:15, 4.45 PM 3

On the whole, Fusion serves as a pretty decent final chapter of the Metroid saga. No, it’s not perfect, and as a whole it would be far more enjoyable if the designers had had more confidence in their work and their audience and spent less time guiding you through the station. While the back half of the adventure opened up considerably — or at least offered the illusion of freedom, anyway — it didn’t quite go far enough. And the arbitrary, untelegraphed lockout at the end of the game was some real amateur hour stuff.

Nevertheless, Fusion does a great many things well. It’s not as timeless and seemingly effortless a masterpiece as Super Metroid, but I think the team was smart to try a different tack with this game rather than simply trying to outdo the classic Super NES game on its own terms. I don’t agree with all their choices, necessarily, but for the most part they pulled it off and gave Fusion its own identity. And most importantly for the purposes of this particular project, the game’s creators still managed to insert lots of subtle storytelling and design ideas into Fusion despite Adam’s pedantry.
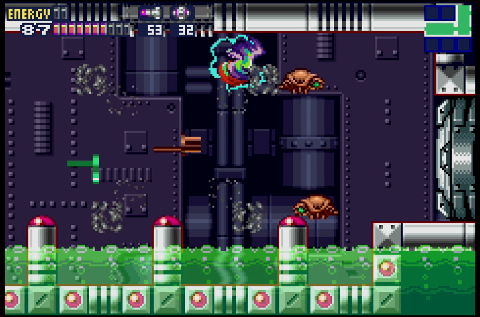
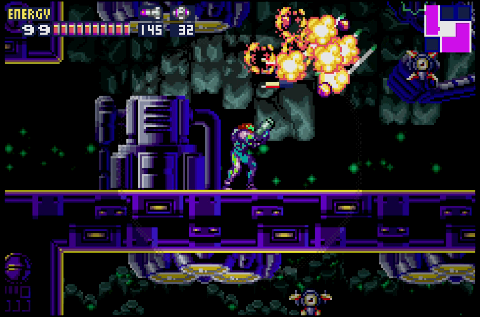
Metroid Fusion Screen Shot 8:5:15, 4.45 PM

I would still love to know what Metroid Dread was meant to be, how Sakamoto intended to follow up on Fusion’s design and story twists. But that never worked out, and for now, this is well and truly…

THE END

Well, except for one other game that doesn’t really advance the story but brings together the sum total of the Metroid series into one perfect classic sendoff. I suppose we should look at that one, too.

The Anatomy of Metroid Fusion | 16 | Old friends

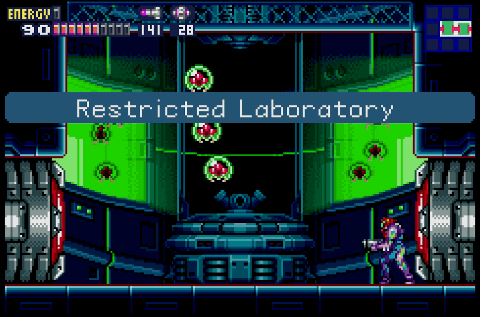
Metroids are the first of many returning friends in this segment of the adventure. Well, the game’s name is Metroid, after all. It just wouldn’t do if the actual last metroid had been in captivity last time around.

Metroid Fusion Screen Shot 7:22:15, 9.39 PM

Two things really stand out here: One, whoops, the Federation is just as rotten as the Space Pirates!

Metroid Fusion Screen Shot 7:22:15, 9.39 PM 1

Two, wow, mature metroids look a lot better here than they did in Metroid II.

Metroid Fusion Screen Shot 7:22:15, 9.39 PM 2

A massive explosion rocks the station once you reach this chamber, which happens to be a dead-end…

Metroid Fusion Screen Shot 7:22:15, 9.39 PM 3

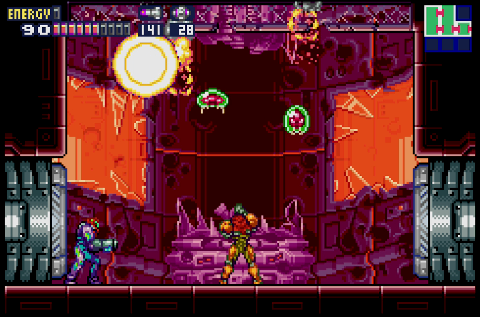
…at least, it’s briefly a dead end, anyway. The SA-X has followed Samus to the restricted lab and, being an adaptation of a creature whose natural enemy is the metroid, basically freaks out upon seeing a tiny army of the things being cultivated. The SA-X opens fire, unleashing its destructive power against the growth chambers packed with larvae, which shatters the walls and ceiling alike — the dead end room from a moment ago now becomes interconnected with the lower level, the floor shattering away.

The SA-X appears less intelligent than advertised. Rather than open fire against the larvae with its ice beam, it blasts them indiscriminately. They quickly descend upon the fake Samus and presumably suction its life force away. Do baby metroids have suction powers? They can make mystery blocks disappear, sure, but in all this time we’ve never encountered one in a hostile situation.

Metroid Fusion Screen Shot 7:22:15, 9.40 PM 1

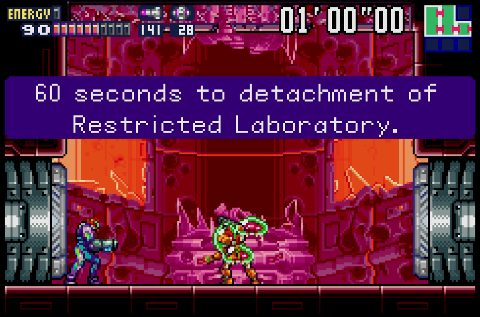
We’ll just assume they’re making a TV dinner of SA-X. You don’t really have a chance to enjoy the sight, however, since this turn of events initiates an escape sequence.  In a nice touch, the one-minute countdown display uses the same typeface as the one-minute escape indicator in Super Metroid‘s Ceres Station.

Metroid Fusion Screen Shot 7:22:15, 9.40 PM 2

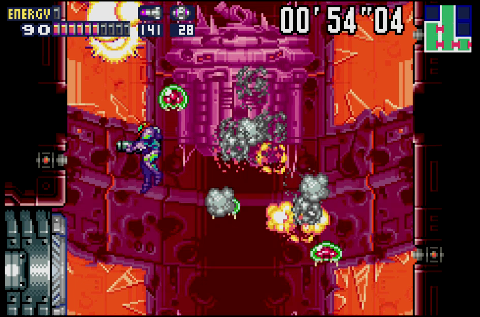
Interestingly, and fittingly, the metroid larvae don’t attack Samus. Why would they? The SA-X identifies Samus as metroid thanks to her genetic modifications; presumably the metroids do, too. That said, they don’t make this sequence easy; they hover in mid-air and will interrupt Samus’ space jump if she collides with them, and they demonstrate a decidedly annoying inclination to drift into your path as you try to make your way out of the restricted zone.

Metroid Fusion Screen Shot 7:22:15, 9.40 PM 3

Cut to an external shot of the restricted laboratory being jettisoned from the station. No explosions? Seems like an unacceptable breach of tradition…

Metroid Fusion Screen Shot 7:22:15, 9.40 PM 4

Oh.

With that, it would seem the last of the metroid, and the SA-X, are done for. Game over?

Metroid Fusion Screen Shot 7:22:15, 9.40 PM 5

When you link up with Adam again for a debriefing on your mission, he thanks you for your hard work by goose-stepping for the Man. Adam really is the worst. People complain about Adam’s equivalent persona in Other M being too priggish to be in-character for his Fusion counterpart, but frankly it seems pretty faithful to me.

Metroid Fusion Screen Shot 7:22:15, 9.41 PM 1

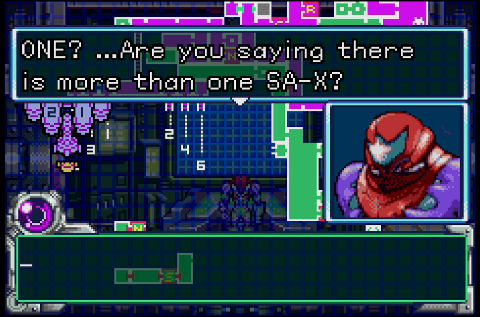
A nice touch here — another big plot revelation is given extra impact by the designers breaking the rules of the Adam chat sequences. Until this point, you’ve always received instructions passively from Adam at computer terminals, with only his HAL-like eye present on-screen alongside his dialogue box. Here, as he reveals the fact that SA-X is one of 10 that have appeared in the station — parthenogenesis is a helluva thing — a dialogue and portrait box appears for Samus, too. Until now, she’s taken everything in stride. But this, this news is far too much to bear, and she plays proxy for the player’s sense of dismay at discovering the SA-X is not, in fact, dead.

Metroid Fusion Screen Shot 7:22:15, 9.41 PM 2

At this point you end up in a weird little corner of the station, whose design feels cold and mechanical — there’s no simulation element at play here. The result looks uncannily like the Tourian zone of planet Zebes…

Metroid Fusion Screen Shot 7:22:15, 9.42 PM

This area pits you against your second returning friend and the greatest non-boss challenge in the entirety of Fusion: Gold Space Pirates. Or rather, X parasites masquerading as Gold Space Pirates.

These warriors can be downright harrowing; unlike their equivalents in Super Metroid, they never flash to reveal their vulnerability. Instead, you have to sort out the trick to defeating them on your own: They can only be hurt by striking them from behind. That’s more easily said than done, since they always try and face Samus. Ultimately, the trick is to get up close to them, which will cause them to leap over you and briefly expose their vulnerable backs. Once you get the trick, they’re pretty harmless due to their simple AI patterns, but getting to that point can be taxing.

In truth, though, you never actually have to fight Gold Space Pirates. They never appear by default, strictly coalescing from X parasites loosed from other creatures. If you avoid allowing the freed lesser parasites from congregating, they’ll never merge into Gold Space Pirates. Their presence truly tests your skills, your problem-solving capacity, and your patience.

Metroid Fusion Screen Shot 7:22:15, 9.41 PM 3

The further you descend into not-Tourian, the nastier it gets. Eventually, you’re dealing with pools of acid and weird X blobs that break the rules and attach to you like metroids. This area should remind you very much of the lead-up to Mother Brain’s chamber in Super Metroid, with parasites replacing the metroids. Does this mean an X-corrupted Aurora Unit is just around the corner…?

Metroid Fusion Screen Shot 7:22:15, 9.42 PM 1

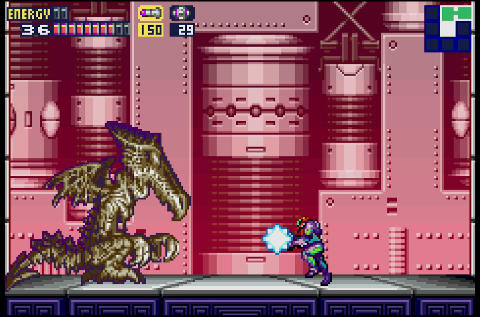
No, it means that Ridley is up, having somehow relocated from deep freeze to this sterile zone. Hello, returning friend number three.

Metroid Fusion Screen Shot 7:22:15, 9.42 PM 2

The mystery of the dead, frozen fiend’s relocation quickly becomes evident: His corpse — or frozen, Big-Boss-coma, near-death self, I suppose — has been subsumed by the X parasite and turned into a gross self-parody of himself. You almost kind of feel bad for Ridley, but I guess this is what he gets for being such a chump during that first encounter.

Metroid Fusion Screen Shot 7:22:15, 9.42 PM 3

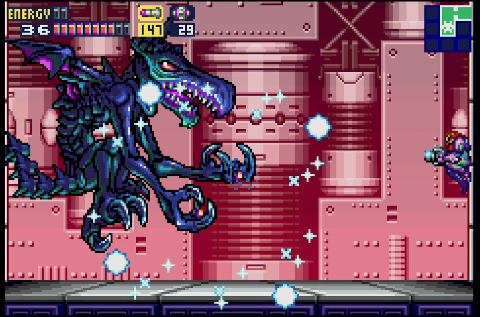
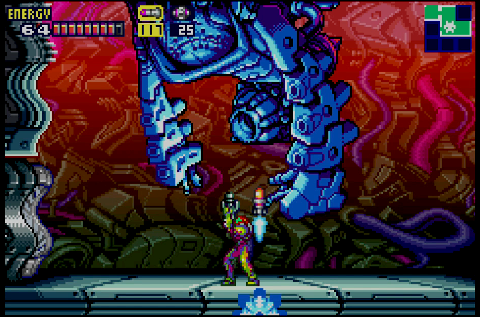
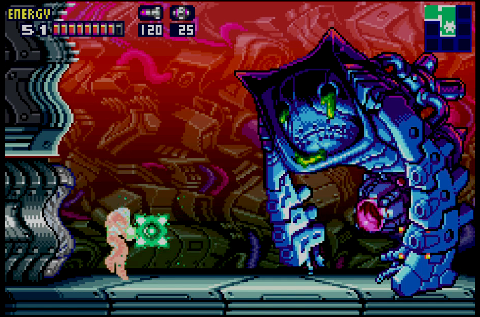
After the past few battles, which have been largely pattern-based and required tremendous patience and careful execution, Ridley-X is a straightforward slugfest. This fight, even more so than Nightmare, plays out as a battle of attrition: Ridley is a huge target and doesn’t really move around all that much, sort of bouncing and hovering in place. But at the same time, it’s very difficult to evade his attacks, as he occupies so much of the screen.

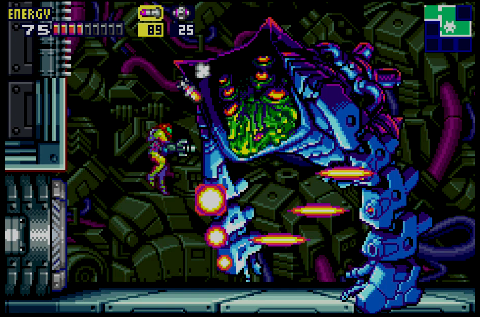
His fiery breath — a trademark since the beginning — now consists of a handful of large flame blobs that spread out in a sort of parabolic pattern. They tend to fire away from Ridley and are by far his easiest attacks to dodge.

Metroid Fusion Screen Shot 7:22:15, 9.42 PM 5

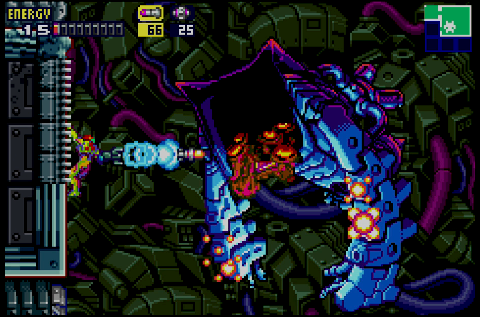
Much less difficult to evade is his grab attack, which he’ll execute if he manages to corner you — something he does with ease and regularity. As in Super Metroid, breaking free is simply a matter of peppering him with missiles… something made slightly more complicated by the way Ridley flips orientation between right and left. When Ridley changes the direction he’s facing, Samus doesn’t turn with him — you continue attacking in the whichever direction you were aiming at. It’s a weird design choice, but it definitely can break your rhythm.

Metroid Fusion Screen Shot 7:22:15, 9.42 PM 4

Otherwise, though, it basically comes down to a question of who dies first: You or Ridley-X.


Metroid Fusion Screen Shot 7:22:15, 9.42 PM 6

Assuming you didn’t screw up too much against the Gold Space Pirates, it’s not too difficult to survive this straightforward battle of attrition.

Metroid Fusion Screen Shot 7:22:15, 9.43 PM 1

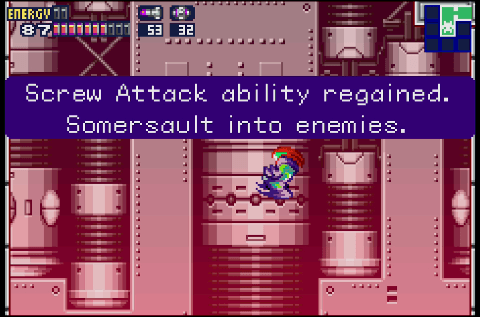
Which results in Samus acquiring her final key upgrade, and an essential part of surviving the difficult battle ahead: The Screw Attack. As always, this ability turns Samus’ Space Jump into a deadly weapon, destroying anything she comes into contact with, or at least rendering her safe from harm, so long as she’s spinning in air.

Metroid Fusion Screen Shot 7:22:15, 9.43 PM 2

In a nice little touch, the room immediately before Ridley-X was filled with drifting Rippers who were completely invulnerable to all of Samus’ attacks. Now it is you who are the ripper, tearing through these dudes with the power of the Screw Attack. One final little diegetic gameplay tip to show off your new powers before the end game.

The Anatomy of Metroid Fusion | 15 | Round two

Even after linking up again with Adam, and despite the continued linearity of this section of the game, Fusion continues to allow you to feel like you’re basically free-wheeling. It manages to hit the same sweet spot that certain parts of Super Metroid did, giving you a nudge toward your objectives but leaving you to sort out exactly how you’re supposed to meet those objectives on your own. Zero Mission, as we’ll see, does this from start to finish, which is why Zero Mission is probably the best Metroid.

Metroid Fusion Screen Shot 7:22:15, 9.34 PM

The game also takes this opportunity to allow you to recalibrate yourself. You’ve been facing a host of ever-more-dangerous creatures, from the SA-X to Space Pirates that somehow transform into mermen, and for all your seeming progress Samus never really gets a leg up on the opposition. But as you return to the night sector, you work your way through areas you cleared much earlier in the game, fighting enemies who once demanded strategy and caution. Now, equipped with a nearly full-powered beam, diffusion missiles, and the Gravity Suit, Samus slices through her enemies like a scythe through summer corn. You are mighty — it’s just that the enemies have scaled up with you.

Metroid Fusion Screen Shot 7:22:15, 9.35 PM

That said, you’re still not awesome enough to break through all those pinwheel wall barriers that seem to make up a significant chunk of the station’s core areas.

Metroid Fusion Screen Shot 7:22:15, 9.36 PM 1

Eventually, your path through puny weakling monsters leads Samus to a shuttered gate being watched by a video camera. The camera is non-interactive and, unlike the mystery eyeballs at the beginning of Super Metroid, doesn’t follow Samus. Nevertheless, it definitely stands out here — and the fact that approaching the gate initiates a computerized voice warning you to stay out of the restricted zone definitely doesn’t sit right. However, you can’t get past this gate no matter how much you’d like to… so, naturally, the only solution is to go find a Core X with a Wave Beam power-up. That’s the routine in Biologic’s station: Hit a wall, kill a mutant alien virus, steal back a skill.

(In a nice touch, the computerized voice sounds almost exactly like MU-TH-UR’s detonation countdown in Alien.)

Metroid Fusion Screen Shot 7:22:15, 9.36 PM 2

Your goal now is a slightly flooded room, which you very likely passed through on your way to the locked gate — it’s much easier to find, more obviously in your path, and it sits suspiciously empty. Chances are pretty good you would have stumbled upon it before triggering the warning voice and, in an attempt to make sense of what this pointless room was about, detonated a Power Bomb that revealed ladder rungs running across the ceiling.

Metroid Fusion Screen Shot 7:22:15, 9.37 PM 1

Those rungs turn out to be of vital importance once you’ve triggered the alert, since the computer warning draws the security robot out of hiding. Alas, some idiot at Biologic decided to make B.O.X. with organic components, and it’s now corrupted by the X as well as everything else on the station.

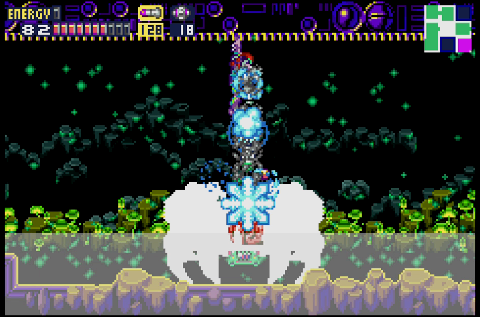
The robot has a fairly simple pattern here, but it’s devastating. It scuttles along the floor, leaping frequently with the intent of body-checking Samus, which jars her loose from the rungs. It also fires off strings of missiles, several at a time, which rise up before homing in on Samus. These, too, dislodge Samus on contact.

That’s bad, because the robot has electrified the pool of water — touching it saps Samus’ energy quickly, and with the boss constantly slamming into you, it can be tough to get back out again.

You’d think this would be a great place to make use of your Diffusion Missiles; since it’s tough to draw a bead on the robot and it’s constantly firing off projectiles, the diffusion effect should allow you to “fire and forget,” right? The wave taking out the enemy missiles and delivering damage to its vulnerable core. Sadly, that’s not how this fight works. The missiles are unaffected by diffusion, and you have to hit the biological core directly in order to effect damage.

Metroid Fusion Screen Shot 7:22:15, 9.37 PM 2

This means hanging around up top, waiting for the robot to scurry into your line of sight, gunning down missiles with your energy cannon as they approach. Unfortunately, unlike the first encounter with the security cyborg, you can’t just sit in one spot and wait for it to pass by. If you hang around for long, it will take a mid-air swipe at you. So you need to remain on the move…

Metroid Fusion Screen Shot 7:22:15, 9.37 PM

…and make the most of rare and precious openings. The B.O.X. doesn’t take a huge number of hits to defeat, but actually landing those blows can be ridiculously difficult.

Metroid Fusion Screen Shot 7:22:15, 9.38 PM

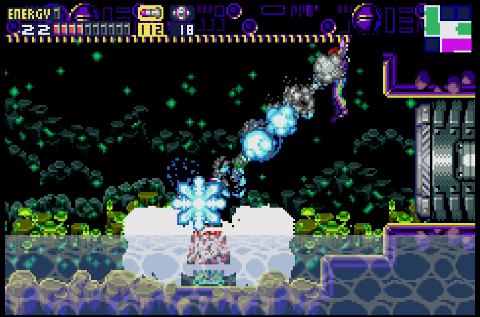
There is one saving grace to this battle, though: B.O.X. is not very smart, and there’s a safe spot in this room. Despite its ability to jump, the boss’ pattern doesn’t allow it to hop up on the raised perimeter of the room. So, if you hang above the lip of the floor at the right or left edge of the space, you’ll be completely safe from B.O.X.’s dangerous leap attacks. You’ll also have plenty of lead time to shoot down its missiles as it paces back and forth. And, every once in a while, it’ll come into your line of sight. It’s not a courageous approach, but this sort of exploit is fairly uncommon in Fusion. Might as well take advantage of it, yeah?

Metroid Fusion Screen Shot 7:22:15, 9.38 PM 2

Well. A thing like that.

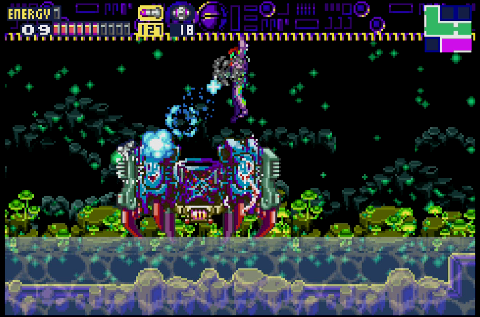
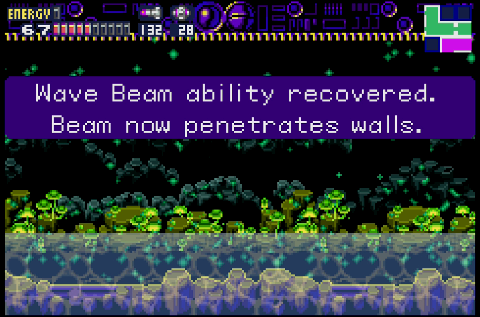
The Wave Beam acquisition was basically a given at this point, but it does feel a little unsatisfying from a design sense: Pretty much every boss until now has made use of the ability its Core-X stole from Samus, but nothing about B.O.X. resembled the Wave Beam (which allows your arm cannon fire to pass through all barriers in addition to the Plasma effect that pieces foes). While you had to gain the Wave Beam in order to advance, and you were bound to face off against B.O.X. again, it feels a bit obligatory rather than inspired.

Metroid Fusion Screen Shot 7:22:15, 9.38 PM 3

Anyway, the Wave Beam allows Samus to bypass the security gate and ender the restricted zone.

Metroid Fusion Screen Shot 7:22:15, 9.38 PM 4

And the plot thickens.

The Anatomy of Metroid Fusion | 14 | Ahh, memories

With the Gravity Suit in hand (not literally), unsurprisingly the next phase of the game takes you back to all the underwater areas you couldn’t proper explore last time. This comes much later in the game than Maridia did in Super Metroid, where you acquired the Gravity Suit at the midpoint. Here, you have only a handful of power-ups remaining.

Metroid Fusion Screen Shot 7:4:15, 9.49 AM 1

Although! The game certainly isn’t shy about gating your progress with those last few skills. You may be near the end at this point, but there’s still plenty of potential power locked behind walls of icons you don’t have the power to destroy yet.

Metroid Fusion Screen Shot 7:4:15, 9.49 AM

You continue to make connections between different areas of the space station by alternate routes — service passages and other corridors. In addition to making the game more interesting to navigate, it also helps lend a sense of empowerment even though you’re really just going by the game designers’ prescribed route. Adam’s directives always plot you back through the main elevator space, punctuated by a patronizing reminder of how to repeat paths you’ve traveled a dozen times, and making these connections behind the scenes feels like an act of rebellion. You’re breaking the rules by way of carefully curated and meticulously controlled world design.

Metroid Fusion Screen Shot 7:4:15, 9.50 AM 1

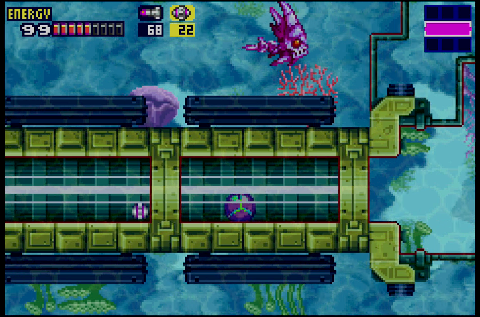
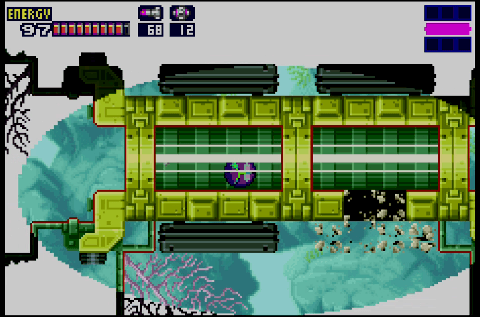
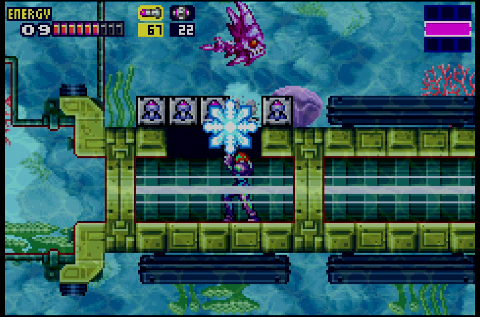
The flooded areas of the station contain numerous callbacks to Maridia, and survivors of Samus’ previous adventures will almost certainly intuit certain hidden secrets here. Such as what happens when you detonate a Power Bomb inside a glass conduit underwater…

Metroid Fusion Screen Shot 7:4:15, 9.52 AM 2

Yeah that’s right.

Metroid Fusion Screen Shot 7:4:15, 9.49 AM 2

A number of creatures make a return from Super Metroid as well, such as the little baby versions of Draygon. In keeping with the theme of the game, though, these familiar creatures always require new techniques to defeat and can behave in surprising ways.

Metroid Fusion Screen Shot 7:4:15, 9.50 AM 2

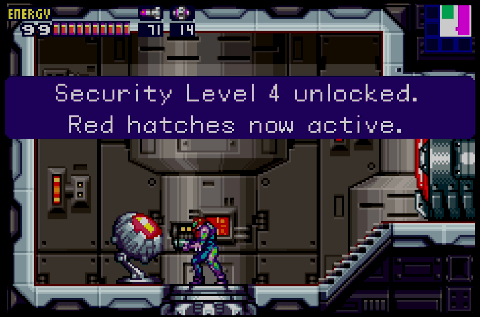
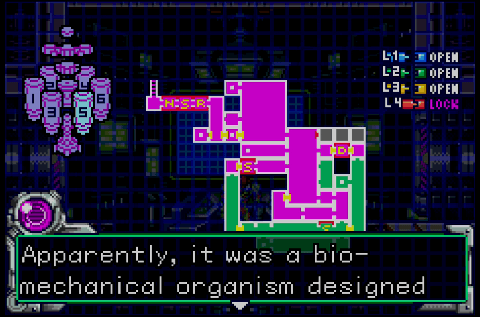
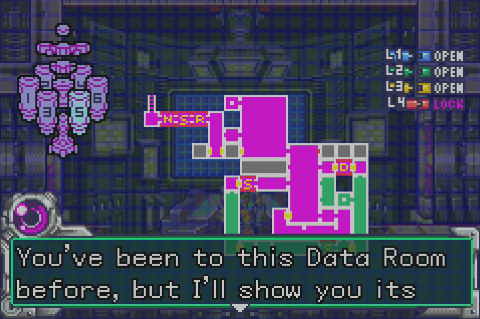
The glass tube-busting tactics aren’t just a fun shortcut in Fusion the way they were on Zebes; in fairly short order, you’ll cover all the “official” areas on the map and find yourself stymied by red Level 4 security doors. The only way to advance is to go off the grid, as it were, and map out new areas on your own. You’ve ventured into green portions of the map a number of times by this point, but this is the advanced version of the technique, the 301 course. You have to sniff out the secret areas all on your own, and even then simply “going green” isn’t enough to advance — you have to puzzle through a couple of tricky rooms, too.

Metroid Fusion Screen Shot 7:4:15, 9.50 AM 3

Every portion of the uncharted map here seems like a dead end at first glance. There are clues for to advance, but you have to look for them. In this case, a set of vents sits over a suspicious pit… and while that alone isn’t a dead giveaway, considering how the framework of this region presents plenty of “open” areas outside the playable space, the fact that the two vents over the opening don’t discharge air bubbles the way the other vents do should definitely tip you off to their artifice.

Metroid Fusion Screen Shot 7:4:15, 9.51 AM 1

Likewise, drop down and you can take the obvious path to the right… but it dead ends again. The true path is to continue descending through the fake vents. Here the false vents lack the tip-off of empty space below, but since you’ve already learned how to spot the difference between real and fake vents, you can sort it out.

Metroid Fusion Screen Shot 7:4:15, 9.51 AM

This little nook makes a puzzle out of two separate properties of the game: Rooms that only unlock once enemies are defeated, and X parasites that merge into new enemies if left to fly free. You can’t open the exit to this room unless you allow some of the X parasites from enemies in the main passage to drift over and possess the little (non-parasitic) crab dudes hanging out in this walled-off space. Only when they’re destroyed along with the immediately hostile foes can you advance… something that might not immediately seem intuitive. You’ve been trained to snag free parasites as quickly as possible, but if you do that here you can’t destroy the innocent creatures and the door won’t unlock. It’s a pretty ingenious puzzle, and it’s not completely opaque either, since the basic crabs are sort of conspicuous in the way they putter around in the background of this otherwise useless walled-off section.

Metroid Fusion Screen Shot 7:4:15, 9.52 AM

The final bit of this environmental puzzle is a room full of hard-to-reach, invisible passages. It gives you one somewhat obvious route that terminates in a dead end, forcing you to pore over every inch of the room to find the correct route — with a hint coming in the fact that the dead end (the bottom-right cavity obstructed by a Bomb block) sits right next to a huge, conspicuous space that you can’t reach directly (with a Bomb block directly above a pipe leading into a room below). Fusion does a great job of being tricky, but not so devious it feels like you’re playing a guessing game. If Metroid was too opaque with its hidden passages and Super Metroid too obvious, Fusion hits a perfect balance. Or near perfect, I suppose, because how do you improve on perfection? And Zero Mission definitely improves on Fusion.

Metroid Fusion Screen Shot 7:4:15, 9.52 AM 1

Your ultimate goal here has been to unlock the final set of security doors. As with some of the previous security computers, you had to reach this room through an indirect route. This trip, however, was far more convoluted than your previous escapades… and also, you weren’t given tips (or authorization) by Adam.

metroid fusion 14-02

With the red doors unlocked, the game gives you no further guidance, leaving you to figure out your next objective for yourself. The continuing lack of didactic direction gives this phase of the game an almost alien feel; you’ve been led by the hand for so long at this point that the notion of working it out for yourself take a bit of adjustment.

metroid fusion 14-01

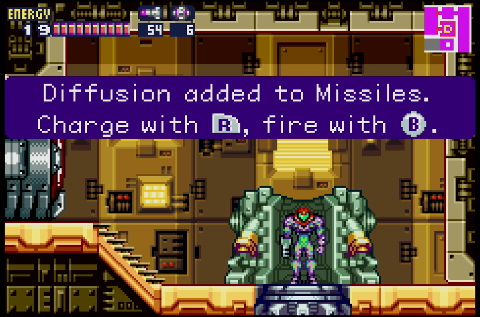
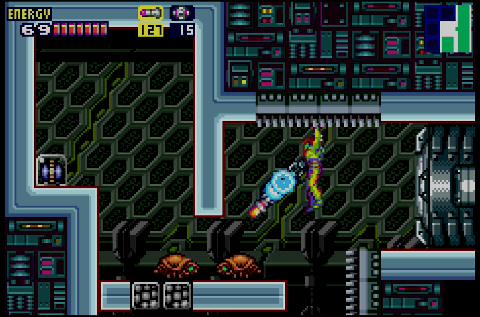
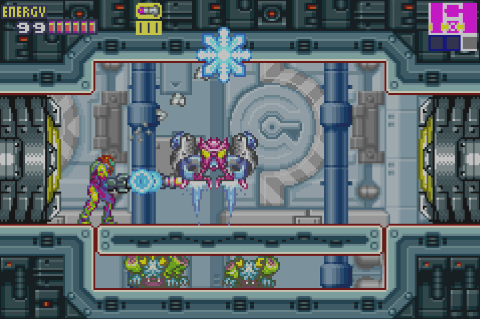
Of course, the answer is to find all the greyed out map spaces behind red door icons, which leads you to this data room where you acquire one of the game’s unique power-ups: Diffusion missiles. This power allows you to charge a missile before firing it off; when a fully charged missile hits a target, it emits a freezing wave that freezes up pretty much everything in the room.

metroid fusion 14-04

This is helpful for rooms full of creatures that need to be shut down or turned into footholds. It’s also useful for areas like this, where tiny creatures inflate to block passages when you come near. They’re too small to hit with a normal missile, but the diffusion effect can hit them regardless.

metroid fusion 14-03

Of course, your cool new missile power has no effect on these blocks, which at this point appear to comprise, like, half the station.

metroid fusion 14-05

In any case, Adam acts intensely constipated about Samus’ actions and acquisitions, which makes this sequence all the sweeter.

The Anatomy of Metroid Fusion | 13 | Bad dreams

A few housekeeping notes following up on the previous entry.

First, I forgot (or maybe never realized) that you can temporarily freeze the SA-X to give yourself a moment’s respite during the big chase scene. This doesn’t do that much to help, but some help is better than none whatsoever in such a deadly sequence. As reader “Dark Holy Elf” (presumably an alias) notes in the comments, the SA-X once again demonstrates its fearsomeness if you do try to freeze it; while you can stop it in its tracks, it immediately enters the flashing state that indicates an enemy is about to defrost. The freeze state lasts about two seconds for SA-X. Even hitting the thing’s weakness doesn’t do you much good.

Metroid Fusion Screen Shot 7:4:15, 9.43 AM 2

Also, the platforming and weapon puzzles you have to deal with in order to acquire new power-ups are growing increasingly arcane and tricky. The only way to get this Power Bomb is to freeze these Rippers side by side beneath the low overhang, creating an ersatz platform that you can roll across and then leap from.

Metroid Fusion Screen Shot 7:4:15, 9.44 AM 2

Anyway, per usual, Adam sends you after your next objective; this time it involves destroying a beast instead of seeking an item. He goes into great detail about the damage this thing has wrought…

Metroid Fusion Screen Shot 7:4:15, 9.44 AM 3

…although, once again, his commentary proves superfluous. The revamped graphic set for Sector 5 makes Nightmare’s power quite clear. The glass panes separating the foreground from the back of the sector are now cracked or shattered, portions of flooring have rippled and disintegrated, and certain structural elements have collapsed.

I find a frustrating irony in the fact that the Metroid game that offers the most elaborate and intentional narrative through level design — changing, evolving level design at that — is also the Metroid game that demonstrates the greatest compulsion to overexplain itself through text. We’ve seen fascinating hints of story in subtle details of previous Metroid adventures, such as the shattered Chozo statues near the Metroid Queen’s lair in Return of Samus and the entire prologue of Super Metroid. Fusion takes that principle to its most elaborate extreme… then smothers you with explanatory dialogues. Well, monologues, really. It’s like going to an art gallery opening and having the featured artist hover over your shoulder to explain every painting to you, in case you missed the symbolism he sweated over. It’s OK, creators! Have confidence in your work.

Metroid Fusion Screen Shot 7:4:15, 9.45 AM 1

Much of this area has become flooded, and the X parasite shows off more of its adaptability: The X that mimic Space Pirates have gained the ability to transform into mer-forms, something decidedly lacking in the Space Pirates you encountered throughout Maridia.

Metroid Fusion Screen Shot 7:4:15, 9.45 AM

Not unlike what Portal would do five years later, as you gain more “freedom” and increasingly are forced to find back routes to reach objectives that have become trapped behind ruined doorways and melted rooms, Samus spends more and more time “backstage” in the game. This isn’t breaking the fourth wall or anything, but you need to navigate service corridors and other passages clearly intended for the B.S.L station staff. Compared to the straightforward paths you traverse in the game’s first half, this really adds to the sensation that the game’s setting is rapidly spiraling into chaos.

This makes for a nice touch, too: Normally Metroid games have Samus show up after the fact. Here in Fusion, though, you watch the collapse unfold as you complete your mission. Samus is, essentially, patient zero for the X outbreak, caught up in the crisis she unwittingly prompted. Which isn’t to say she’s the bad guy here. She’s not the one who was cultivating bioweapons of mass destruction, after all.

Metroid Fusion Screen Shot 7:4:15, 9.46 AM

As always, an infested eyeball door serves as your warning of the battle about to transpire.

Metroid Fusion Screen Shot 7:4:15, 9.46 AM 1

But what’s this? Instead of a boss, it’s an Energy Tank?

Season Metroid vets should be wise to such unexpected generosity. You can’t trust the level designer.

Metroid Fusion Screen Shot 7:4:15, 9.46 AM 2

Indeed, detonate a Power Bomb and you’ll reveal trick flooring that drops you permanently into the next chamber if you take the direct route, along with a passage in the ceiling that actually takes you to the Energy Tank. But you know, even if you’re not familiar with the fake floors next to too-convenient Energy Tanks of the older Metroids, Fusion has still given you ample warning for this ruse. Most of the game’s boss battles and the recent SA-X encounter saw Samus entering a seemingly innocuous room that dropped her into the thick of battle. And certainly there have been item-related fakeouts aplenty, such as the devious and hateful Mimics.

Metroid Fusion Screen Shot 7:4:15, 9.46 AM 3

None of those encounters come close to matching the ruthless difficulty of Nightmare, though. This could well be the most difficult boss battle in the entirety of the series. The spider and infested Torizo were rough, and that SA-X escape sequence intense, but Nightmare involves multiple phases, disables your weapons, soaks up a ridiculous amount of damage, and flies around the room with a ponderous bulk that makes it seemingly impossible to evade. Nightmare comes by its name honestly.

Metroid Fusion Screen Shot 7:4:15, 9.47 AM 2

Initially, the creature hovers around, altering its altitude and firing off a triple spread of energy beams from both its “arms.” While you need to pay attention to the timing of its firing sequence in order to predict whether you’ll need to jump or duck to evade the plasma beams, this isn’t too tough.

Metroid Fusion Screen Shot 7:4:15, 9.47 AM

After its initial pass, however, Nightmare alters the playing field by activating a gravity generator that severely impairs Samus’ ability to jump. The gravity is also sufficient to make her Freeze Missiles essentially useless; they barely emerge from Samus’ arm cannon before plummeting to the ground harmlessly. It’s not impossible to hit Nightmare with a missile in this phase, but it’s dangerous and difficult — you have to be standing directly beneath its weak point (the circular gravity generator pod between its arms), which means you’re probably going to take a hit as it drifts through its pattern.

So, the fight begins by removing two key tools from Samus’ arsenal: Her mobility and her most powerful attack.

Metroid Fusion Screen Shot 7:4:15, 9.47 AM 3

No, you’re much better off relying on the Charge Beam. It does less damage to Nightmare, and it obviously involves charging time, but you can hit Nightmare from a distance. The wide spread of the Charge Beam at this point (thanks to the acquisition of effects like Plasma Beam and Spazer) also means your shots are more likely to slip past the barrier created by Nightmare’s appendages. Given the power of the upgraded Freeze Missiles, it’s entirely possible you’ve forgotten all about the Charge Beam by this point in the game. Nightmare deliberate forces you to avoid relying entirely on the chain of power progression.

Metroid Fusion Screen Shot 7:4:15, 9.47 AM 1

As Nightmare takes damage, its mask begins to ooze; once you destroy the gravity generator, the mask shatters, revealing a hideous decomposing creature inside. Now its only vulnerable point is its exposed face, which is not as easy to hit as it might look. You basically need to shoot it from directly across on a horizontal line. But at this point, the monster’s pattern changes and it begins to swoop around the room, aiming toward Samus, before settling in an homing in on her in a slow, direct line. Samus regains her mobility with the gravity generator gone, but Nightmare’s size, speed, and extended pattern make the thing incredibly difficult to dodge.

Metroid Fusion Screen Shot 7:4:15, 9.48 AM

A handy ladder on the upper left wall serves as a handy perch for drawing a bead on the creature, though Nightmare does tend to drift somewhat off of a straight horizontal line, so you need to scramble to remain aligned with its weak point. You also can’t afford to stick around too long at this spot, because Nightmare will keep right on drifting until it plows right into you. It’s essential to know when to exercise the better part of valor and begin evasive maneuvers — especially since your movements determine Nightmare’s follow-up attack pattern, and if it settles in for its slow phase too high or too low you won’t be able to hit it easily and will essentially waste an entire precious iteration of the pattern. Given Nightmare’s size, mobility, and power, the longer you take to destroy it, the more likely you are to fumble the parts where you can only evade the beast. So this isn’t just a test of firepower; it’s about pattern recognition, alternate tactics, rate of fire, and balancing your attack actions with evasion.

Metroid Fusion Screen Shot 7:4:15, 9.48 AM 1

Eventually, though, Nightmare will go down (you can tell, because its face turns red and melty) and reveal a relatively harmless Core-X. This one doesn’t have a protected core or firing capabilities like the last one did, because the game designers have some sense of mercy.

Metroid Fusion Screen Shot 7:4:15, 9.48 AM 2

And, naturally, your reward for defeating this durable, gravity altering monstrosity is the Gravity Suit, which increases Samus’ durablity. Natch.

The end game is in sight.

The Anatomy of Metroid Fusion | 12 | Twisted mettle

When last we left Samus, she was dying horribly at her own hands.

Metroid Fusion Screen Shot 7:4:15, 9.39 AM

This latest encounter with SA-X is a particularly difficult one for a few reasons. For starters, it happens in the midst of the sector’s power outage; while you need to restore basic power to reach this point, that’s amounts to a save point and door hatches. There’s no way to restore your energy here besides grinding for health on Kihunters, which is a bit tricky. They soak up a lot of damage before going down, and they inflict a lot more hurt on Samus than they restore upon defeat. Plus, if you use missiles on them (which is much easier than relying on the charge shot), half their X parasite drops will be green missile-restoring blobs. So chances are you’ll meet SA-X with only enough energy to withstand a handful of shots, which the mimic is more or less guaranteed to land due to the structure of this faceoff.

Metroid Fusion Screen Shot 7:4:15, 9.40 AM

Even if you know SA-X is lurking below, you have to navigate just right in order to avoid falling on it (her?) or, perhaps even worse, landing to the right of her and allowing her to block off the escape door on the left side of the room.

There’s a small grace period when you escape to a new room; even if SA-X is literally on your heels as you duck through the door, you get a couple of seconds to run ahead before the SA-X enters the room. However, this is more or less mooted by the presence of obstacles such as this wall, which can only be cleared by ducking into a morph ball and dropping a Power Bomb, which leaves you completely vulnerable to SA-X.

Metroid Fusion Screen Shot 7:4:15, 9.40 AM 1

These gates are also likely to trip you up, as they take a couple of seconds to retract; even if you know they’re coming, it’s hard to avoid taking a couple of chump shots while they open. You really have to have the chase down to a science in order to survive.

Metroid Fusion Screen Shot 7:4:15, 9.40 AM 2

Eventually, the pursuit terminates in what appears to be a dead-end room, and that transitional grace period offers you a chance to haul yourself over the ledge above before SA-X storms in.

Metroid Fusion Screen Shot 7:4:15, 9.40 AM 3

SA-X has all the powers of Samus at her peak, but it also has the memory retention and deductive reasoning skills of a brain-damaged goldfish. As long as you wait it out back here and can refrain from making any noise, the SA-X will assume you teleported back to your home planet or something and slowly saunter back out.

Metroid Fusion Screen Shot 7:4:15, 9.40 AM 4

Your reward for surviving this harrowing, difficult encounter with SA-X is… nothing. You get no new weapons. No opportunity to restore Samus’ health. No save point. Instead, you’re pitted against yet another array of Kihunters, some of which hover freely, while others have become entangled in the creeper vines that choke these sectors.

It’s interesting how Fusion allows the advanced, more freeform game progression to unfold versus the way it played out in Super Metroid. In the older game, the portions where you experienced greater liberty was the vast and sprawling Maridia, which featured no single correct route to the end. The real challenge there was figuring out where to go, how to get there, and making certain you didn’t leave behind key items.

In Fusion, however, these portions where the game cuts the apron strings and lets you roam “free” from Adam’s suffocating oversight tend not to be large and sprawling. Instead, they’re highly focused and more or less linear, but they also prove to be much less guided than the rest of the game. The challenge here is survival; between the SA-X encounters, the hard-hitting enemies with tricky movements patterns, and the nastiest bosses in the series, the latter half of Fusion is less about discovery and more about survival. This marks a significant change in focus from Super Metroid, but at the same time it’s internally consistent with the overall theme of the game: Samus is overmatched, out of her depth, forced to get by through stealth and evasion rather than through brute force.

Metroid Fusion Screen Shot 7:4:15, 9.41 AM

Of course, there’s still plenty of figuring things out — areas that you can only reach with new powers.

Metroid Fusion Screen Shot 7:4:15, 9.41 AM 1

The boss that follows in the wake of the SA-X encounter neatly underscores Fusion‘s overall shift in philosophy: You plunge into a pit as soon as you cross through a door and drop into an inescapable boss battle.

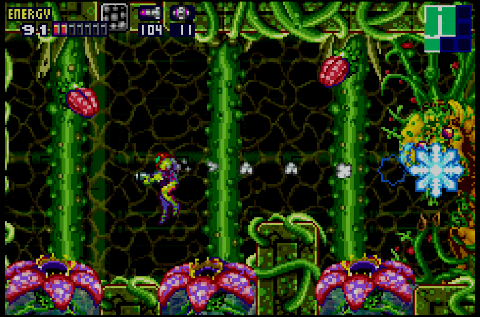
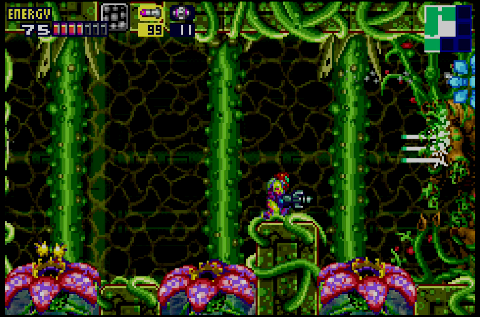
Metroid Fusion Screen Shot 7:4:15, 9.42 AMNot only that, but it’s a “gotcha” scenario; you’re almost definitely going to take damage from the projectiles being fired from the plants on the ceiling. If you aren’t careful, the recoil from this damage (or your attempts to recover from the recoil) will cause you to drop into the dangerous flowers that line the floor of this arena.

This battle reprises multiple elements of Metroid and Super Metroid in a far deadlier and more challenging manner. The core of the plant infestation appears to be a Torizo, which stands motionless in place but seemingly directs the growth as it assaults you. The flowers along the bottom of the room are reminiscent of certain aggressive flora in Super Metroid‘s Brinstar, and it’s very easy to slide into them and become caught inside. Once captured, they whittle down your health quickly and angrily, and it can be slightly counterintuitive to escape (you need to hold the jump button rather than press it rapidly as might be your instinct). Meanwhile, the flowers along the ceiling emit spores that fly in broad, evasive sine waves as they work their way toward Samus.

Metroid Fusion Screen Shot 7:4:15, 9.42 AM 1

It’s essentially a reprise of the Spore Spawn battle, but with the pendulous plant replaced by a Torizo and a much more dangerous environment to contend with. This fight demands patience; you need to leap and blast the Torizo in the face, but all the wall the spores are darting around the room.

Metroid Fusion Screen Shot 7:4:15, 9.42 AM 2

If you take your time and shoot the projectiles out of the air and content yourself with only getting off one shot at the Torizo between openings in the spore pattern, you’ll do fine. But it’s tempting to give in to urgency and try to squeeze in a few extra attacks at the statute, which inevitably leads to tears. This is not a battle of raw reflex and finger speed but rather of attrition and determination.

Metroid Fusion Screen Shot 7:4:15, 9.42 AM 3

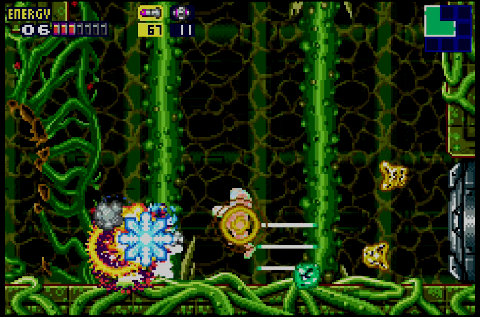
Once the Torizo takes enough damage, its head falls off and its chest is exposed, causing it to attack directly. While you’re spared the spore attack during this phase, there’s also no longer a safe spot. The Torizo fires a triple piercing beam at varying heights, and the blast can pass right through the low platform directly opposite the statue. While standing on the platform gives you less time to react to the Torizo’s projectiles, it’s a much faster perch from which to attack… and you’re a little less likely to fall directly into a plant maw if you screw up.

Metroid Fusion Screen Shot 7:4:15, 9.42 AM 4

The Torizo explodes into an aggressive Core-X that fires the same type of beam every few seconds, and naturally the only opening for your attacks comes with it exposes its interior to fire off a beam.

Metroid Fusion Screen Shot 7:4:15, 9.43 AM

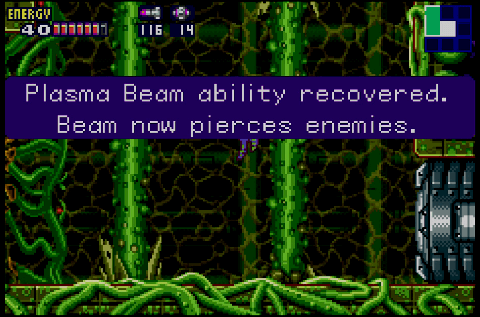
But the plus side: Once you survive the battle, you claim the Plasma Beam as your own. As ever, each component of the X parasite uses a different element of Samus’ arsenal against her, and once it fails its weapons fall back into her hands.

Metroid Fusion Screen Shot 7:4:15, 9.43 AM 1

And the effects of the new weapon are presented much more plainly than they were in Super Metroid. Immediately outside the Torizo’s room, you find some enclosed chambers containing Kihunters. You can fire through the destructible walls and take out the winged nuisances in just a few shots — sweet, sweet comeuppance for the frustration they wrought in the wake of the SA-X escape.

Metroid Fusion Screen Shot 7:4:15, 9.44 AM 1

That’s right, Adam. Suck it.

The Anatomy of Metroid Fusion | 11 | Fresh hell

At long last, Adam has restored the lifts back to the initial zone of the station. Now that Samus is pretty heavily kitted out with skills and equipment, this means you’ll finally be able to poke around in all those areas of the administration zone that previously were unavailable to base-level Samus, right?

Metroid Fusion Screen Shot 5:16:15, 6.12 PM

A promising start: Right away you can veer left from the top floor of the elevator to see what was behind the wall the SA-X smashed when she made her cinematic debut. It turns out it’s just a single room with a missile expansion in it. This leaves the question of how exactly SA-X made it into that room to begin with, but I suppose you’re not meant to think about it. Still, I kind of feel like Super Metroid would have added some meager detail for the sharp-eyed. But that’s just me comparing this game to hypotheticals about its predecessor, which is terribly unfair.

Metroid Fusion Screen Shot 5:16:15, 6.13 PM

Still, my cynicism isn’t entirely unwarranted — once you reach the central zone of the station, you quickly find that most of the possible side paths here have been freshly blocked by those membranous growths. Now they’re yellow, and nothing in your arsenal can break through them. So even though you ostensibly have your freedom to explore restored here, in truth you’re still being railroaded in a decidedly unsubtle fashion.

Metroid Fusion Screen Shot 5:16:15, 6.14 PM

More and more complex navigational tests continue to appear. In this case, you have to reach the upper chambers of the station’s control center by freezing these wall dudes when they’re partially or fully extended, transforming them into makeshift platforms. You can enter from the lower levels, but all you’ll find are one-way passages (or rather, gates with gun sensors on the far side, which remain effectively one-sided until you acquire some substitute for the Wave Beam power).

Metroid Fusion Screen Shot 5:16:15, 6.14 PM 1

Once you reach your destination, you learn you’ve been sent in search of your old pals the Etecoons and the Dachora, who were hidden away in Super Metroid to provide a tutorial demonstration for Samus’ hidden innate powers of wall-jumping and shinesparking. They’re just kind of hanging out behind a glass wall here, evidently in captivity by the Federation or Biologic.

There’s really no better metaphor for the difference between Super Metroid and Metroid Fusion than these guys. In the previous game, you might stumble onto them by accident in the course of exploration, and their actions would cause you to realize: “Oh! I can do that!” Here, they don’t really do anything, but the game forces you to go find them. Then Adam muses pointlessly about their presence, saying a lot of words about them without actually saying anything.

Metroid Fusion Screen Shot 5:16:15, 6.14 PM 2

Ah well. You set them free and they traipse along to Samus’ ship. I suppose if you really want to look for subtle meaning here, you could ask yourself how these creatures came to be on the station. Were they captured for study? Was Biologic preserving them now that their planet had been detonated and they presumably were the last members of their respective races? And why do they appear to be immune to infection by the X? I suspect that would be putting more thought into their role here than the game’s creators gave it, though, so maybe it’s for the best that you don’t waste too much time on such questions.

 Metroid Fusion Screen Shot 5:16:15, 6.14 PM 4

With that fairly pointless detour out of the way, Adam tells you your next objective.

Metroid Fusion Screen Shot 5:16:15, 6.15 PM

And he really doubles down on the “patronizing Samus” thing. “You’ve already been to this room, but I’ll show you how to get there in exacting detail in case you’ve somehow become incredibly stupid within the past hour of game time.”

Metroid Fusion Screen Shot 5:16:15, 6.15 PM 1

More familiar creatures make their Fusion debut — or rather, their enhanced X mimic counterparts do. The X version of Geruta (formerly seen in planet Zebes’ warmer zones) have become far more difficult to destroy than in earlier games. Their outer claws now have a metallic trait, resisting all of Samus’ projectiles and forcing you to destroy them from below as they swoop down toward you. They tend to appear in narrow spaces such as this room. So while Fusion may have changed the flow and freedom of the series arguably for the worse, it continues to create new and challenging iterations on known hazards.

Metroid Fusion Screen Shot 5:16:15, 6.15 PM 2

As seems to be happening more and more frequently in Fusion, acquiring a new key weapon rarely affords you the opportunity to backtrack and use it on relevant obstacles you’ve just encountered.

Metroid Fusion Screen Shot 5:16:15, 6.16 PM

Instead, you’re railroaded off the known map and forced to find your way back to the main bulk of the station without guidance. This is not as liberating as the design of Super Metroid — Fusion is nowhere near as good at hiding its linearity — but nevertheless these journeys into the uncharted green portions of the minimap tend to be Fusion‘s most exciting sequences.

Metroid Fusion Screen Shot 5:16:15, 6.16 PM 1

Especially when you’re forced to detonate a Super Bomb in order to advance and unavoidably reveal yourself to the SA-X in the process.

This sequence is the first time you’ve been forced into a direct confrontation with SA-X. Normally, she appears and stalks off on her route, unaware of your presence unless you’ve very, very careless. Here, though, SA-X paces back and forth in the right half of the room eternally. It’s a little bit of a cheat in terms of game design, breaking the conceit that the foe is unaware of your presence by coincidentally having them set up camp, forever, in such a way that you’re forced into a confrontation. (Fittingly, given Metroid‘s inspiration, Alien: Isolation is practically built around this cheat.)

But, OK, whatever. Maybe the SA-X has, like, spidey-sense or something and knows you’re nearby but can’t pinpoint you precisely and is happy to hang around forever until you give yourself away. Sure.

In any case, once you’re exposed, the SA-X opens fire on you. However, it doesn’t really give much chase; the passage forward is a narrow aperture that you have to roll into, and the SA-X doesn’t seem to like ducking into Morph Ball form except to blast the world with Power Bombs. Maybe the logic is that the Morph Ball is too vulnerable a form to adopt during combat — certainly you can’t help but take a hit or two while rolling through the passage to escape. SA-X has the Wave Beam power Samus doesn’t, so it can fry you through the walls. You need to be assume you’ll have to soak up two or three hits here, each of which blasts you for hundreds of health points, so both topped-off energy tanks and speed are of the essence in this scene.

Metroid Fusion Screen Shot 5:16:15, 6.16 PM 2

Having survived your first (mercifully finite) encounter with the SA-X, you can work your way back up to the main portions of the station. Passages previously obstructed by the yellow X membranes (Gelon) no longer pose an obstacle, as the Power Bomb can clear them away.

Metroid Fusion Screen Shot 5:16:15, 6.17 PM

As Samus grows more powerful, the game throws occasional optional tests of skill your way. This sequence is one of Fusion‘s most devious, a series of narrow passageways that tests your reflexes, your understanding of the Ice Beam, and your mastery of the Spring Ball. Your reward is a trifling missile expansion, because work is its own reward, apparently.

Metroid Fusion Screen Shot 5:16:15, 6.17 PM 1

At this point, the game inelegantly sends you back to the beginning in order to advance the plot. It’s the start of a satisfying, interesting sequence, but it’s presented quite poorly.

Metroid Fusion Screen Shot 5:16:15, 6.17 PM 2

Mid way up the elevator back to the administration zone, the power goes out and Samus becomes stuck halfway up the shaft as the elevator platform wheezes to a halt. Luckily for you, it happens to do its wheezing right next to a fragile portion of wall that leads to a service passage or something.

Metroid Fusion Screen Shot 5:16:15, 6.18 PM 1

Never has the Alien influence on Metroid been clearer than as you roll through a passage where faceless quadrupedal creatures shuffle around in the overheat ductwork, dripping acid through the grates at you. Thankfully you can ignore your motion tracker and detonate Power Bombs here to make fairly short work of them.

Metroid Fusion Screen Shot 5:16:15, 6.18 PM

Your payoff: The passage leads you to the freezer chamber where Ridley’s corpse had been stored. Happily, you no longer suffer sapping damage from frigid air, so you can hang out here as long as you like. Even more happily, this does not initiate a sudden boss battle. The downside? Ridley’s mortal remains collapse into a pile and a flock of X parasites emerge and fly to parts unknown. There should be little doubt that particular twist is going to come into play sooner or later…

 Metroid Fusion Screen Shot 5:16:15, 6.18 PM 2

For now, however, you’re railroaded into another side mission. In this case, you need to restore power to the station’s reactor so you can move around freely again. Or at least as freely as Fusion allows you to move at any given point.

Metroid Fusion Screen Shot 5:16:15, 6.18 PM 3

The trouble at hand: Turns out Chekhov’s pupae have hatched. All the throbbing insectile grubs that have blocked key pathways since you defeated that boss in Sector 2 have molted, leaving behind hollow shells that you can now pass through.

The former grubs have reached adult form and now are Kihunters, or X versions thereof: Sometimes-flying, always-goop-belching insects that take a huge amount of punishment and do a remarkable amount of damage. It’s interesting how much more dangerous common foes are here than they were in Super Metroid.

Metroid Fusion Screen Shot 5:16:15, 6.19 PM

The moltings coincide with the arrival of a tangled overgrowth of vines that have shut down the generator. Apparently the space station runs on turbines.

Metroid Fusion Screen Shot 5:16:15, 6.19 PM 1

Along with the Kihunters, you’ll also find Zebesian Space Pirates (or, yes, their X clones). They’re even more devastating than Kihunters in terms of power, though fortunately vulnerable to charge shots. The power station area essentially consists of a zig-zagging descent down a huge gantry of platforms populated by these guys, forcing you to dodge their triple blasts of energy beams in close quarters and beneath low ceilings.

Metroid Fusion Screen Shot 5:16:15, 6.19 PM 2

These crazy-tough enemies serve as your hors d’oeuvre for the boss of the reactor area, a massive biomechanical spider inexplicably known as Yakuza. It sidles up to you and demands protection money — no, wait. Actually, it simply sets about destroying you in very little time.

Yakuza (less weirdly named Gedoh in Japanese) is perhaps the hardest boss in Fusion until you figure out the secret to beating it, which basically involves unlearning your standard boss-fighting tactics. The spider sidles around the room by moving along the background wall at a roughly 45-degree angle, reflecting at a 90-degree course change whenever it hits a wall, floor, or the upper edge of the battle area. It covers the full span of the screen with its movements, forcing players to react and avoid collisions.

Metroid Fusion Screen Shot 5:16:15, 6.19 PM 3

What makes this boss so difficult is that it can capture you with its forward appendages if you come anywhere close to them. Your instinct in a fight like this is (almost certainly) to stay low to the ground and let the spider pass overhead, but this makes you extremely susceptible to capture. When it grasps you, Yakuza behaves similarly to Draygon from Super Metroid: It pulls you into the air, slowly draining your health before slamming you against the floor for insane damage.

Even though Yakuza’s general tactics should seem familiar, it’s a vastly more dangerous battle this time around. Draygon could only capture you when it drifted slowly into the arena, whereas Yakuza can snag you anytime, and it always moves quickly. Unlike Draygon, it only needs to get hold of you a few times to bring the fight to an end; the first time you face this enemy, it could be over in a matter of seconds.

As with Draygon, the safest tactic is to take enormous leaps over top of the monster in order to avoid its grip — more easily said than done. Occasionally it will pause to belch fire, which is when it’s vulnerable… only in its maw, unfortunately, and only for a brief moment. You have to be mindful of where Yakuza pauses to drop its flames, since it’s easy to get so carried away pumping it full of missiles that you fail to notice it’s close to a wall… which means that when it begins moving again, it’s reflect directly into you.

Metroid Fusion Screen Shot 5:16:15, 6.20 PM

The saving grace of this encounter is that your missiles are legitimately powerful now, so you don’t have to hit Yakuza too many times. On the other hand, the creature has a second phase, as if it weren’t difficult enough already. The second phase is much less dangerous than the first, since it loses its deadly legs here, but chances are good that the initial boss form has whittled down your health. It’s a grueling, challenging, fast-paced battle — the biggest variance from the traditional slow-paced Metroid style Fusion has presented to date.

Metroid Fusion Screen Shot 5:16:15, 6.20 PM 1

And yeah, there’s an X-core on top of that. But hey, now you have infinite jump.

Metroid Fusion Screen Shot 5:16:15, 6.20 PM 2

THANKS ADAM.

Metroid Fusion Screen Shot 5:16:15, 6.20 PM 3

Defeating Yakuza restores partial power — evidently the creature was feeding on the generator? — so you can save. But you still need to clear out the vines, and there’s only one route through which to do this.

Metroid Fusion Screen Shot 5:16:15, 6.21 PM

Again, you start to find secret connections between the various divisions of the space station as you explore off the beaten path. Unsurprisingly, perhaps, the source of the vines appears to be something growing in the tropical sector 2.

Metroid Fusion Screen Shot 5:16:15, 6.21 PM 2

More surprisingly, on the other hand, is the way the one-way block in the ceiling drops you directly into the SA-X’s line-of-sight.

Metroid Fusion Screen Shot 5:16:15, 6.21 PM 3

Samus has grown pretty tough by this point, but SA-X is only too happy to remind you that while you may have reacquired the Space Jump, you still don’t have to Screw Attack. Or the Wave Beam. Or…

Metroid Fusion Screen Shot 5:16:15, 6.21 PM 4

…much of a fighting chance at all, really.

The Anatomy of Metroid Fusion | 10 | Porno for PYR

I always like to see developers making conscious, and conscientious, use of their selected platform.

Metroid Fusion Screen Shot 5:3:15, 4.38 PM

For example, here we have the real path to Sector 5’s objective tucked behind a hidden block that offers a small, discreet visual cue at the very right edge of the screen. This is something that wouldn’t really have worked in console Metroid games due to the uncertainty of television pictures and overscan — some tubes would have shown too much of the hidden passage and given it away while others would have made it truly hidden and left players casting about for the way ahead. But with the fixed resolution of the GBA screen, Fusion’s map designers could give a subtle hint to observant players without making it too obvious.

 Metroid Fusion Screen Shot 5:3:15, 4.38 PM 2

This sector introduces a number of new creatures whose real value isn’t immediately apparent — though they might jog the memories of series veterans. These manta ray things leap straight up and slowly descend, dropping corrosive fluid as they flutter to the ground. But they have a greater value that becomes evident only later, once you acquire this area’s main weapon upgrade.

Metroid Fusion Screen Shot 5:3:15, 4.39 PM 2

And there there are these lattice shrubbery things, which initially appear both completely inert and completely indestructible. They are completely baffling at first, since they literally do nothing but sit there.

Metroid Fusion Screen Shot 5:3:15, 4.39 PM 1

Returning from the original Metroid in this area are Wavers, which now behave somewhat differently than before. Rather than drift aimlessly in sine wave patterns at all times, they now alter their flight pattern when they pass directly in front of Samus, accelerating to collide with her. You can actually exploit this behavior in this room — when they plow into the wall, they become momentarily stuck, and they protrude far enough that you can actually hit them through the barrier. If you don’t realize that, however, this room is a bit stressful, as blasting through the wall with a bomb causes the entire barrier to break away, opening the room to half a dozen erratic enemies.

Metroid Fusion Screen Shot 5:3:15, 4.39 PM 3

Once again, you unlock doors with a terminal rather than a tool. That’s not very Metroid-like at all.

Metroid Fusion Screen Shot 5:3:15, 4.40 PM

Two yellow doors become immediately accessible once you lower the security lock, but the one to the right leads to this: A shaft with a ledge too high and far away from the ladder you climbed to reach this point to be accessible. However, armored Rippers drift back and forth within the shaft, which is comfortingly familiar; despite all the changes Fusion brings to the series, these guys still exist entirely to serve as temporary platforms once you acquire ice powers.

Metroid Fusion Screen Shot 5:3:15, 4.41 PM

Speaking of which, said powers are just beyond the other yellow hatch. Ice missiles reproduce the function of the classic Ice beam, but in a way they make for a faster, smoother play experience. The Ice beam had the side effect of reducing your firepower by adding the freeze effect to basic attacks; in Metroid, this meant you had to shoot everything twice as many times in order to destroy it. Super Metroid switched things up by causing the freeze effect to wear off with time rather than using the Ice beam as a toggle, but it still meant enemies would freeze when fired upon… whether you wanted them to freeze or not.

Here, though, you have more control over the freeze effect. Rather than every single basic shot freezing a monster, now you only freeze them when you use your secondary weapon. Combined with the instant single-button toggle Fusion adds for missile attacks, it works really well — a small but well-considered interface improvement.

Metroid Fusion Screen Shot 5:3:15, 4.42 PM

Yes, that’s better.

Metroid Fusion Screen Shot 5:3:15, 4.42 PM 1

Not cool” Another one of those mimics, this time imitating an Energy Tank.

Metroid Fusion Screen Shot 5:3:15, 4.42 PM 3

As has happened several times already, acquiring a new item causes a change to affect the enemies in the current area. This is similar to Metroid II‘s arbitrary gating, but it’s much more graceful than that game’s earthquakes causing subsidence and lowering the water level to reveal new areas. The changes here take place within the X parasites infesting the station, who react to the growing threat that Samus represents to them. It’s still arbitrary and conspicuously designed, but it demonstrates a much better integration of narrative and mechanics.

In this case, those inert nests of vines or whatever now come to life. They remain indestructible, but now they grow upward and cause impact damage to Samus. They’re both a passive threat and, in some cases, a deliberate obstacle. You can freeze them with the Ice missiles now, but it doesn’t do you any good if you freeze one after it’s risen to block a passage.

Metroid Fusion Screen Shot 5:3:15, 4.42 PM 4

Which isn’t to say frozen vines aren’t useful; this one bridges a gap that allows you to build up a speed boost and reach a new area.

Metroid Fusion Screen Shot 5:3:15, 5.01 PM

Another new dynamic element here: A massive shadow appears in the background of the main chambers of the sector, swooping quickly back and forth. It’s ominous, but you can’t do anything about it…

Metroid Fusion Screen Shot 5:3:15, 5.01 PM 1

…though that bizarre presence makes the sudden alarm considerably more alarming once the screen begins strobing with a red light. A computerized voice begins warning you about an emergency. Is it related to the ominous shadow?

Metroid Fusion Screen Shot 5:3:15, 5.01 PM 2

No, it’s just a machine error. You’re given six minutes to make your way to Sector Three and shut down the boiler before it detonates the station.

Metroid Fusion Screen Shot 5:3:15, 5.01 PM 3

And you burn about 30 seconds on the elevators alone, which doesn’t help soothe the nerves.

Metroid Fusion Screen Shot 5:3:15, 5.01 PM 4

This works as an excuse to revisit previously explored areas under a new frame of reference — a bit of backtracking, but one that doesn’t feel aimless or repetitive. Instead, you need to recall the paths and passages through this area, such as the hidden, crumbling block under this expand-o-alien. While six minutes is actually quite generous if you know where you’re going, the padded time allowance lets you bumble around momentarily if needed to remind yourself of the proper route.

Metroid Fusion Screen Shot 5:3:15, 5.02 PM

A new path opens in the molten regions of the area; the magma remains deadly to the touch, but you can pass beyond it now.

Metroid Fusion Screen Shot 5:3:15, 5.02 PM 1

A number of active threats appear in this area, such as more of those retracting monsters and Novas — three-eyed wall-crawlers who, unlike in previous games, now drip fireballs as they scuttle along. On their own, these hazards wouldn’t be a particular bother, but the stress inspired by the countdown timer can result in sloppy play.

Metroid Fusion Screen Shot 5:3:15, 5.02 PM 2

It’s good not to take too much damage, though, since the main boiler room…

Metroid Fusion Screen Shot 5:3:15, 5.02 PM 3

…culminates in an eye door. Which means you’re gonna have to fight something.

Metroid Fusion Screen Shot 5:3:15, 5.03 PM

Which turns out to be just a nerd in a lab coat. But! If you walk up to the scientist, Samus takes damage. Counterintuitive as it may be, you have to shoot his guy — the first instance of violence against a human in the Metroid series.

Metroid Fusion Screen Shot 5:3:15, 5.03 PM 1

The “scientist” actually turns out to be a Core-X imitating his form. It drifts around, pivoting its vulnerable eye rapidly to return fire at Samus, but ultimately the only challenge here comes from the narrow space in which you’re forced to complete this battle.

Metroid Fusion Screen Shot 5:3:15, 5.03 PM 2

Which is ironic, see, because surviving the battle in this narrow space results in the acquisition of the wide beam.

Metroid Fusion Screen Shot 5:3:15, 5.03 PM 3

The wide beam strengthens Samus’ blaster yet again while also creating a broad spread — not only do her beams separate from one another more dramatically, they also take on a ring-like form, similar to the ripple laser from Gradius games.

Metroid Fusion Screen Shot 5:3:15, 5.04 PM 1

With this task complete, the game allows you at last to return to an area that’s long been cut off: The very first area, the Habitation Deck, closed away when the SA-X blasted its way through the elevators. Adam has restored power, allowing you to put all your new powers to use in a sector you previously experienced at your bare minimum strength. While this clearly stated directive to return to the beginning is, once again, a much less elegant way to nudge players backward than in older Metroid games (which would have locked off the main elevator with some sort of barrier that could be circumvented with the acquisition of an advanced skill), the satisfaction of returning to old haunts with far more capabilities at your command is satisfying enough to make up for it.

Book report

Hello, everyone. Sorry for the lack of activity here lately — I’ve been dealing with a nasty hand injury that’s made writing and video editing (not to mention playing for research) painful and difficult. In my downtime, though, I’ve been keeping myself productive by converting all the Anatomy of Games books to a format that can be sold on Amazon.com. I’m happy to say the process is finally complete. Hoorah!

It’s been an interesting learning experience, which unfortunately means a slightly inconsistent final product. I initially began by working with 6×9″ books to keep the price economical, but the last two books I’ve changed over are at the 8×10″ size. When it came time to convert The Anatomy of Metroid Vol. I, I had to completely overhaul the book for technical reasons and decided to experiment with the larger format. I also combined both Metroid books into a single volume.

The results turned out to be pretty fantastic, I have to say. The 8×10″ format looks better, and because it allows more content in a smaller page count, and ends up being about the same price as a 6×9″ book. More importantly, the price of 8×10″ Anatomy paperbacks through Amazon ends up being about half that of 10×8″ paperbacks via Blurb! Volumes that were $40 on Blurb turn out to be $20 on Amazon, making them far more reasonable — and that’s before Amazon does its random temporary price reductions. Needless to say, this is the format and medium I’ll be using for all future books, Anatomy and otherwise.

My only complaints with the CreateSpace/Amazon route are that (1) I can’t sell through Amazon.ca (even though I can sell in Europe and the UK) and (2) they don’t offer a hardcover option. So my Blurb store will continue to offer hardcover versions of books as well as most old GameSpite Quarterly volumes. I intend to convert the platform retrospective books (NES, Super NES, and PlayStation) to Amazon with expanded content for those systems’ 30th/25th/20th anniversaries, but that process will take a while, I suspect… and I can’t find the Super NES book’s original files in my archives for some bizarre reason, so that one may simply be lost to the ages. We shall see.

Anyway, for anyone who had been interested in the Anatomy books but understandably balked at Blurb’s exhorbitant costs, they’re now available at Amazon for much more sane prices. Or, more specifically:

And of course Game Boy World 1989. Needless to say, I’m pretty happy about this development — the books take a fair amount of time to put together, and maybe now people will actually be able to afford them. (Certainly they’re a lot more affordable for me now, and lining my bookshelves with my own words is really the whole point of this.)

Also, p.s., if anyone does pick up any of these volumes, I hope you’ll be kind enough to review it on the bookstore and increase its visibility! Ideally a positive review, but the important thing is to be honest, of course. Thanks!