As I mentioned before, Guts Man’s stage is a terrible place to begin playing Mega Man if you’re a first-time player. It’s a great starting point for an experienced pro, because it’s a good jumping-in point on the rock-paper-scissors ring of enemy weaknesses. I also like it because of the tricky lifts in the opening area – if I can make it past them without any trouble, I’m in the right “zone” to play Mega Man. If not, I should play a baby game instead. Like, say, Mega Man 2 on Normal difficulty.
Part of what makes the Guts Man level so poor for newcomers comes from the difficulty level of the lifts and enemies here, but really there’s a more fundamental design problem at work: Mechanically, Guts Man’s level doesn’t reflect the character.
Conceptually, Guts Man is meant to be a construction labor robot, clearing away heavy rubble, lifting debris, carrying materials. And, aesthetically, his level reflects this concept – it seems incomplete, a rocky canyon in which rough trestles hold up broken bridges and belt lifts drop their contents due to damage along their tracks. But in terms of hazards, nothing really mirrors Guts Man’s skills or style.
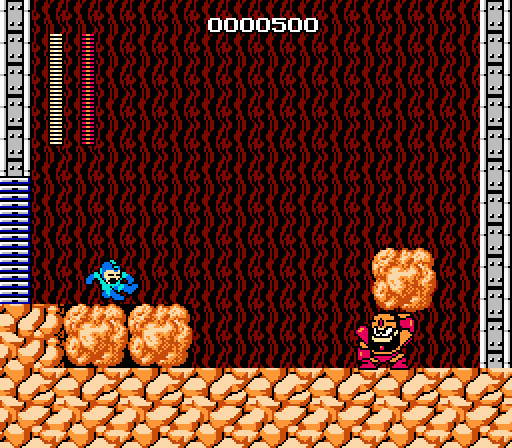
Guts Man attacks by leaping at you with such seismic force that Mega Man is stunned and helpless by the impact, leaving you immobile as the tremors cause a boulder to fall into Guts Man’s hands for him to toss at you. Even if you manage to avoid the tiny quakes’ effects, the boulder projectiles shatter upon impact with the floor, disintegrating into a spray of debris that covers the back half of the room – a tricky hazard to leap. He’s not tremendously difficult to fight once you get the timing and pattern of his jumps down, but unlike many of the other bosses in Mega Man, nothing he does has precedent in his stage.
More crucially, there’s no tipoff whatsoever to his r-p-s weakness, Bomb Man. Sure, it makes sense from a logistical standpoint that the construction robot would be vulnerable to the demolition robot’s weapon (albeit nihilistically slavish to the concepts of entropy, suggesting that it’s easier to destroy than to build). However, nowhere in Guts Man’s level does the Hyper Bomb feel like a more efficacious solution than just shooting as fast as possible with the default P beam.
For instance, if the Hyper Bomb could crack a Metool’s shell, you’d have all the info you needed right away as your first encounter puts you up against a stack of these guys. But because of the delay on the bombs’ fuse and the very slim timing of the Metool’s vulnerability, it’s not a particularly effective combo. While the placement and behavior of these guys do convey some valuable strategic data, it falls more into the category of general gameplay mechanics than stage-specific rules.
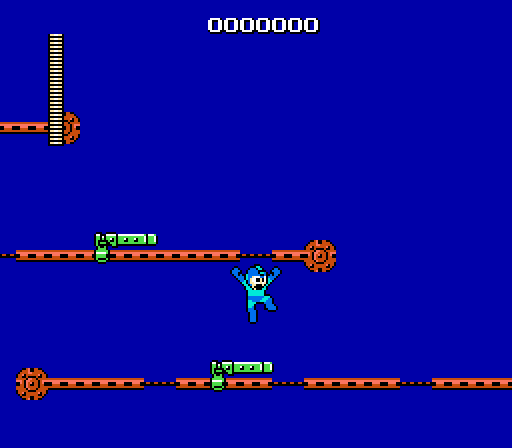
Likewise, the most infamous element of Guts Man’s stage – the broken trundles – in no way relate to the specifics of Guts Man or his weakness. On the contrary, the most effective way past these devices (short of learning their quirks and timing) is to use the Magnet Beam to create a series of platforms and bypass the chasm altogether. But to wield the Magnet Beam, you need to have either (1) beaten this stage and Elec Man’s or (2) beaten Elec Man’s stage twice. Neither of these strategies is particularly helpful if you’re making your way along a fresh playthrough, and the former strategy is utterly idiotic since anyone who can beat Guts Man’s stage without the Magnet Beam doesn’t need to come back once they have the Magnet Beam.
Needless to say, the Hyper Bomb accomplishes nothing whatsoever here.
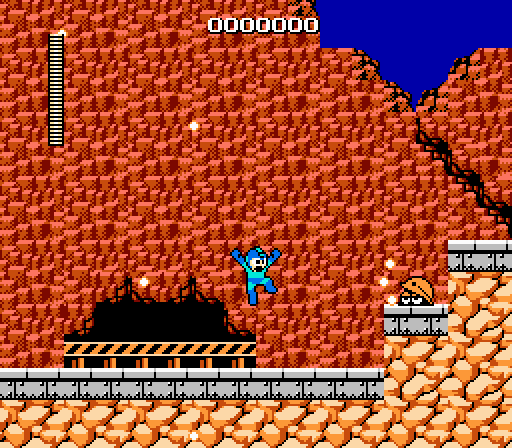
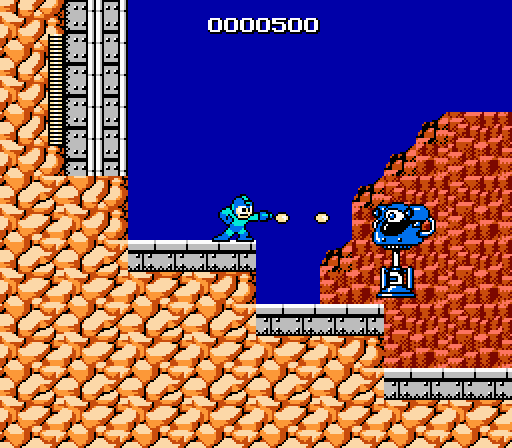
The Piket Men are the closest this stage comes to giving any kind of tip-off to the boss. They bear a vague visual resemblance to Guts Man, combining Metools’ hard hats with an anthropomorphic body, and they toss projectiles, kind of like Guts Man. Narratively, they’re a nice touch – mining and excavation robots gone berserk – and they pose an interesting challenge since their steady stream of pickaxes homes in on Mega Man’s position and forces you to remain in motion while firing and dealing with passive hazards like pits.
Additionally, the Hyper Bomb can take out these guys in a single hit. So there is a touch of hint-through-design happening here, but not in a particularly accessible way. The Hyper Bomb leaves you fairly helpless while you wait for it to explode, meaning that all the while you wait, you’re dealing with a fusillade of picks. The arc of the Hyper Bomb limits its range, so you have to get in close to a Picket Man in order to toss one in the first place, and in most cases the presence of pits surrounding a Picket Man means you need to be precise with your throw and double-back once you make the toss. Unfortunately, the rapid speed of the pickaxes and Mega Man’s slight inertia when he reverses direction leaves you likely to take a hit once you turn around. Ultimately, it’s far more effective to use your basic weapon and inch forward while pumping projectiles into these guys, and you may never even think to try a Hyper Bomb here. Oh well.
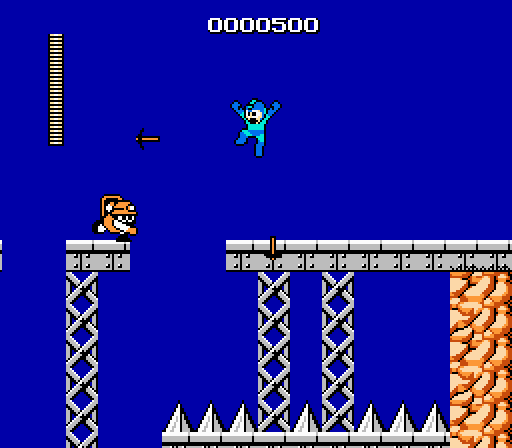
Beyond the Picket Men, the level offers mostly passive hazards: A drop down a shaft lined with spikes.
You face only one last enemy before entering the antechamber before the boss: A Big Eye, which jumps at you. Big Eyes appear in several stages, and they’re the most dangerous and durable enemies outside of bosses. They can soak up a ton of damage, and three hits will do in Mega Man. Their only offensive maneuver is to jump toward Mega Man; they can’t shoot, and they operate on a very consistent timer. That’s enough to be tremendously dangerous, though; a few collisions will bring the action to a skidding halt.
Big Eyes have no special vulnerabilities, and they have only a single reactive behavior based on the player’s actions: If you jump right before a Big Eye does, it’ll perform a higher jump than usual – high enough to allow you to run beneath it safely. If you have the Ice Slasher, you can freeze it at the peak of a high jump to breeze past it (or just freeze it to pour a ton of bullets into it while it stands motionless).
In this case, the design of the level combines with the behavior of the Big Eye to create an extremely difficult situation. In fact, this is easily the trickiest Big Eye encounter with the game (another reason Guts Man’s stage sucks for newcomers). Because the Big Eye jumps upward as it advances on you, there’s very little room on these small steps to run beneath it. It’s possible to make it through this encounter without taking damage, but it requires finesse and a touch of nerve.
Beyond the Big Eye you’ll find the short connective anteroom that precedes each boss room. Unlike in later Mega Man games, these usually span more than a single screen and contain enemies. If you die against the boss, you begin at the entrance to the anteroom, so it’s functionally a checkpoint.
The Guts Man battle unfolds as described above, and defeating him earns you the Super Arm… for whatever that’s worth. (Spoiler: Its worth becomes evident in Cut Man’s stage.)
For the book: Need a “c” in “Picket Man.” (Or “Pickel Man” if you want the original name.) Also, next to last paragraph: Do you mean Guts Man instead of Bomb Man, considering?
This stage is just rough, no matter how you cut it. I think I’ve managed the platforms a whopping total of once, and that was plenty. I can do pretty much the entire rest of the game with little problems, save for maybe the Yellow Devil, but that one gets me more often than not, I think mostly due to Mega Man’s odd plummeting in this one.
For what it’s worth on the Magnet Beam, if memory serves me correctly, you don’t have to actually complete Elec Man’s stage on the second run through to keep it; I think if you die, it remains yours. Of course, by that point, might as well take him out again…
Maybe those platforms would have been better suited to another stage in light of the Magnet Beam situation, but whose?
What makes the floating platforms tricky is the timing on the jumps. The instant the platforms reach that cut part of the wire, you can no longer stand on them and will fall to your death. It looks like maybe you’d have a split second to jump as the platform is falling, but you don’t. Because of that, it’s best to jump just a split second early on these platforms. Once you get used to this timing, you should be able to do it more consistently.
Guts Man’s stage is a terrible starter stage for beginning players, but I don’t think the moving lifts section is bad enough to necessitate cheesing it with the Magnet Beam. The drop points are marked by the thin sections of wire, so it’s just a matter of knowing the right time to jump. It’s not like Heat Man’s bridge of invisible blocks where you’ll only know where the troll blocks are by trial and error.
I also don’t think it’s necessarily bad that Bomb Man’s weapon isn’t useful for most of Guts Man’s stage. Being of little to no use just means you won’t waste it all before you get to the boss. It does drive home how crap Bomb Man’s weapon is, though “super strength that only works when you have access to certain blocks” isn’t much better as a power.
I meant “disappearing blocks” in that last post.
And they operate on consistent rules, unlike Ice Man’s stage, where if you don’t cheese it across the last section with the Magnet Beam you can get killed just by random chance no matter how good you are.
If I were to point to the single best change in Powered Up, it’s that: making the floating platforms move more consistently and not fire projectiles.
Guts Man’s stage is a bastard but it’s fair; the platforms will always behave in the same deterministic manner. It’s also got one up on Ice Man’s stage by putting the hardest part at the beginning instead of the end. If you run out of lives on the moving platforms on Guts Man’s stage and have to start over from the beginning, you don’t lose any progress; if you run out of lives on the moving platforms on Ice Man’s stage, well, you’re either going to be here awhile or throw your controller across the room.
Yeah, the floating platforms in Ice Man’s stage are nasty. It’s not just that they can shoot you and move in odd ways, but also that the platform robot can hurt you from contact damage below a certain point. Paired with the erratic movements and screwy collision detection, it’s all too easy to take damage from what looked like a safe jump and fall through to your doom.
Gah, yeah, forgot about that; you can actually visibly stick the landing and still fall right through the damn thing and die.
Course, the dilemma of putting enemies in the stage who are weak to the same thing the boss is is that if you use the weapon energy early on, you don’t have it for the boss. (Well, most of the pre-boss chambers have enemies in them that you can kill to farm energy, but man that sure is tedious.)
Worse, weapon energy not refilling when you die is one of the most serious balance issues in the original Mega Man series — you basically have one shot to beat a boss with the weapon he’s weak against; if you die, you’re not going to have enough left for a second shot. That makes for a challenge, sure, but not exactly a fair one. It took until, what, Mega Man 8 before they finally started refilling weapons when you die?
The endgame stages where weapons don’t even refill at the end of each level are the worst. I don’t know how much time I spent shooting little drill guys in Mega Man 2 to refill my weapons.