Sorry, human race; I’ve decided to be reckless and run two Anatomy series at the same time. After speaking with Keiji Inafune this past week and hearing him talk about some of the early days of the original Mega Man, I got to thinking about the game’s design. And, well, that got me thinking about it… anatomically.
Mega Man was pretty unique in its time for the way it let you start on any one of six stages. There is no single “right” order in which to play Mega Man, though certainly some sequences prove to be more advantageous than others. But because you can go about jumping into this game however you like, each of the six Robot Master stages essentially has to work as the game’s first level. In other words, each has to convey the purpose and mechanics of the adventure.
As such, this series will vary a bit from the norm (and, god willing, will distinguish itself as a completely different project than Glass Knuckle’s formative work). Instead of going through the game on a level-by-level basis, I’m going to divide it instead into different thematic groupings or topics that span multiple levels. A non-linear anatomy, you could call it. For instance, in this first part, we’re going to look at the first area of each stage (basically, the first sequence until you scroll vertically) and how each reveals the workings of Mega Man in a different way… and how they encourage you to follow an ideal route.
The title screen
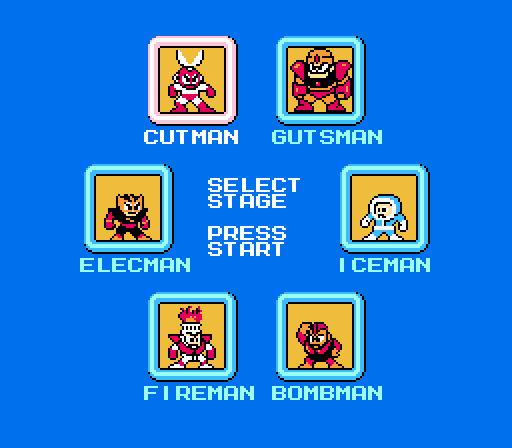
When you begin the game, you jump immediately to a level select screen. By default, the cursor sits on Cutman. If you don’t know any better, you’ll simply begin with Cutman, not realizing you can switch around until you finish the stage and your cursor defaults to an empty rectangle. As it happens, Cutman is indeed one of the least difficult levels of the game, so there’s a definite logic at work here. If you don’t “get” Mega Man, you’ll begin on a suitably introductory stage by default.
At the beginning of the game, Mega Man has an extraordinarily limited move set. He can run, jump, climb ladders, and shoot in two directions. That’s it. No ducking, no shooting upward, no sliding, no special moves. So in order to begin defeating stages and gain new abilities, you need to be able to best both an entire level and the boss at the end with this extremely basic set of skills.
Cutman
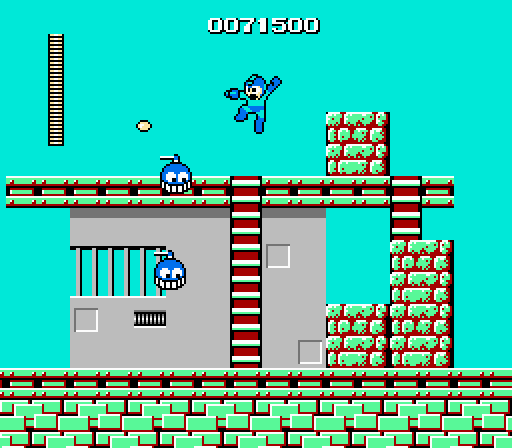
Cutman is one of the less devastating bosses you can face in this game, and appropriately his level reflects his mild temperament. (It also gives a clue to his weakness right out of the starting gate, but you wouldn’t know about that the first time you play the game.) The stage begins with a series of structures whose roofs create a higher tier of platform running parallel to the ground. And, right away, you’re made to learn to climb ladders, as the brick blocks here block the path forward. You can’t simply run straight ahead; you need to fall back a short distance and climb the long ladder to the roof, using the high ground as a means to bypass the bricks.
Immediately after you begin scrolling the screen forward, a trio of little flying enemies called Bladers appear at varying heights. Generally, they’re arranged in such a way that they don’t fly at Mega Man’s height; in order to destroy them, you need to jump to hit them. If a Blader is below you – likely, given that you need to take to the rooftops here – the only way to take it on is to drop down to ground level and shoot it, or else exploit its movement pattern. Bladers will break from their forward motion in order to home in on Mega Man’s location with a quick, sharp movement, and with proper timing you can shoot them the instant before they hit him.
Further ahead, you need to leap over pits. These are pleasantly low-stress pits that you can jump easily, but they do demonstrate the reason it’s a bad idea to fall into empty holes.
Finally, the end of the first run of Cutman’s stage leads you to a dead end where a ladder is guarded by a pair of Beaks, wall-mounted turrets that open their indestructible shells to reveal a gun that fires a stream of five bullets at a gradually depressing angle. One of them is specifically set to hit you as you climb the ladder that leads up to where you can advance to the next area, which will reveal the fact that being injured while climbing causes Mega Man to lose his grip on a ladder and fall. You can also master the timing of hitting temporarily invulnerable foes here, as well as learn to evade weapons that fire at fixed intervals and set angles.
As a small bonus, the leftmost Beak demonstrates the way Mega Man’s bullets pass through walls. By climbing the ladder and firing at the Beak, you can safely destroy it from behind.
What you learn here: Ladder-climbing, blocks, leaping to deal with enemies at other heights, tactics for dealing with temporarily invulnerable enemies, firing through walls
What the design says: This ain’t so bad. Let’s kill Cutman.
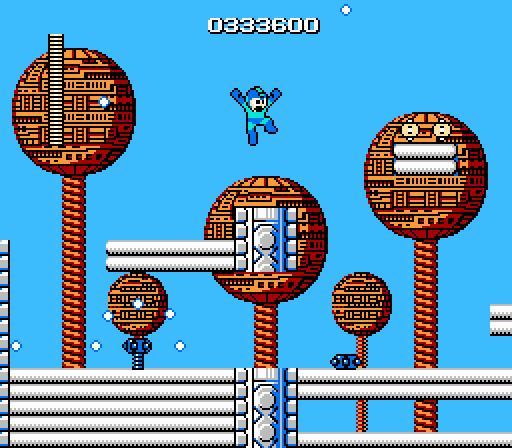
Gutsman
In contrast to Cutman’s stage, Gutsman’s level is insanely hard unless you have the proper tools. It’s a short level, but intensely difficult. Curiously, though, Gutsman is one of the easiest bosses in the game; you can take him down with Mega Man’s default weapon, no trouble. Getting to him, however….
From the very beginning, Gutsman’s stage poses some advanced challenges. Here you face, for the first time, Mega Man‘s iconic Metool enemies. These guys hide beneath invulnerable hard hats and briefly emerge from their armor to fire at you. Unlike Beaks, though, Metools expose their weaknesses (their eyes) for about a second before dropping their helmets again – just long enough for you to shoot back, but you’ll only be able to hit them if you anticipate their action and fire right before they emerge. And then you need to leap immediately to avoid their bullets.
On the plus side, you can largely use the terrain to your advantage. The Metools are stationed on platforms of varying heights, invariably above you. Since you don’t stand directly in front of the, it’s not too tough to pass between the safe spots in their projectile spreads. The second Metool, however, is situated just far enough back from the edge of its platform that you have to leap onto its own level in order to trigger its attack – Metools remain hidden until you come within a certain range – forcing you to master the preemptive attack and leap combo.
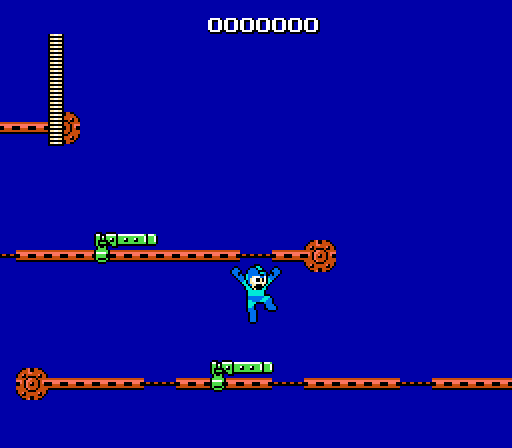
This, however, is cake. The real challenge comes immediately after the small Metool gauntlet: A trio of moving platforms that glide along parallel tracks. You can hop on the first one and it’ll move you along safely. But once you drop down to the second one, you’re almost certainly going to die. When the left anchor that connects the platforms to the rail encounters a frayed portion of the track cable, it causes the platform to pitch forward and dump Mega Man into the bottomless pit below. This happens in a split-second, without warning, and it’s a total shock the first time it happens.
The middle track has a couple of frayed spots, but the bottom one is practically half-missing. Also, the platforms move out of sync with one another, so it’s possible you could be forced to ride the middle platform back and forth several times until you have the opportunity to drop down. Once you get the timing and mechanic here, it’s not so hard – but as a first stage, it’s utterly harrowing.
Strangely, this isn’t teaching you a mechanic you’ll use throughout the game; the frayed cable tracks only appear here and in the very final stage.
After all this, the area still isn’t through, as next up you encounter a group of Bladers. Then you’re forced to face a gauntlet of Picket Men, who stand their ground and chuck picks at Mega Man. You’re forced to come to terms with a few factors here: The Picket Men can defend themselves with their shields (and will, if you move too close to them). Their attacks travel in an arc that homes in on Mega Man’s location. You need to understand space management to take them on: You can’t stand in one spot and attack without taking a few picks to the face, and you don’t want to advance on them too quickly or else you’ll come face-to-face with them and cause them to raise their shield. Only by moving deliberately toward them can you triumph… though this becomes considerably more difficult when you also have to navigate over a pit (into which you can be knocked by the recoil of taking a pick to the face) in the process.
What you learn here: Metool tactics, using uneven ground to your advantage, maddeningly difficult sliding platforms, leaping to deal with enemies at other heights, managing space against aggressive enemies with high defense values
What the design says: Go away.
Elecman

Elecman’s stage is interesting because it’s the only one that begins by making you move vertically. It’s quite complex and daunting, which actually works out to be OK; in this case, the difficulty of the level design corresponds to the boss at the end. Elecman is extremely difficult to defeat as the game’s first boss, and by making the barrier to reach him quite high, Capcom discourages the unworthy from making the attempt.
Again, though you won’t realize it if this is the very first level you’ve attempted, the design (specifically, the enemy placement) encourages you to tackle this level only after you’ve acquired the proper weapon from another boss. The enemies here – called Spines – glide slowly back and forth across the floor. However, once you come to stand on the same level as them, they accelerate rapidly. So this small setup of four short platforms, staggered in height and patrolled by Spines, is very difficult to clear unscathed. Once you leap onto the first platform, the first Spine speeds up, giving you about two seconds at most to hop over to the next platform. But that platform is patrolled by another Spine, as is the one above the first ledge, and each time you reach a new platform its tiny guard will race to attack you. You have to jump again almost the instant you land, and the gap between the two columns of platforms is just wide enough that it’s easy to fluff a jump.
Spines are too short to shoot while standing on their level – standard bullets fly right over them, and Mega Man can’t duck – but if you hop up and fire at just the right height, you can hit them. Standard bullets don’t hurt them, though, so this only stuns them. It’s possible to hop-shoot-jump, hop-shoot-jump your way to the top, but not easily. This simple-looking screen is devilishly complex and encourages you to perhaps consider an alternate route your first time through the game.
What you learn here: Quick-reflex platforming, dealing with seemingly invulnerable foes
What the design says: You’ll probably have better luck elsewhere.
Iceman
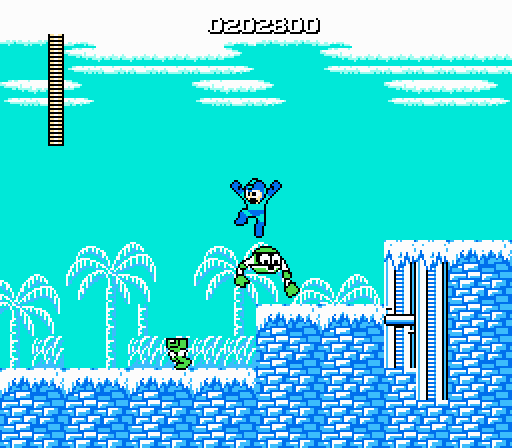
Iceman’s stage offers some advanced considerations right away. The icy ground has low friction, which affects Mega Man’s inertia; rather than stopping immediately when you cease running, he slides to a halt. This inertia particularly affects his ability to reverse direction – if you try to turn around, he’ll run backward, slowly, for a moment. However, you can cancel out the inertia of ice by jumping, which causes you to rise straight into the air as usual. It’s not realistic, but it does offer a workaround for a tricky physical mechanic.
As first stage choices go, Iceman is a terrible place to start. Not only do you have to learn the basics of the controls, you have to do so with slightly altered physics. And the game doesn’t go easy on you; as soon as you scroll to the right, you encounter one of the more devious standard enemies in the game: The Crazy Razy.
A Crazy Razy is an odd robot with independently operable upper and lower body portions. If you let it come too close to you as it marches forward, it’ll split apart. The lower half will keep on marching, but the upper half will hover slightly above you, harassing you with short, dive-bombing attacks. Crazy Razy is somewhat taller than Mega Man, so if you shoot it while running, you’ll hit the lower half. It takes a few shots to destroy, but you can kill the lower half… though that still leaves the upper body in play. On the other hand, if you make a short hop and fire, you can destroy the upper half in a single shot. This has the side benefit of also destroying the lower half at the same time.
Which is pretty smart placement for these things. As you puzzle out how to destroy them, you’ll also discover the inertia-nulling side effect of jumping. Still, this is better tackled once you have some more experience with the game – and, fittingly, Iceman is pretty tough to beat with your default weapon.
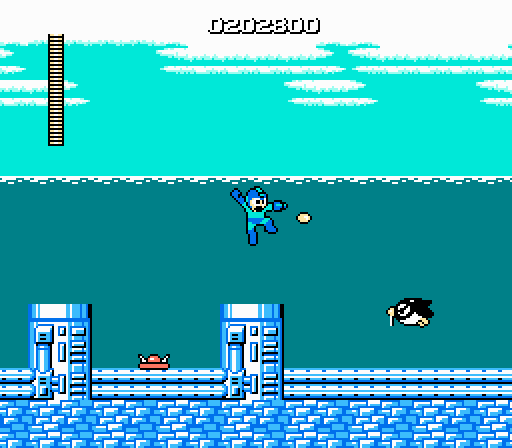
And hey, that’s not all. Past the initial wave of foes, the icy ground gives way to water. Mega Man doesn’t use the same fluid physics as its sequels, so you can’t jump higher than normal here. The action does slow down somewhat, but I’ve never been able to tell if that’s because water is meant to create extra resistance of if something in this portion of the level causes slowdown.
In any case, here you have to deal with multiple enemy types at once – besides Beaks, which patrol short patches of ground, there’s also a host of infinitely respawning Pengs, which fly in from the right. Once you shoot one, another immediately spawn to replace its fallen comrade. Pengs are the poor man’s Medusa Head, moving in a similar (but flatter) sine wave pattern at a rapid clip, constantly placing pressure on you to react. The terrain works both for and against you here; while the floor underwater isn’t slippery and the uneven terrain limits the range of Spines, the constant flow of Pengs adds a dynamic hazard as you’re trying to hop over short columns and avoid bumping into Spines. Again, this is sophomore-level stuff, not Platforming 101. And it just gets worse later.
What you learn here: Ice physics, leaping to deal with enemies at other heights, managing unexpected enemy behavior, dealing with multiple threats on complex terrain, water makes you slower (maybe)
What the design says: I hate you and want you dead.
Fireman
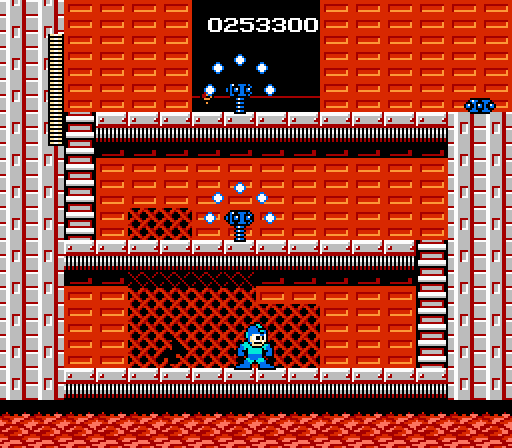
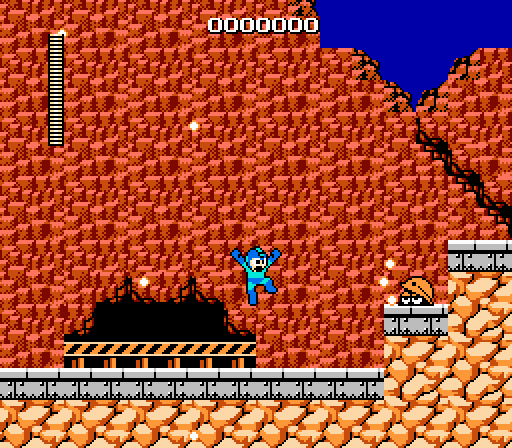
There’s an awful lot going on in the first screen of Fireman’s stage. Although Mega Man spawns in absolute safety, there are no less than three turrets above him that pop up at regular intervals and fire off arcing sprays of five bullets. They’re pretty easy to deal with in reality, but they seem awfully intimidating at first.
You can take away a few handy pointers here. First, if you try to take on the turrets – Screw Bombers – directly, Mega Man can only hit them once they pop up to shoot, which means you’re trading bullets. Second, climbing ladders is slower than running or jumping, so you need to learn the timing of your enemies’ actions. Third, if you combine these two factors you can actually stop at the top of the ladder, just before dismounting, and fire on the Screw Bomber while it’s still retracted, destroying them all safely from a distance.
The second screen is more or less a mirror image of the first, though with one fewer Screw Bomber. However, since the Screw Bombers here start on the same level as or below Mega Man, you can’t use the ladder trick to beat them. Instead, you have to learn to avoid their fire while advancing upon and destroying them. It’s possible to situate Mega Man into the gap in the lower Screw Bomber’s bullet spread easily enough, which means you only really need to worry about leaping over the ground-level bullet that the upper one fires out when it pops up without jumping high enough to smack into the bullet it shoots at a 45-degree angle.
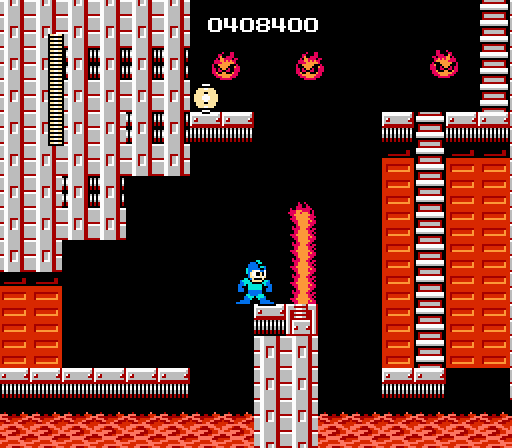
After the turret gauntlet, you have to contend with a rather more harrowing sequence in which you have to clear several gaps by crossing a platform from which a pillar of fire rises at regular intervals. That in itself might not seem too dangerous, but at the same time a trio of fireballs called Tackle Fire that fly up into the ceiling and descend in a somewhat unpredictable meandering spread. You can shoot the Tackle Fires, but once they’re all dealt with, more will appear. They tend to emerge from the top of the screen directly above the jet of flame, making them very likely to bump into you and potentially knock you into the open fire below as you try to avoid the geyser of fire and reach the ladder opposite. On the plus side, there’s a health refill above and to the left that you can use to restore whatever energy you lose trying to navigate this hellscape.
What you learn here: Climbing and descending ladders, dealing with stationary enemies, the danger of pits, non-interactive timed hazards, managing multiple threats despite precarious footing, health refills
What the design says: Maybe try again later.
Bombman
And finally, Bombman. This stage has the most uneven, broken-up terrain, requiring a great deal of basic jumping skills to leap from platform to platform. If you take the high ground, you need to be mindful of the Screw Bombers below, which pop up to fire at you. It can be tricky, but you can position yourself safely into the gaps in their projectiles. On the other hand, you can just drop down and shoot them, too. The high road lets your recharge your energy, though, and if you fall you can’t simply hop back up to the upper road as it’s too far up to reach.
Beyond the Screw Bombers, you need to navigate a field of pits from which indestructible hazards called Bombombs rise at regular intervals. They fire up into the air and, once they reach their apex, explode into fragments that rain down onto the ground below in a sort of arcing inversion of the Screw Bomber’s projectile patterns. These are situated so that, if you time it sensibly, the fragments of the Bombomb that rises ahead of you will impact harmlessly on the upper peak of the columns you use to cross the pit sequence. But then another will rise behind you, and its debris will hit your safe location. So you need to maintain constant, measured motion across the pits. Cautious movement will take you far; on the other hand, if you don’t take care, you’ll leave yourself vulnerable to a fragment that almost certainly will knock you into a hole.
This opening sequence isn’t really difficult and simply requires a bit of patience and observation. It’s a good starting place for the game, and fittingly the boss at the end is probably the easiest in the game.
What you learn here: Dealing with fast-moving enemies, dealing with leaping enemies, dealing with stationary enemies, the importance of caution around bottomless pits
What the design says: Come on in!
I am very happy about you dealing with Mega Man, the three first are among my all-time favourite games. This thread also, and I guess that that is part of the intention, got me thinking.
You could argue that of the three first games (which are the only ones I’ve really played much), only MM2 really succeeds with the level choice thing. In the first, as you say, Fireman, Elecman and Iceman are nowhere near playable for anyone who doesn’t know the game inside out. In fact, I haven’t even tried to do that and won’t be bothered, because beating Elecman with the Buster is probably close to impossible, and the same goes for Fireman. As for Iceman, I won’t ever do that platforming thing without the Magnet beam again…
In MM 3, the complexity of the levels and the difficulty of some of the bosses mean that to me, only Top, Hard, Magnet and possibly Spark would be viable to begin with, and even among those I consider Hard and especially Magnet (because of the bee gauntlet) to be more of a chore without the proper equipment.
In 2, however, you can start almost everywhere. Only Heat (vanishing blocks) and Quick (beams) and Crash (boss) are too hard for someone who’s never played the game before, and of those I would only avoid Heat as a first, because the blocks are hugely annoying.
Then again, MM2 is the most fun of all MM games, and arguably the best 2d pure platformer ever.
In MM3 I would argue Needle man or Snake man are great places to start as well. Needle man in particular has an easy to reach E tank and his pattern is pretty learnable once you get the hang of it.
Nice to see another anatomy! Sorry I haven’t said anything in regards to the Goonies games anatomy, but I’ve never played the Goonies game because it wasn’t released on cart in the US and I’ve generally passed up emulating it in favor of other oddities like Sweet Home and Getsu No Fuma. As for Goonies II, it’s been well over two decades since I last played it, so I vaguely have memories of Konami Man, first person bits, and some ice area. Might try that one again before it comes up as a refresher.
Anyway, in Mega Man I generally start with Bomb Man first. His weapon kinda sucks, but overall I find his stage more forgiving than the other starters.
Judging the Mega Man stages by how they work as a first level is definitely a good angle. I know the fans always recommend some robot masters for starting the cycle for an easier time (off-hand, I remember starting with either Galaxy Man or Splash Woman in 9, since they’re easier bosses on relatively easier stages).
“Mega Man” has always been an underrated game, docked points mainly due to what people view as a brutal difficulty-level. Though, I’d argue it’s a manageable game with only four real rough spots-the moving, shooting platforms in both Ice Man’s level and Wily Stage 1; the yellow Devil; and the boss gauntlet. For beginners, a little helping of the magnet beam and the select-pause trick will neutralize those. Sure-it’s a little glitchy, but glitches back then were tolerated and treated as a genuine part of the experience.
Anyway: This is an interesting way to look at how the game eases you into (or pushes you away from) its world. Did any of these realizations come to you as you listened to Inafune talk?
No, it’s just that Inafune’s comments got me thinking about how the game is designed.
I agree Mega Man tends to go unfairly overlooked. It’s actually the best balanced game in the classic series, difficult but definitely beatable. Part of that, I think, stems from the fact that it doesn’t have E-tanks to fall back on.
Well, it also has that nasty trick in Wily 1 where if you didn’t get the totally missable Magnet Beam, you are screwed and can’t proceed 😛
That’s not poor balance so much as poor design – related, but not synonymous.
It’s been several years since I played through the entire series, but I seem to recall that the E-tanks admittedly throw a bit of a wrench in the balance of the later games in particular. Mastery can basic
In the first game, though, I’m always hankering for an energy tank (or at least a big energy pellet) in the midst of the four-boss rematch in Wily’s last stage. For me, it’s the hardest spot by far of any of the main-line entries… or at least it feels that way, since there’s also not a continue/password system to fall back on. Anyone who grew up with the game has probably ironed out the wrinkles in that spot pretty cleanly; I, on the other hand, started with Mega Man 4 and, pre-emulation, only played the original at my piano teacher’s house in 30-minute segments, and thus have a tougher time with it than those who were there from the beginning.
Interesting that so many people express frustration over the boss gauntlet. I’ve never really found it that difficult. I’ve always found the clone battle to be much dicier.
Yeah, the final bosses didn’t give me much trouble either. Speaking of bosses that didn’t give me trouble, it amazes me how people treat the Yellow Devil like some unstoppable monster you have to cheat to get past when he has a set pattern to his attacks.
People always talk about Mega Man games being hard, but personally I found them easy compared to other hard games like Castlevania and Ninja Gaiden. After all, you have full control over Mega Man’s jump and various situational tools to work with.
Nice. Mega Man. Finally! I like your different take than Glass Knuckles.
I always considered Cut Man’s stage as the starting point, however, that leads to the problem that you don’t have the Super Arm from Guts Man when you are going to Elec Man’s stage next. And that means you can’t get the Magnet Beam on your first trip.
So I usually started with Bomb Man (I need his bombs as I always have problems getting the timing right when avoiding Guts Man’s earthquake.), to go to Guts Man next. As experienced player, starting with Guts Man is also an option, also to have the benefit of finishing the platforms from hell as early as possible in your quest.
I always found it funny but admirable how Elec Man’s stage in this game is so determined to keep you out and away from its frantic, super-hard boss, but the first Game Boy game, Dr. Wily’s Revenge, practically funnels you towards him as they changed him into the easiest boss in the game! I want to say it’s proof the Mega Man team really knew what they were doing back then but the Game Boy games were developed by Minakuchi Engineering, so maybe it’s just proof that Capcom knew what they were doing at the time!
(“easiest” is relative, since the lowered HP bar in Wily’s Revenge makes all of the bosses harder than they should be, but the team does seem to have been aware of that, since they changed Elec Man to barely shooting his high-damage weapon at all, turning him into JogBot)
Nice article. I’ll be interested especially in seeing when you get around to Mega Man 2, as that’s actually the one I started with. And to this day, I remember the biggest problem I had starting out was getting to the end of the first horizontal part of Metal Man’s level and being completely and utterly confused as the game was asking me to jump in a pit which it had spend a great deal of time teaching me was a super bad idea 😛 (Metal Man’s level especially with all the conveyor belts).
But yeah, as far as Mega Man 1 goes, this I think jives with my experience (having played it after MM2). I might have actually beaten Bomb Man first, I can’t remember. But definitely Guts Man and Ice Man’s stages had big “get the hell out of here” signs up front. I think Elec Man’s was more doable with my MM2 experience, but those disappearing blocks in the next section are definitely annoying 😛
Ah, this is proving an interesting take on the concept.
Funny thing, too: When Nintendo Power covered the game, they had Bomb Man as their recommended first level.
As for MM1 being the best balanced, there are two problems:
The first is the third Dr. Wily boss: if you get the wrong weapon (Elecman) on your first attempt, the Gutsman blocks will clear out, and they don’t respawn. Meaning that unless you are born with innate rapid fire, you will lose and have to start Dr. Wily again.
The second is the boss gauntlet. Especially Fireman is very hard to take out without losing massive energy, and with the Gutsman incarnation after him being very prone to jumping into you, you will at best be very short on energy when taking on Wily. To make matters worse, there are no energy refills after the boss rush.
In my opinion, the possibility of getting 9 energy tanks in MM3 killed the game, because it became too easy. MM2 got that part right, and I’d argue that the original (i.e. European and American “Normal”) is the best balanced MM game. It is hard, but you’ll have a fair shot at most bosses (Air, Wood, Bubble, Metal, Flash) when starting out, and the limited, but available energy tanks give you a chance against most bosses.
Interestingly, the concept of removable obstacles staying away after you die makes MM1 harder (3. Wily boss) but makes the most awkward boss of MM2 (the wall turrets in Wily 4) easier. Like the Metroid Zebetite, any removed obstacle will stay away if you die, leaving you with the chance of whittling down the obstacles before finishing the boss properly.
Of course I meant the European and American “Difficult” mode having the best balance.
I agree with everyone here, it’s great you’re approaching this from the perspective of a beginner who doesn’t know what stage to choose, or perhaps that it’s even possible to choose.