I keep referring to Bubble Man’s stage as the “default,” but that’s only slightly true. Unlike Mega Man, the Mega Man 2 stage select screen actually begins with the cursor in a neutral position (centered on Mega Man’s portrait in the middle square). You really aren’t pushed toward any particular selection; I call Bubble Man’s upper-left position the default simply because that’s how the eye reads, left to right. I suppose Quick Man could just as easily be the default, though, since Japanese is generally read right to left.
So really, any stage is truly fair game for starting. I pity whoever picks Heat Man for their first go, though.
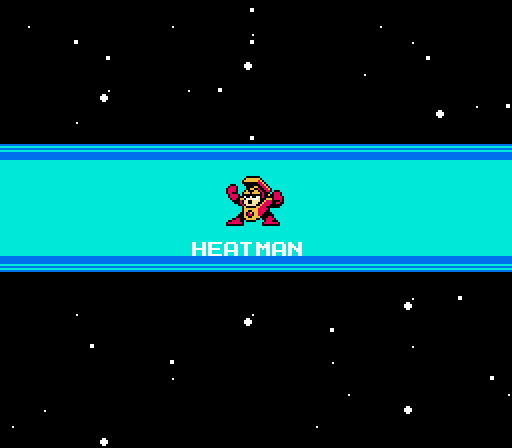
Can you tell Heat Man was designed in a culture which has a much more enthusiastic attitude about smoking than America? He looks like a Zippo lighter. As a boss, he’s not the worst in the game… but his stage more than makes up for it.
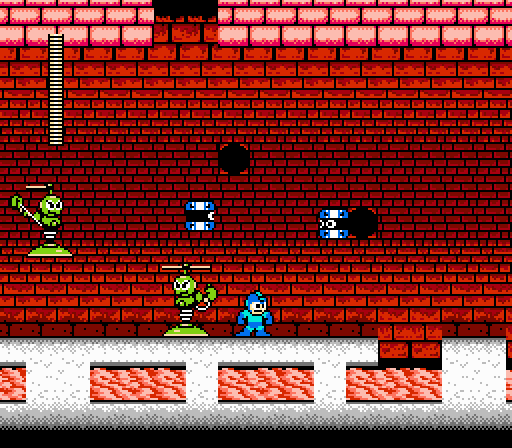
While not the most visually diverse stage in the game, Heat Man’s level does a great job of using the NES’s minimal color capabilities to create the impression of a tunnel through which a channel of lava flows. The floor beneath which the lava runs throws a shadow up against the walls, which appear to curve into the background. It’s a simple effect, but it makes for a great example of smart graphic design on the system. Four colors can go a long way!
Heat Man’s stage is fairly straightforward in terms of the basic ground it covers, at least at first. It’s more or less a straight run through the action until you reach the end section, but I wouldn’t describe it as easy. The enemies here differ from the norm in that near every one you face respawns infinitely. The green propeller guys drop from holes in the ceiling, land on the ground, sit for a moment, then “jump” at you. Technically they’re flying, but it’s a short arcing motion. It’s a jump. These guys will continue to pour out of their hatches every few seconds, whether or not you’ve already destroyed the previous ones.
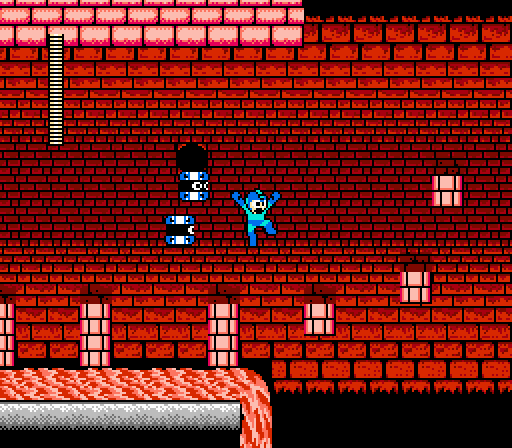
Likewise, the blue barrel-shaped robots emerge from small hatches in the wall and drift slowly in a homing pattern toward Mega Man’s position, constantly changing direction to track his movement. Up to three can appear on-screen at once, and while they may not seem like much of a threat here, they serve a similar role to the mini-goblines in Air Man’s stage: They’re slow, persistent, omnipresent threats that interfere with your carefully timed movements as you’re navigating more active environmental hazards.
Interestingly, the best weapon to have for Heat Man’s stage isn’t the boss’ weakness, the Bubble Lead. No, it’s the Metal Blade, because most enemies approach from above. The Air Shooter works, too, I suppose, but it’s much hungrier for weapon energy and goes quickly against so many infinitely respawning foes. The Metal Blade is much more economical, and it allows you to hit enemies just about anywhere on the screen. Plus, because it can kill both types of enemies you see here in one hit, its piercing effect allow it to destroy multiple foes in a single shot.
It doesn’t take long for Heat Man’s stage to take off the gloves. Still, you have to give it points for rolling out its threats progressively. Even ground with robots. Broken ground with robots and exposed flumes of lava. Completely open lava flow with narrow columns to leap on, and also robots. Wide yawning chasms with tiny little platforms scattered across its length… and robots, of course.
The previously unthreatening drifters become more dangerous here, as you’re forced to navigate slippery footholds above instant-kill scenarios while they materialize out of the scenery and home in on you. They will happily knock you into a pit as you stand and work up the nerve to jump… and they will just as happily obstruct a leap from one platform to another, destroying your aerial momentum and, yes, knocking you into a pit.
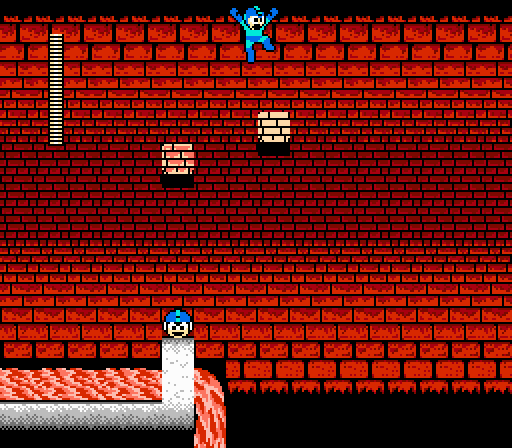
However, that’s not the worst of it. Amidst all of these increasingly complex platforming scenarios, you’ll encounter a handful of tall columns that can only be leapt by making use of the vanishing platforms that appear next to them. Yes, Mega Man‘s second most hateful mechanic makes a return here and officially becomes a franchise standard. I’m sorry.
The most-hateful mechanic in the original Mega Man was those stupid floating platforms in Ice Man’s stage with the glitchy collision detection and an annoying tendency to shoot players while they dangled precariously over a fatal chasm. Those were fixed for Mega Man 2 with the Kaminari Gorou platforms in Air Man’s stage — while dangerous, their improved programming, consistent pattern-based movements, and the ability of the player to gun down the threat riding atop them made for a fun and interesting challenge, not a frustrating one.
Alas, nothing about disappearing blocks has changed in the least here. In fact, Capcom doubled down on them. A massive stretch of Heat Man’s stage consists of either fire or chasm (both equally fatal) which can be navigated only by traversing the lengthiest sequence of vanishing platforms in any Mega Man game ever. The way this element is scaled back in future entries, I think, shows that the developers recognized they maybe went a little too far here.
The block sequence is absolutely doable; I’ve complete it a few times. But it is insanely challenging, requires extended pattern memorization, and forces you to play precisely without becoming rattled by the intensity of the situation. That is no small demand!
On the other hand, if you’ve completed Air Man’s stage, you can completely skip this part by hopping on Item-2 and riding it across the gulf. There’s just enough weapon energy for Item-2 to fly you to safety… though someone in the level design department got a little nasty here by sticking a 1UP on a ledge in the middle of nowhere to tempt you into jumping off. If you do, you won’t have enough juice for Item-2 to reach the other side. You can use the blocks, of course, but if you’re using Item-2 it’s a safe bet you don’t have the nerve to try.
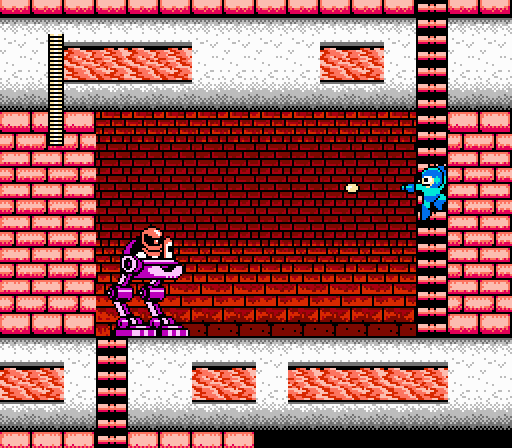
By comparison, the stage’s epilogue — a face-off against a walker — seems almost like a relief. This is a straightforward threat. One you can kill.
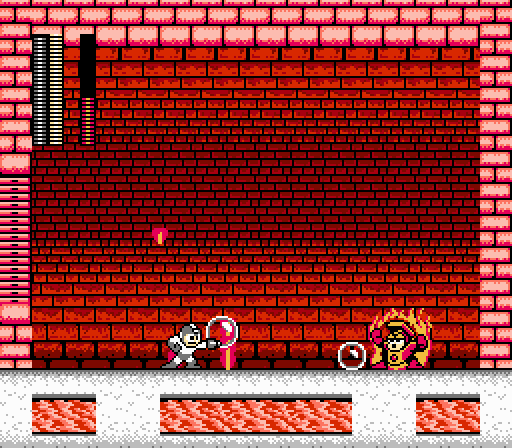
As for Heat Man, he goes down pretty quickly to the Bubble Lead. While the weapon is basically useless in the stage itself, the connection between “guy made of fire” and “weapon made of water” should be pretty intuitive.
Interestingly, Heat Man’s attack style bears some small resemblance to that of his predecessor, Fire Man. While he doesn’t fire a weapon forward, he does fling a trio of napalm-like embers that fly in a triple arc and burst into a tall fire column once they land, reminiscent of Fire Man’s tendency to create a persistent burst of flame on the ground wherever his flame cannon struck Mega Man.
And Heat Man does possess a powerful horizontal attack: Himself. After flinging his napalm blots, he flares up and dashes across the screen as a geyser of indestructible flame, aiming for Mega Man’s current position. This actually works to his detriment, though; you can fairly easily jump over him as he jets, land, turn, and hit him in the face with the Bubble Lead. This will also cause him to toss his triple-flame attack in a shallow arc, which makes it easy to evade. While powerful, Heat Man isn’t as unrelentingly aggressive as many of the game’s other Robot Masters, so learning his patterns will take you far.
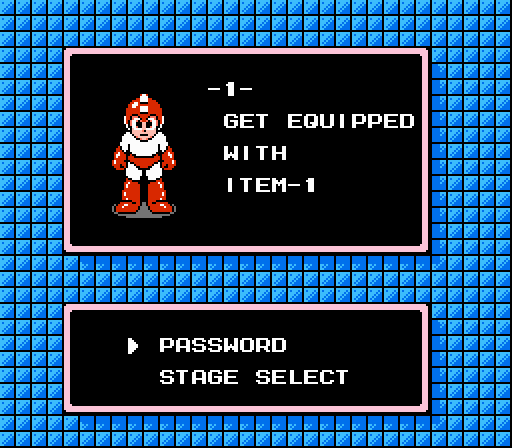
Besides the powerful but limited Atomic Fire, your second reward for besting Heat Man is Item-1, which works as Item-2’s opposite number. While Item-2 sends you cruising straight ahead, Item-1 is a tiny propeller-driven platform that rises slowly. You can lay down up to three at a time to create a stair step effect and reach extremely high and out-of-the way platforms and ladders — something essential in the final stages.
Slight correction: the middle square is the “Dr. Wily” logo, not Mega Man’s portrait. It’s Mega Man’s portrait in 3.
Oh, uh, yeah. Duh.
Yet another slight correction: you can indeed jump off item-2 and pick up the extra life. You just have to be careful about the timing when jumping back on, because if you mistime it, the block which is there to save you will push you into the pit.
Those vanishing blocks are wicked. Not only because the stretch is so long, but rather because there is a slight, unsignalled “stagger” somewhere in the middle. Hence, you will mistime one block and plunge into the pit. The sheer number of blocks you need to hit is such that I ‘d assume that everyone who ever did that one the hard way must have a severe OCD. Sorry Jeremy, I love your stuff, but I hate that stretch 😉
Hm, are you sure? I’ve tried it and I always run out just before reaching the other side.
You have to start the item-2 where the lava pool starts, then it works. But as I said, you need to time properly when getting back on, or the extra life will be lost straight away.
If you’ve got the right weapons (Metal Man and Item-2), Heat Man’s level is quite ok. Without Metal Blade, it is a chore. Without Item-2, you shouldn’t even try.
I really like the disappearing blocks, generally. I love the sound they make when they appear, I like that they require observance and timing. But, this particular stretch in Heat Man’s stage doesn’t use them very well. The big problem is that it doesn’t let you observe their pattern first before trying to get acrossed them. Almost every other Mega Man puts them in places where you can observe the pattern first before trying… even Mega Man 1!
But in Heat Man’s stage, you have to take blind leaps acrossed the blocks. That would be okay if they were designed in such a way that it was realistically possible to react to them, but it’s not… there are a bunch of places where you need to know ahead of time where a block is going to appear or you’ll be screwed.
Even so, it’s not a terrible design flaw because it IS possible to get through with memorization, and the designers give you an out in the form of Item 2. So it’s not the worst thing in the world, and mastering tough platforming challenges like this can be fun. But there are better designed block puzzles in Mega Man 9 that are just as challenging while being much more fair.
Bubble Lead isn’t entirely useless in the stage itself; it does a great job of dispatching the spring-head robots that appear in a few annoying places, which is helpful for that first disappearing block sequence.
As for the infamous block sequence: There are only three spots in the entire sequence where you’re screwed if you don’t know them in advance (when the blocks appear directly over your head), and two of them come before the lava. As infuriating as retrying those sections can be, I’d commend the level designers here for actually providing a safe walkback area to recover from the first two parts. As for the third spot (just before the end, over the pit) - well, that one’s a bit trial and error, but at least it’s the only one in the entire stretch over the lava/pit; it’s a great example of the designers making something seem far more intimidating than it actually is.
Sidenote: Am I the only one who found it odd that there are no actual heat/fire enemies in the entire stage, and yet there’s a fire robot (“Changkey maker”) in Quick Man’s stage? Yes, there’s lava, but those are nothing more than glorified spikes…
I’m not entirely confident in this, but I’m reasonably sure that any time there’s one of those blind leaps, you jump straight up just before your block disappears, except if you’re already on the top row and there’s no room above you for another one… in which case you jump forward just before it disappears. It’s not quite intuitive, except in the sense of “where else will you go?” so there’s still that unnecessary level of trial and error going on, but once you know it there’s no issue. I haven’t done the stage in years and I’m confident I still could.
As for the 1-Up, I always figured you were supposed to do the first half yourself and then get the 1-Up and Item-2 your way to safety from there.