If you can survive the towering gauntlet that is Area 5, then maybe, just maybe, you’ll be up to the task of taking on Area 6.
You don’t have a choice in the matter. Area 6 sits at one end of a lengthy map corridor leading to the Badd empire’s inner regions, and you can’t traverse the corridor without the advanced communicator located in Area 14. And in order to enter Area 14, you need to special pass acquired once you beat Area 6. Yes, kids, it’s a fetch quest in a 1988-vintage platformer… the one blemish being that the requirements (getting the communicator) and the process of getting the pass (beat Area 6) aren’t immediately evident. You kind of stumble into the answer…
…or never find the answer, because Area 6 is hellacious. This is, without question, the most challenging stage in the game. It’s the real test of skill for Bionic Commando, a lengthy and unforgiving series of unique platforming trials with very little tolerance for failure. You need to grok Bionic Commando‘s rules with the whole of your being. You need to swing with the best of them. You need to become Radd Spencer.
Thankfully, the stage begins by offering you a 1UP to allow for a bit of failure. On the other hand, you have to work even for this little perk, as it appears on a girder above the starting area, and reaching it requires backtracking from further into the stage. There are a few opportunities to slip and die pursuing the 1UP, so it makes an effective winnow: If you can’t even clear that relatively low bar, Area 6 is going to be a rough ride for you. Maybe go back and practice on some previous stages.
You literally can’t even challenge Area 6 until you’ve proven your mastery over the perils of Area 5; the entrance to this stage is barricaded with a low wall that can only be destroyed with the Rocket Launcher awarded for completing Area 5. Otherwise, you’re unable to advance beyond the first screen. (Annoyingly, there’s a special button combo that allows you to exit stages instantly if you arrive without the launcher, but the manual doesn’t actually describe it. D’oh!)
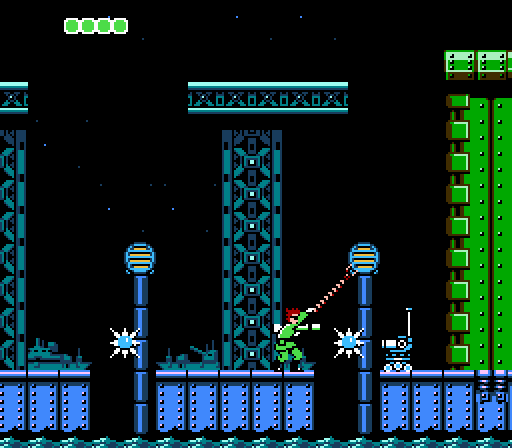
Once you’re properly armed and ready to take on the stage, it begins with some modest grappling challenges and semi-passive threats. The spiked balls here emerge from the gaps in the platforms and rise to the height of Spencer’s head before falling back into the water; they’re on a timer that allows you just enough of a window between “leaps” to swing past. However, several of the platforms are patrolled by these small remote tanks, which don’t actually shoot… maybe they’re meant to be camera drones. In any case, they roam left and right, and they tend to spawn far enough to the right that you could easily swing into one if you don’t advance with the appropriate level of caution. You need to take your time and see if one rumbles into view.
With this stage, Bionic Commando returns to the more open, multi-path design we’ve seen outside of Area 5. Beyond this opening run, Area 6 largely consists of wide expanses of enemy installation connected by small choke points. You need to traverse the choke points the same way every time, but how you reach them remains fairly open to your discretion. You’ll find enemies along either route, so it ultimately boils down to how you think you can most effectively reach your destination.
Complicating things in this first portion of the stage, we have a new enemy: The drone pilot. Bionic Commando predicted modern warfare, right here.
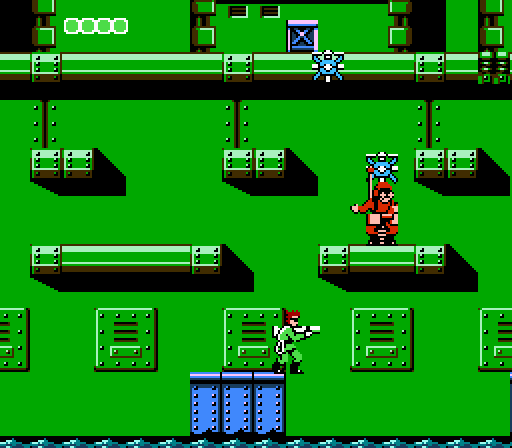
The drone controller stands motionless on the battlefield and has no direct attacks, but he can send out several small drones at a time. These fly erratically in slightly elliptical paths and tend to home in on Captain Spencer — not directly, but with just enough random aggression to pose a threat. You can shoot down the drones, but the pilot will simply send out more. Instead, you need to take down the pilot himself, which will cause all active drones to come crashing to the ground.
Naturally, the drone pilots are placed in spots that make it awkward for you to take them head-on. The one above is fairly low on the base structure, so if you travel the most direct route through the stage he’ll be inconveniently tucked away below you; you won’t be able to reach him, and he’ll continue to harass you with drones that fly up and buzz you. But even if you take the lower route, another drone pilot appears above, closer to the choke point between this structure and the next, so you’ll still have to navigate the stage vertically while dealing with drones.
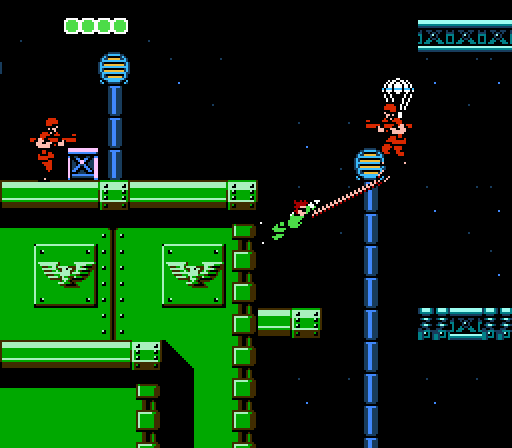
A single grapple point connects you to the second half of this portion of the level — a simple grab-and-swing made slightly tricky by the fact that it’s raining men (i.e. paratroopers). It’s just a taste of what’s to come, though: Multiple sequences requiring consecutive mid-air grapples via these tiny spot lamps. The first string of lamps comes with a sort of safety net — if you miss a grapple, there’s still solid ground beneath the lamps. But the last few swings require you to make perfect grabs in mid-air, and if you miss you’ll go sailing into the ocean. Your target is a small platform with a door in it, and you need careful control to reach it.
Interestingly, though, the door doesn’t lead you to a comm room. This is the first stage in the game without a communications array; instead, the door leads you to… the second half of the stage. Despite this already being the most challenging level to date, all of this has only been the first half of the stage.
There’s one final swing-of-faith for this stage immediately after entering the second half, and it’s the toughest grab in the game. You have to swing off a structure toward a high light pole and grab it perfectly, then swing across a huge chasm and grab a ceiling at the edge of your range at just the perfect time. It’s a hell of a jump, and you really have to possess a flawless, instinctual grasp of your bionic arm’s range and timing in order to pull it off.
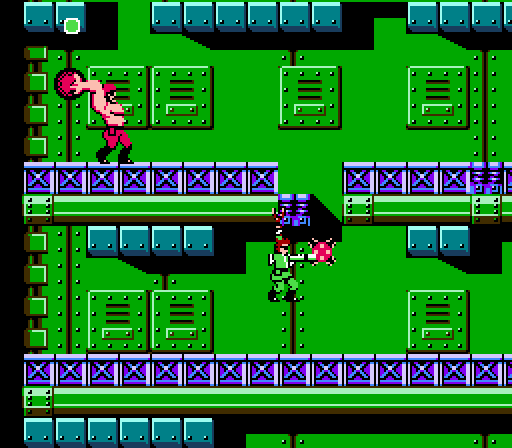
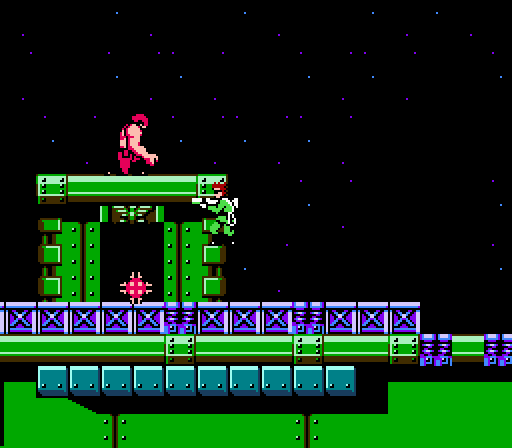
The final stretch of Area 6 involves a climb up an undulating structure, dealing with these guys. The giant soldiers toss spiked balls at you, which roll along and drop from higher levels. I’ve already referenced the Donkey Kong games in relation to Bionic Commando, and the connection is even more overt here: This sequence feels like a direct nod to the first stage of Donkey Kong.
I don’t think it’s an accidental nod, at that. Donkey Kong pretty much invented the platform genre, and Bionic Commando reinvented it in its own way. Running left and right along girders while leaping barrels chucked by a hulking ape was the ur-platforming challenge. Now, here’s a hero who can’t jump. So how does he go about evading this classic genre trope?
The answer: By grappling out of the way, of course. When a barrel comes rumbling along, you have to snag the ceiling and pull yourself up for a moment. This requires more forethought and time than simply jumping, so you have to stay on your toes here and learn the patterns of the spiked balls. They often drop in from off-screen, appearing so quickly you don’t have time to react once you spot them, so you need to learn their timing and plan your movements accordingly.
As an extra little gut-punch of challenge, the teal blocks bolted to the ceilings here can’t be grasped by your arm. Only open expanses of green ceiling are interactive for you, and much of the difficulty here comes in the need to dash from opening to opening between spikes. The lower portion of this sequence places only a handful of teal barriers in your way, but by the time you reach the top the available interactive ceiling consists of single tiles spaced quite far apart. There are also a few of those spring launchers from Area 5 that will send you, but not the spiked balls, sailing into the air, so you can also use those to avoid damage from time to time.
One nice thing Area 6 has over Donkey Kong is that unlike in that classic, you are armed with a rocket launcher. You can take your revenge. Sweet, sweet revenge.
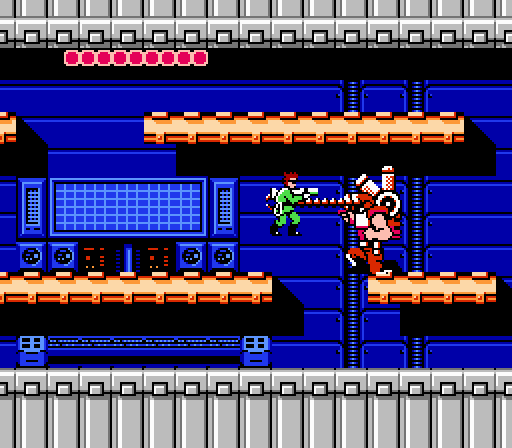
Congratulations, you’ve bested the most grueling stage in Bionic Commando to date. Oh wait, this hell hasn’t ended; inside the reactor room is a towering giant, the Badd’s own bionic commando. He doesn’t have a bionic arm, instead carrying a huge backpack that can fire a grappling wire at three different angles. He’s no less deadly for that, though; his arm doesn’t grapple onto ceilings, so he can reach through the floor to grab you. Once his arm connects with Captain Spencer, he pulls you into him for massive damage.
To make matters worse, the enemy commando is only vulnerable in one point: His head. You have to grapple up to the level of his head to take aim, and he’s very likely to snag you from your perch while you try to line up a shot. The one saving grace of this encounter is that the commando only reaches out to grab you every few seconds, and he kneels before doing so; this slight tell allows you to time your actions. Grapple up, drop and fire, duck. With the Rocker Launcher, you need to blast his face four time to take him down. Tricky, but not unmanageable.
Alternately, you can run beneath his platform and grapple up to shoot the reactor three times with the Rocket Launcher, but where’s the fun in that?
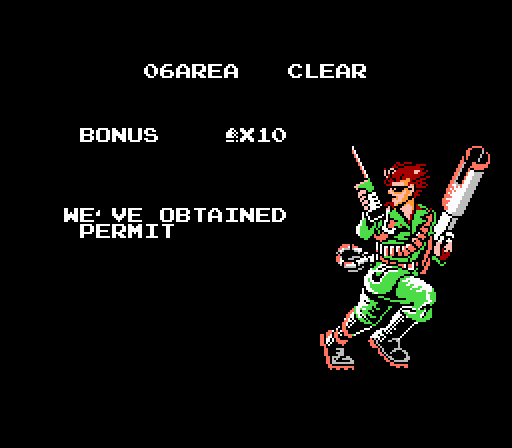
Your reward for all of this is the key to the second half of the game. The good news is that nothing else in the game is quite as difficult as Area 6.
I’m sure there is all kinds of artwork to refute this, but have you ever observed the end of level image of our hero as well as his in-game sprite? He doesn’t have a bionic arm. he has a grappling hook attached to his belt. I’ve always stood by the idea that maybe he had some sort of bracelet that channeled the metal hook and cord. It isn’t like the name “Bionic Commando” is in any way cannon to the intentions of the actual game developers. Thoughts?
Area 6 is one I have mixed feelings about: on one hand, I love the re-interpretation of Donkey Kong, as clever and appropriate a quote as there has ever been in a video game. On the other hand, the absolutely dastardly difficulty of said sequence has probably driven me into chronic hypertension…
Two things that’ll help you:
(1) You can reach that stage-opening 1up by simply latching onto a spotlight (preferably from a long distance), throwing yourself into the air, and firing the grappling hook upward at the flight’s peak. It requires quick-fingered action, but it’s safer than any other method.
(2) You don’t have to get close to the stage boss to defeat him; instead, stand beneath the left side of that orange platform seen above, and then continue to grapple upward and drop, firing the rocket launcher at head-level as you fall (or, for visual reference, a little above the middle portion of the background monitor’s speaker).