I can’t believe it’s been a full month since I posted the last of these. My apologies. I was out of town for two-thirds of that time and basically just set the site to auto-publish GameSpite Journal 12 content (aside from the occasional pointless observations about Evangelion). Let us now regroup and return to the task at hand, with the understanding that the demands of review season dictate continued service interruptions.
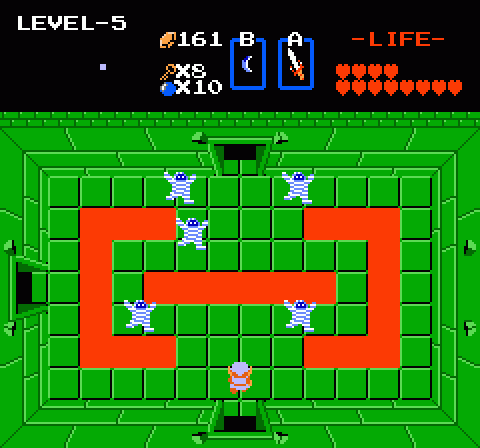
If the past couple of dungeons featured occasional moments where The Legend of Zelda’s gloves came off and it began to pummel you rhythmically right in the tummy, the fifth dungeon (“Lizard,” not related at all to the worst album in King Crimson’s discography) is where it uses the gloves to slap you in the face before rolling up its sleeves, knocking you to the ground, and beating you in the face. Well, maybe it’s not quite that bad — the sixth and eighth dungeons are far more brutal — but this stage definitely marks the point of no return.
At this point the game design no longer teaches you or strings you along as it did early on. Here you’re expected to understand the fundamentals of the game design and apply them intelligently and in various combinations. Zelda has doled out its invisible guidance until now, but no more. Sink or swim, little elf.
Even reaching the dungeon requires patience, exploration, and honestly a bit of good luck. Level-5 resides atop Death Mountain at its eastern edge, hidden by a place usually referred to as the Lost Hills. The only exit from the Lost Hills is to the west; if you travel in any other direction, the screen simply loops endlessly. That is, unless you happen to know the secret: Travel north five times and the Lost Hills will reveal the dungeon. Unraveling this mystery needn’t be entirely happenstance; the woman living in the waterfall directly west of the Lost Hills will give you a clue to that effect (“Go up, up the mountain ahead”) if you pay her well enough, but even then a bit of deduction is in order since “ahead” may not necessarily mean “to the east” — especially if you happen to be emerging from a frustrating bout of Lost Hills exploration when you find the cave.
When I talk about how secrets and wisdom of NES games made the rounds in the school yard in the olden days, this is one of the mysteries that I’m referring to. Reaching Lizard had us stumped for ages, and when someone finally figured it out, he was hailed as a champion of the common man.
Once inside Lizard, it’s… kind of garish. I think the red-on-green color scheme is meant to imply rivers of magma running through mossy or coppery stone, given that it’s up in the mountains, but since every dungeon uses the same stone tile graphic set it’s hard to be certain.
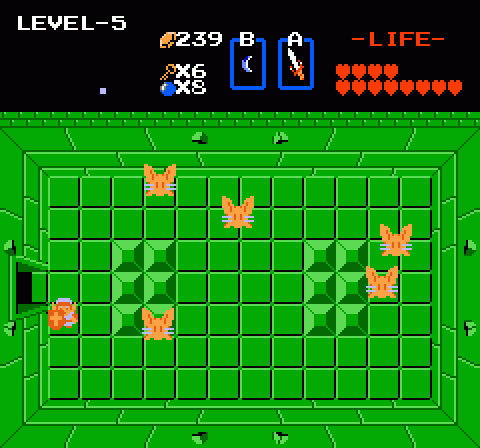
Two things come to mind about Lizard. First, it introduces an entirely new foe, Pols Voice. These rabbit-like creatures move slowly but soak up enough damage that they’re difficult to destroy via sword alone without taking damage. In Japan, of course, they were infamously vulnerable to loud sounds (that is, shouting into the microphone on the Famicom’s controller) but given the NES’s lack of audio input options this was changed in America. Instead, a single arrow will not only kill a Pols Voice but pierce completely through it, potentially hitting several in a single shot. That’s called “getting your money’s worth” (arrows cost one rupy to fire, you see). The use of an alternate technique to fight these monsters is appreciated, but the change does somewhat diminish the slight music theme this dungeon originally possessed.
Because, you see, the boss — Digdogger — can be defeated only by using the dungeon’s treasure, the Flute. Is a massive circular creature that almost resembles a sort of paramecium, and it can’t be hurt in its standard form. Playing the flute, however, will cause it to shrink in size and become vulnerable to the sword. What we have right here is the ur-Zelda experience. Use of a musical instrument? Check. Using the treasure of a dungeon in order to weaken its boss and expose its vulnerable point? Check. This means something. This is important.
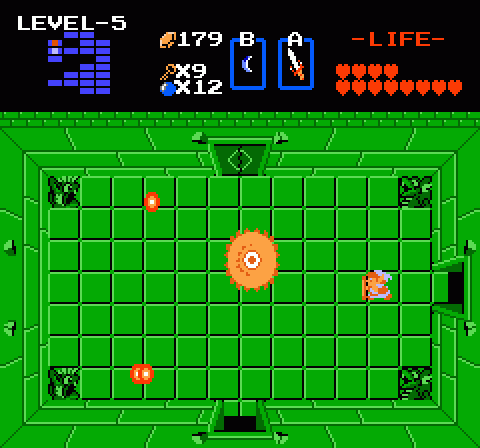
Once you know to trick to Digdogger (and an old man in the dungeon openly tells you what that trick is), it may be the easiest boss so far; the only real danger in its lair comes from the fireballs being lobbed by the statues in the corners. The trick, however, is actually acquiring the flute you need. It’s the single most difficult thing you’ll have done so far in the game.
You’ll probably experience a moment of panic when you head north from the entrance and find a trio of Dodongos, a single one of which appeared as Level-2’s boss. But they’re cake compared to what lies ahead. The Flute rests in a room in the northeast corner of Lizard, but that room is completely isolated and non-contiguous from the rest of the dungeon. It cannot be reached directly. Instead, you have to take an underground passage accessed by pushing a block (something true for the return trip, too). Zelda‘s mechanics require players to defeat all the enemies in a room before they can push a block to open a passage… which wouldn’t normally be that big a deal, except in this case the enemies consist of more than half a dozen Darknuts. And not the friendly red ones that die in two hits of the White Sword. No, these are the upgraded models, the Blue Darknuts. Remember, “blue” means “danger” in Zelda, and Blue Darknuts take no less that four hits of the White Sword before they go down. It is possible to have the Magical Sword here, even if you’re playing the dungeons in order, but unless you know where to find every Heart Container in the game, this is a brutal ordeal — one of the toughest in the First Quest.
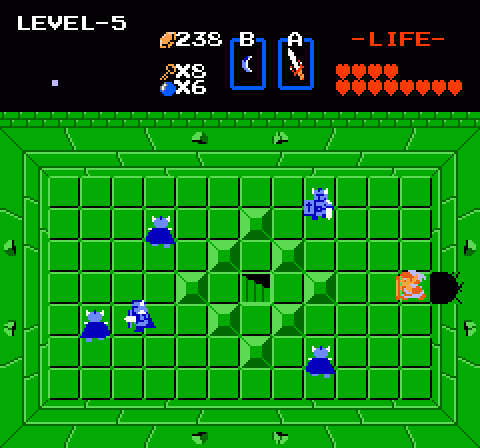
The room in which the Darknuts appear makes the going even more difficult, because so much of the floor space is occupied by the barrier around the passage. You can really only maneuver in the corners of the room, chipping away at the bad guys with your sword beam — you did enter this room with full health, right? — or dropping bombs at them if you have any left after the Dodongos. The Darknuts’ invulnerable, shielded front sides and erratic movement patterns make them tough when you’re facing the weaker ones, but these blue guys are just insane.
But the reward for surviving them is the Flute, which not only helps defeat the boss but also make getting around the overworld much easier — on the outside map, the Flute summons a whirlwind that transports Link to various areas of the map, speeding the process of travel considerably.
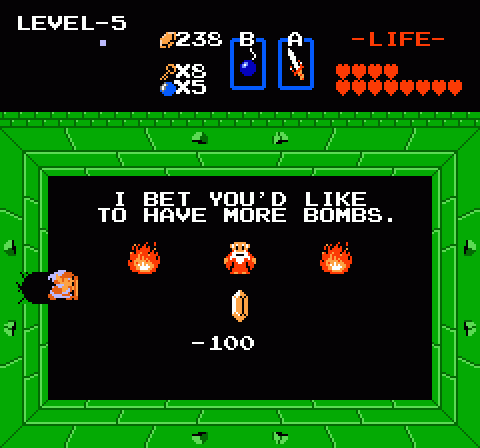
Also in this pocket of the stage, you’ll find (by bombing the proper wall) an old man offering a bomb bag upgrade for 100 rupies. He’s a shrewd businessman. The triple Dodongo threat and the rooms full of Darknuts should be all the incentive you need to drop some cash on the spot.
It really helps to have the Magical Sword before visiting the fifth dungeon, but since it requires the heart containers from the first four dungeons and all five heart containers hidden in the overworld to get, I definitely wouldn’t expect a first time player to get it that early. Heck, I’d be surprised if a beginner had the Blue Ring by that point.
Taking on three Dodongos with a maximum of eight bombs is tricky. If you’re lucky you’ll stun them, but if not it’s off to grinding Gibdos for more bombs. Good thing it’s the first dungeon with a bomb count upgrade for sale.
And speaking of the flute, recorder, whatever, I thought it was a pretty neat touch how Super Mario Bros. 3’s warp whistles were a direct ode to it. Same shape, same travel by tornado, same six-note tune.
Fighting a room full of Blue Darknuts is terrifying. The sheer horror of stepping into that room…
@MetManMas: Agreed on the whistle in SMB3. What bothered me about it here was that where it takes you is randomized, so sometimes getting where you want to be can be bothersome… more so when the seventh dungeon is added to the list, and you have to step off-screen just to continue.
I don’t remember Blue Darknuts being too tough the last time I played… it really helps once you know not to just go for the back.
As for finding the dungeon, I guess I just lucked out. In my naive little gaming mind, I just decided to see what happens if you simply keep going up… and next thing I know, boom! New labyrinth.
Incidentally, ever notice how the Lost Woods frequently return in Zelda games, despite containing nothing on their own, but the Lost Hills do not, despite being one of the places you must go?
Ah, for the days when there was a crew to help review!
I thought you could control where the whistle took you, depending on where Link is facing?
I love killing the rabbits with the arrow. It’s just so damn effective. They are one of the few monsters I’m willing to squander my precious rupees on, by using the bow.
For me, this dungeon (and specifically the darknuts) is where the dungeons stop being fun, and start being WORK.
Just wanted to say that I am really enjoying this series! Often, when an article or podcast focuses on a specific game, it tends to focus on either a simplified summary of the mechanics, or the trivia surrounding the game. It is rare that a piece gets so deep into the nuts and bolts of level and overall game design, and with games like Zelda, many of us have played it so much and know it so well that a lot of the nuances get missed (by myself, at least). There was a piece on 1up awhile back that looked at the first level of Super Mario Bros. , and how they teach you how to play the game with level design rather than tutorials…I never noticed any of these things when I played them as a 10 year old, so seeing them unpacked in articles like these is very interesting,
Looking forward to the rest of the posts.
I never understood why they didn’t make Pols Voices’ weakness the flute. Would have actually made the manual correct too (ah the dangers of translating without realizing they changed the game during localization)