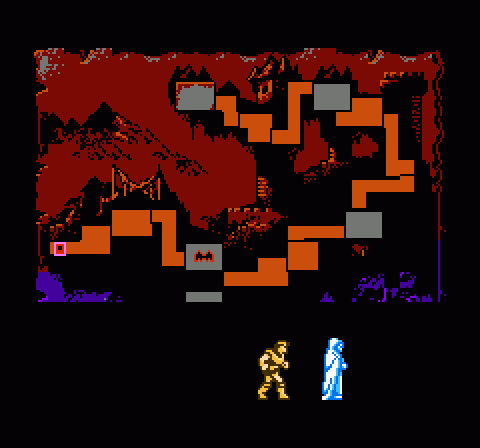
The seventh block along Castlevania III‘s alternate path brings us to the end of Sypha’s route, and the game marks your arrival at Castlevania proper by swapping out the standard regional map for a castle floor plan patterned after the first game’s stage map. In case you had forgotten about the way the journey diverged several levels back, the new map shows hints, partially obscured, of a route down beneath the castle. “You’ve missed something,” it declares. Another neat detail to nudge the player to explore the game in greater depth.
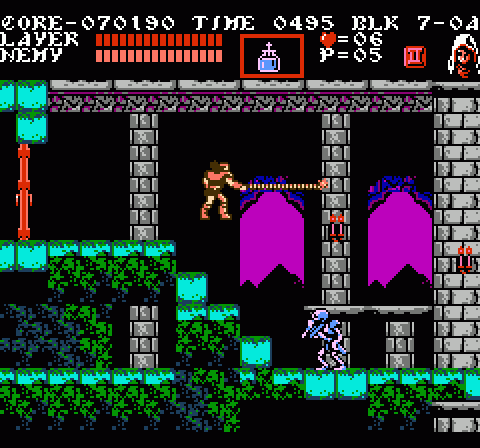
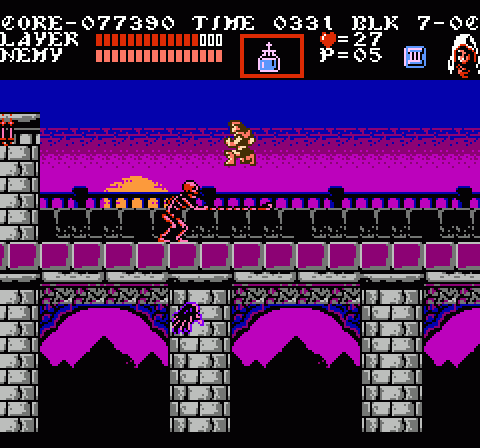
But for the moment, the important thing is to overcome the stage ahead. Block 7-0A doesn’t waste any time throwing you into the thick of things; it’s light on novel gimmicks and heavy on straight-up challenge. Every enemy in this stage either takes multiple hits to defeat, avoids your attacks with evasive movements, or simply can’t be destroyed. On top of that, you have multiple environmental features to contend with as well: Once you move a short distance into Block 7-0A (making it past the wicked armored skeletons swinging their swords at you), you have to navigate a series of descending platforms. These are arranged to afford very little flexibility in traversing them, as the last platforms requires a practically pixel-perfect jump in order to reach safe ground. That’s tricky in and of itself, but to make things just that much tougher, an indestructible fuzzy ball… thing (I have no idea what their official nomenclature is) circles the last set of solid blocks before you venture onto the moving platforms. Because you can’t destroy it (unless you happen to have Sypha’s ice spell from the previous stage, a trick that works exactly once), its relentless orbits keep you on your toes and can easily mess up your timing as you move onto the dropping platforms.
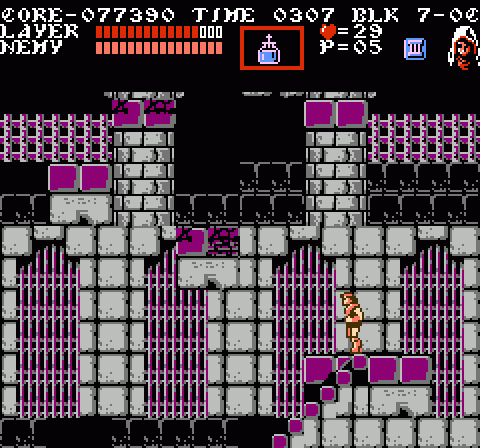
Beyond the platforms you’ll encounter yet more Dragon Cannons. Where the game until now has frequently placed these at the edges of pits and raised surfaces to knock you to your death if you don’t stay on your toes, here they’ve been placed well away from the edges. But this poses a different kind of hazard; you have to maneuver close to them between their fireball volleys, advancing slowly while defending yourself.
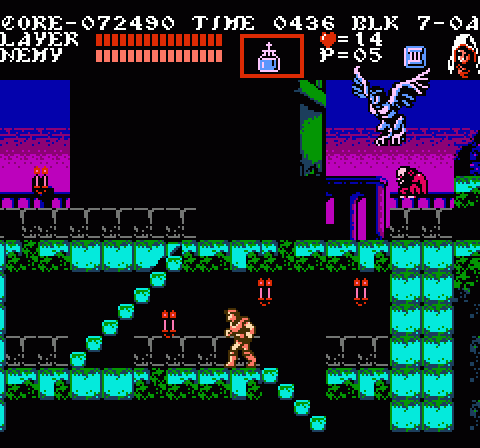
At this point you encounter a new yet familiar threat: Harpies that fly past and drop Flea Men. This is a reprise of the eagles that flew past as you traveled through the courtyard (or whatever) in the fourth stage of Castlevania, but it’s much trickier this time around as you’re forced to climb stairs to the level where the Flea Men bound. This gives the Harpies time to drop several of the little guys at you — and since the platform to which the Flea Men fall is in the upper half of the screen, they have less time to drop, which gives you less time to take them out while they’re in free-fall and have yet to go on the attack. As so often happens in Dracula’s Curse, you encounter a situation from the original Castlevania that’s been made considerably more dangerous thanks to the team’s evolved sense of deviousness and design.
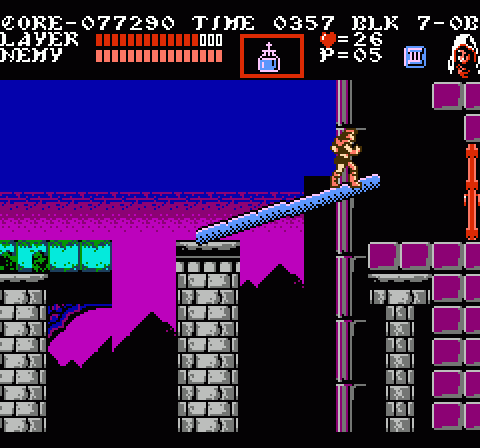
The second leg of the block is one-half durable enemies chucking projectiles (Axe Knights and Dragon Cannons), one half platforming challenges. The lower portion of Block 7-0B is patrolled by these familiar, dangerous foes, while the upper area forces you to navigate a series of those spinning platforms that appeared in the upper masts of the pirate ship. Again, you don’t have to fend off enemies here as you leap, but the jumps themselves are difficult enough that it doesn’t matter. The last jump in particular requires absolute pixel-precision as your footing drops beneath your weight — easy enough for Grant to manage, but a real nail-biter for anyone else.
In another of those nice architectural touches, the columns on both screens line up almost perfectly.
At Block 7-0C, you’ve truly reached the castle proper. The color palette changes, and the architecture takes on a more solid, stable appearance with fewer bridges and barely supported masonry. Once you cross the final bridge, you make your way down the castle’s outer wall to face the boss and enter the structure where Dracula waits.
In an unusual touch, you see what appears to be a rising or setting sun in the background as you trudge across the bridge. It’s hard to say exactly what the intention was with this besides a nice graphical touch; the game so far has transpired in the apparent darkness of night, and the final stages are similarly shrouded in nocturnal gloom. Then again, Symphony of the Night featured the moon in wildly different phases depending on where in the castle you looked at it, so I think the idea is that the heavens arrange themselves for maximum dramatic impact and you’re not meant to think too hard about it.
One new enemy appears here: Red Simon Wraiths. These are exactly as dangerous as standard Simon Wraiths, striking at you with the same reach as Trevor’s whip, but with the added danger of being immortal like Blood Skeletons.
And a final environmental hazard as you descend on the final approach: A strange instance of auto-scrolling downward. Dropping off the bottom of the screen is deadly as ever, but getting caught between a platform block and the top of the screen is equally fatal as well. Adding to the stress level, the blocks here crumble and disintegrate if you stand on them for a few seconds. It’s not a difficult sequence, but coming after so many nerve-wracking encounters, you can easily psyche yourself out and screw up. Worse, you might miss the subweapon here — a Boomerang for Trevor or lightning spell for Sypha — in which case you’re in deep trouble when you finally reach the boss.
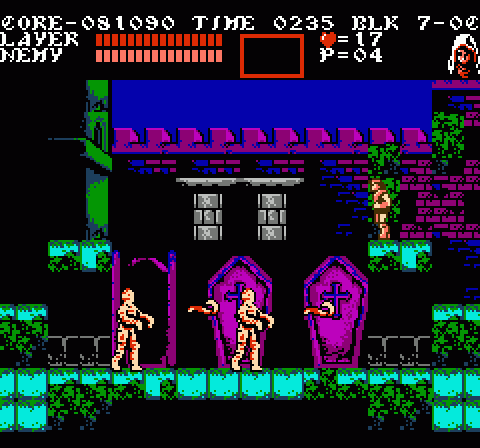
The last challenge before entering Castlevania’s grounds is the possession wraith that activates enemies in their coffins… but this time, there are three coffins, and the critters within are more aggressive than in previous encounters. The mummies in particular are just nasty: They fling far more wrappings than before, and they no longer stick to one side of the screen. One of them makes a beeline for the player, forcing you to jump up and out of the way… which in turn makes dropping back down into the fray very difficult, since the wrappings are flying fast and thick. The Boomerang proves invaluable here, destroying wrappings both high and low and also inflicting damage on both mummies in a single fling.
The second boss, the Cyclops is business as usual. Actually, he’s pretty trivial this time, since the arrangement of blocks here makes it easy to just jump over him on both sides of the screen.
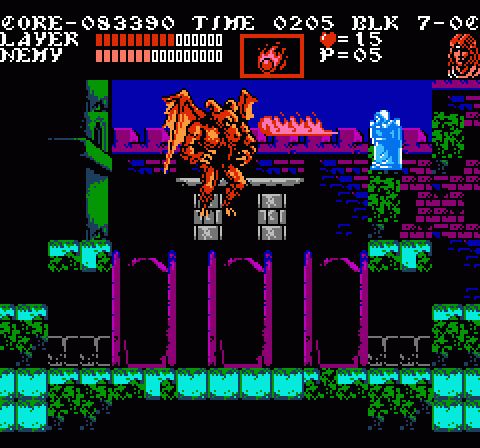
The third foe, however, is a real bastard: A huge gargoyle that behaves a lot like Dracula’s second form in the original Castlevania. It’s huge and leaps up, hovers briefly, and drops to your level. When near you, it spits triple fireballs that can be very difficult to defend against. To top it off, it has extremely high defense — enough so that Trevor’s best weapons do less than a point of damage per hit. The gargoyle might not be so difficult if it weren’t so durable, but the need to whittle it down for so long turns this into a battle of attrition.
Of course, if you use Sypha and grab the lightning spell on the way down the wall, this entire battle is a joke. You can stand safely out of the range of the mummies and cyclops and keep your distance from the gargoyle, blasting them indiscriminately with magic. This is a hell of a fight for Trevor or Grant, but there’s no reason to even take a point of damage with Sypha. Turns out Belnades is Romanian for “Easy Mode.”
And then, on to Castlevania itself. But first….
Actually, all the Cyclops fights are fairly easy once you realize they all have blocks placed to the side in such a way that, with a bit of patience, you can easily camp on the edges and crouch in waiting for when he inevitably lumbers over right into your whip/staff/knife/balls’ range.
It’s such a simple thing, but the map in CV games is a great storytelling mechanism, especially in 3 and 4. It gives the player a great sense of progression over a vast countryside and as noted, gives you peeks at areas you missed. The first time I played this game I thought the castle itself would be quick and rather short, like a Dr. Wily castle, because the game had already been so long and difficult. After a grueling trek through marshes and graveyards, the map switched over and I saw all the rooms of the castle. That’s when I knew the game meant business and I was in for even more devious challenges.
I like to think the legacy of CV2 is this addition of plowing through the country on your way to the castle itself, allowing you to see all the devastation that has been wrought by Dracula’s minions.
Which has, naturally, been almost completely ignored in more recent games in favor of LOOK AT OUR SEXY CASTLE ZEBES. Bringing it back was one of the reasons I liked Ecclesia so much.
Dude, you gotta dial it down. Seriously.
I know you’ve said in the past that you were only doing these for the first three Castlevanias, but you have to do one for Rondo. There’s so much stuff in that game!
I would hope he’d do a more general overview/layout of Symphony. Why are there fleamen in the library instead of mages?
Much like the skull knight and cyclops* before it, the gargoyle-demon thing also had a revival in Harmony of Dissonance, under the name Pazuzu. It’s more a reddish pink there, but the goat face, wings, and muscular body tone are too similar to just be a coincidence, especially with the other Castlevania III bosses present in the game.
I wonder…If you freeze the Blood Simon Wraith and bat it with the staff, does it shatter? I killed a regular blood skeleton that way while testing out Sypha yesterday.
*Yeah, I forgot to mention the cyclops got an HoDissonance makeover, too. Guy’s still got the hammer and blue skin but he’s taller, lankier, and faster.
Amazingly, Grant can kill those fuzzy balls by stabbing them about 50 times. They’re like the flying skulls in Zelda 2.
As much as I love pimping Grant, that’s actually true of everyone IIRC. I think they’re programmed with 255 HP or something.
Here is where I lose all memory of what comes after. Everything up to this point I remember clearly and have sailed through all the different paths multiple times, but it all ends in Castlevania proper. The thing is I have beaten Dracula’s Curse at least 4 times (once with each character and once just Trevor) but for the life of me, even after watching youtube playthroughs I can’t remember these last few levels.
How can you forget the next level? It’s so iconic!
Lilfut, yes, anybody could do it, but only Grant is fast enough to chip their HP to 0 with enough time left on the clock to finish the level. Hence the recommendation.