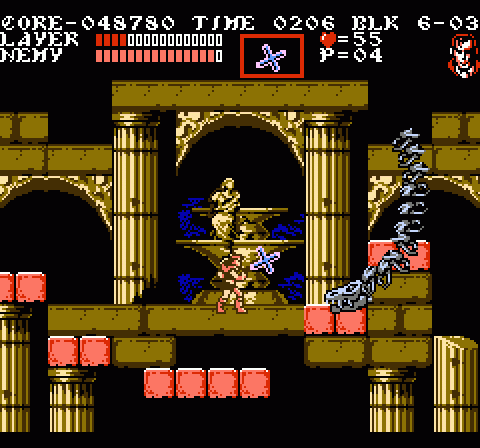
If you elected to take the lower route after recruiting (or not) Alucard, you’ll skip entirely over Block 5-07 and the castle foundations, instead traveling a roundabout course that takes you through a series of partially submerged Roman-era ruins at the outskirts of the castle.

The idea of crumbling ruins outside of and predating Dracula’s own castle seems like a nice nod to history (Romania having been conquered by the Roman Empire, hence the name), though I honestly don’t know enough about the region to say with any certainty that the Romans constructed their classical, Greek-inspired marble structures around such a relatively remote province. I’m guessing no, but maybe it doesn’t matter. More likely the developers were working from a different source of inspiration entirely:
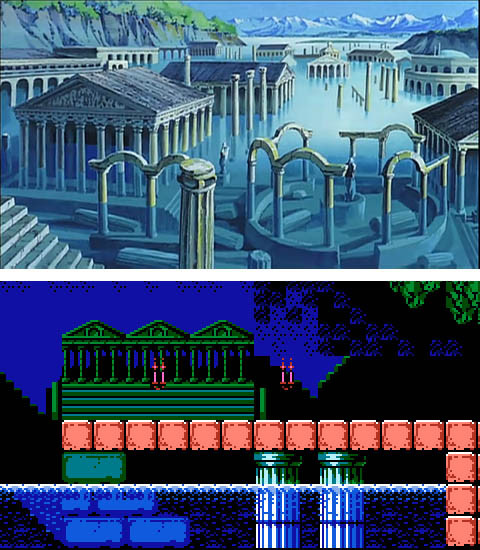
Hayao Miyazaki’s Lupin III: Castle of Cagliostro, to which the 8-bit Castlevania games bear some suspiciously potent similarities. The submerged Roman-era castle ruins could simply be a coincidence, but if you look back at some of the scenery in Block 1 you’ll notice that the town’s background featured a lot of those detached arches in the background. In any case, it lets the mind wander in interesting directions.
As for the stage itself, it’s a doozy — a harshly challenging stage with a completely unique format that will actively conspire to destroy your happiness. If ever a level would tempt you to abuse the HELP ME code (enter your name as HELP ME at the beginning of the game and you’ll have 10 lives per credit instead of three), this would be it.
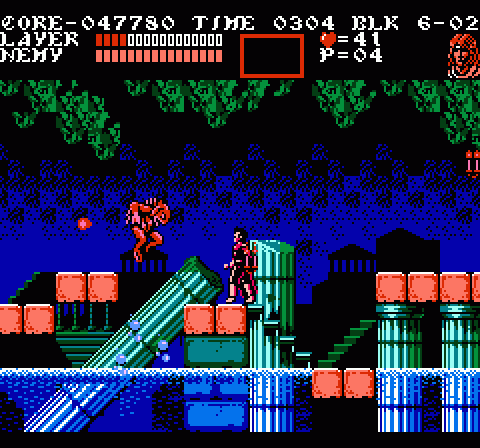
The theme of this level is Fish Men, bats, and Skeleton Dragons. It’s a grueling combination: Fish Men and bats spawn infinitely, so there’s never really a chance to stop and rest as a new threat is constantly popping up throughout the level, endlessly threatening to pop you backward into the water through the uneven surfaces… many of which force you to advance at a breathless pace lest they crumble beneath you. The few spots where you can catch a breather are guarded by Skeleton Dragons that bob and weave to evade your attacks while retorting with fireballs that sometimes fly just outside your attack range but still manage to intersect Trevor’s hit box.
Even skipping the action with Alucard in bat form (or trying to climb around hazards with Grant) can be more trouble than it’s worth, since the constant barrage of foes and projectiles span the entire height of the screen and are more likely than not to bump into your friend the bat.
After traversing entirely too much hazardous ground and fighting a bunch of Skeleton Dragons, you arrive at an area where the color scheme changes. This means “you have reached the boss.” Of course, you have to fight one more anchored dragon first, because nothing in this game can be that easy.
And it turns out all those Skeleton Dragons were building up to something: The granddaddy of the species, which appears from behind you and promptly pits you against one of the most difficult battles in the game.
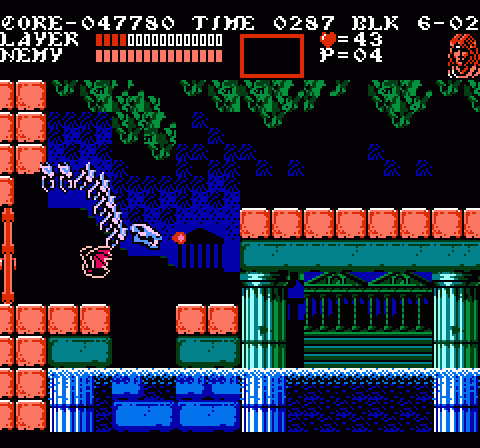
Unlike its lessers, the Skeleton Dragon King is not anchored to the scenery. Instead, it drifts freely about the arena, and until you learn how to lead it, its wide, arcing movements can be a source of intense frustration. There’s very little safe ground in this fight, and the Dragon King tends to follow you around. If you go about this battle wrong, you’re very likely to cause it to take a trajectory that causes it to pass through every single point of safe ground, cornering you before flinging you into a pit. With other bosses, you’ve had the option of leading them toward high ground then jumping over them to safety, but that’s not possible here; the Dragon King’s spine is so long that you can’t actually jump over it with either Grant or Trevor. If you act quickly enough, you can switch to Alucard’s bat form and dash to safety, but even that is no guarantee of success.
The trick to this battle is to come equipped with a good subweapon and learn how to manipulate the Dragon King’s movements. It’s kind of like being a matador, except you’re facing an undead creature of mythology over an open chasm rather than, you know, an angry cow. Ideally, you can get the Dragon King locked into a circular pattern in which it simply spins around you on the center platform, allowing you to smash its face (its only vulnerable point) repeatedly as it follows the same path to its doom. This tactic isn’t without its risks, though; if it decides to break from the loop, it’ll hit you right into the gaps on either side of the center space and you will totally die.
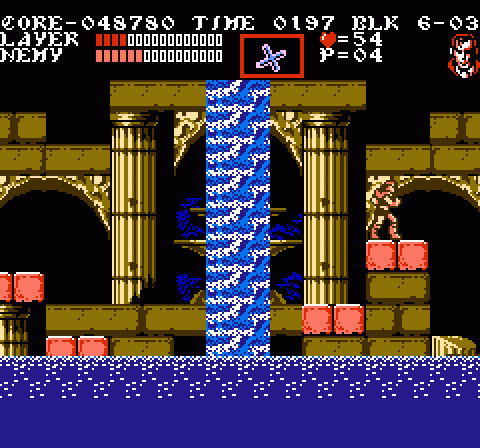
To make matters worse, you can’t actually defeat the Dragon King here. Once you reduce it to one-third of its health, it flees from battle, smashing through some sort of dam or aqueduct above in its hurry to preserve its un-life, which causes the entire stage to flood. You’re forced to escape the ruins before they become a watery grave.
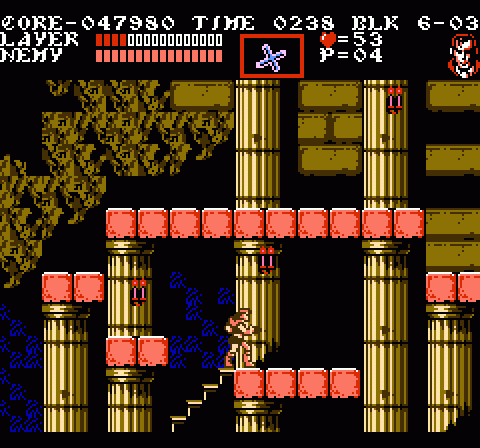
Block 6-04 may be the most anxiety-inducing stage in Castlevania III. You’re probably down a few lives after the incredibly difficult route to the Skeleton Dragon King followed by one of the trickiest fights in the game, the area is slowly but steadily flooding, bats and Fish Men are popping up all over the place, and the few platforms available to travel on begin to crumble as soon as you set foot on them.
There’s a particularly tricky part where you have to jump down from a high platform onto one below where Fish Men like to set up shop. It’s a small space you’re trying to reach, which means there’s very little margin for error in your landing if you want to hit whatever enemies have landed there without being flung back into the water. But you can’t afford to stand and wait for them to disappear, because the blocks above will only hold for a few seconds before crumbling away.
Really, the best course of action here is to make a mad dash for it and simply try to reach the end, collecting only what you absolutely need (namely, two whip upgrades for Trevor). The innate rhythms of Castlevania mean that if you simply go at the game’s natural pace you’ll stay ahead of the enemies, quite likely preventing any of them from appearing on that tricky lower platform midway through in the process. And if you get through quickly enough you might just have enough time to collect the 1UP at the far end of the stage.
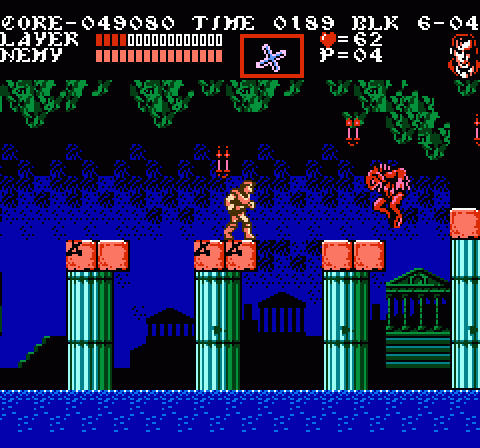
Climbing to the next screen mercifully counts as reaching a new stage; despite the lack of hard demarcation, the second portion of the post-boss escape registers as Block 6-05, meaning you don’t have to run the full escape gauntlet again if you die. That being said, this area offers more of the same, albeit in a less nerve-wracking form.
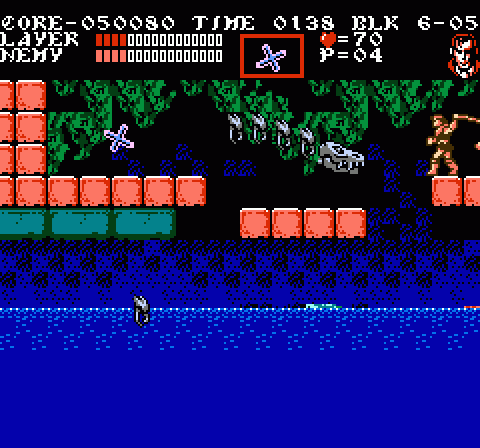
And, at the end, you face off against the remains of the boss. He’s much easier here, as you can stick to the left quite safely. Even though the Dragon King reappears from the left, the same momentary invulnerability that keeps you from inflicting damage on him as he comes onto the screen also keeps him from hurting you if your sprites overlap while he comes forth. He sheds vertebrae as you attack him, meaning he’s become shorter and therefore easier to avoid over the course of your two battles. The real challenge here is dusting him before the water rises and covers the middle platforms where the Stage Crystal appears to mark your victory.
Your reward for victory is the satisfaction of being able to breath easily after one of the most devastatingly difficult levels in the game. From here, the two paths of the Alucard route converge, leading you into the lower castle and within sight of the final common gauntlet shared by all paths through the game.
Fuck. This. Level. Ended my first run through the game.
This one’s not that bad! Just wait until Block 7!
From what I can tell from Google Image Search, there are plenty of Roman ruins throughout Romania. None of them seem to be underwater, though.
Well, sure. They were destroyed by an undead dragon in the 15th century.
Block 6, this friggin’ Block 6. There’s a jump at the start you have you to make pixel perfect or die (unless you cheese it with Grant or Al, which takes the usual two to three second alternate character loading times), there’s an army of skele-dragons out for your blood, and when you think you’re at the end after going through an already lengthy stage, the boss bails before you can kill it and you have more stage to go before you can finish it off. And now there’s fragile platforms. And it’s flooding. And you can’t see the mermen anymore.
I think I’ll just use the HELP ME cheat. It’s better than getting to the second half on my final life only for some fish face to pop out and knock me into the blue death, and I may even have better luck with the other routes, too.
It looks like the Cagliostro influence carried over to Dracula X
http://www.castlevaniadungeon.net/features/castles.html
(Also discusses the influence of many real castles on Castlevania)
I did not appreciate the degree to which the levels made physical sense. Brilliant.
Also, my 9-year-old self had no qualms with using HELP ME every time, and I still don’t. The game was still hard, just a little less frustrating.