After completing the Swamp Palace, or else just swiping the Glove and streaking past while flipping the finger to the palace’s true objective of returning the crystal to the statue at the end, you embark on what easily stands as one of Adventure of Link‘s strongest sequences: Death Mountain. The Death Mountain portion of the game works on multiple levels: It’s a lengthy, unstated side quest of sorts in which Link seeks a key item that exists entirely separately from the next palace; it does a great job of giving you a literally nonlinear approach to a single goal before opening the proverbial doors wide open for your next main objective; and it ties the game back to the original Legend of Zelda in a way that creates a profound sense of scale to the new quest.
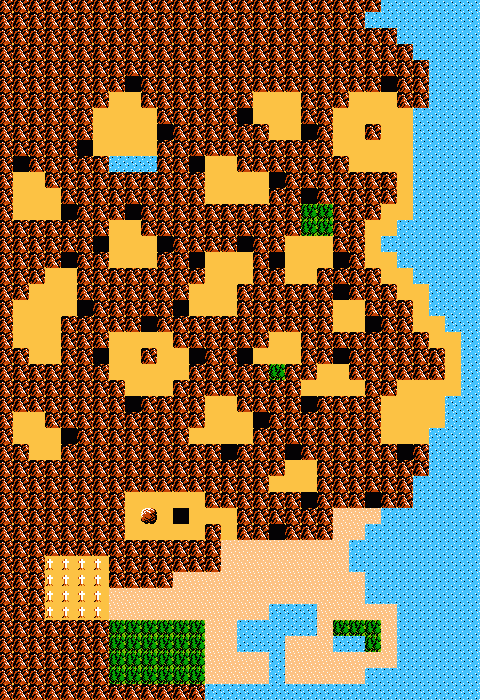
Yes, that’s the entirety of Zelda I‘s overworld there at the bottom. You see the central lake feeding into the sea, the forest and flatlands, the caves at the north edge of the region, and the graveyard to the west. And, of course, the remains of Spectacle Rock, with the cave replacing the easternmost of the two rocks resembling something of an underground palace at times. There is a slightly odd discontinuity in that the missing rock isn’t the one Link detonated in order to find Ganon in the previous game, but maybe it’s going on Second Quest logic. I dunno.
In any case, that isn’t important. Far more significant is precisely what this area signifies: The so-called “never-ending adventure” Link already mastered was just a drop in the bucket compared to the new quest. The previous dungeons are so insignificant they don’t even register here. The weird people living in the caves and the individual geography of each tile barely matter in the scope of Hyrule’s full scale.
It’s a pretty slick move, reducing the entirety of Zelda I to a tiny corner of the overworld map for the sequel. Not only does it communicate the above while grounding the adventure in the familiar, it also fleshes out the rest of this new map by association. You can map the original Zelda’s overworld layout to the area above and think on how dense with detail each of those tiles must be; thus, transitively, the entire world of Zelda II must be equally rich beneath those simple, blocky tiles. The adventure of Link simply glosses over everything but the truly essential — yet all sorts of interesting things must be happening beneath the surface.
Zelda II certainly wasn’t alone in pulling this little trick of creating referential scale. Dragon Quest II did the exact same thing, and Castlevania II did it as well to a certain degree — and all within a few months of one another. Dragon Quest II and Zelda II arrived within weeks of one another in Japan, so clearly Miyamoto and Horii’s teams arrived at the same conclusion independently. Was this something common in earlier adventure games or RPGs? I’ve never played Ultima II or, say, King’s Quest II, so I’m not sure where the trick’s roots lie. Nevertheless, it’s very interesting that the three NES games to make the most notable use of this technique all arrived at roughly the same time.
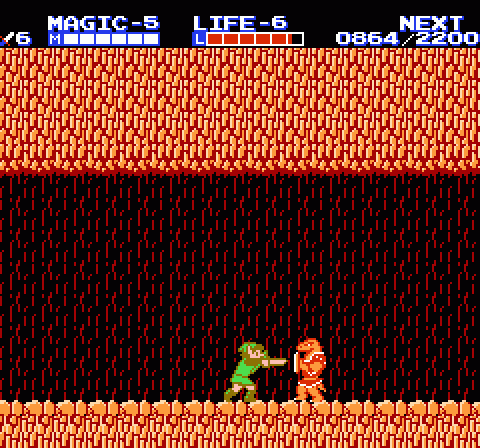
What this also reveals is that Death Mountain, intimidating as it may have been at the northern edge of The Legend of Zelda, stretched far beyond what Link explored the first time around. A vast network of interconnected caverns crosses through and beneath the upper reaches of the mountain, linking Zelda‘s otherwise isolated region with the greater bulk of Hyrule. Now, when you set out from Saria, you’re confronted with this underground maze and left to your own devices if you wish to map or conquer it.
The maze network is fairly complex, with some caverns offering as many as four different exits apiece, each of which leads to a different point on the map. You can get a sense of where you’re heading in general based on the direction you travel, but some caverns do cross over and eject you into an overworld spot you might not expect. Some caves lead to dead ends, while others take you in the opposite direction of the progress you’re trying to make.
On top of that, the caverns are tough, and Link still doesn’t have a means by which to restore life (unless you stand on an active overworld tile and get very lucky with a faerie encounter spawn). So you’re left to explore this area with the pittance of life and lives on a single continue; if you run out of lives here, it’s back to the palace from the beginning at the sleeping princess’ side. Meanwhile, the inhabitants of the caves range from lowly Bots and Keese to the new guys pictured above, the infuriating (and awkwardly named) Lizalfos.
Lizalfos run directly at you wielding a heavy axe. Unlike the swords of Stalfos and Ironknuckles or the spears of Moblins, Link’s shield can’t block an axe. This makes battling a Lizalfos dauntingly difficult at times, as they basically create an impenetrable wall of deadliness that you have to slip through in order to strike them — and their hides are thick enough that the sword beams you shoot at full health only push them back rather than harming them. The ones who throw their axes are even worse, as they can hit you at a distance and the rate of their axe-chucking perfectly matches Link’s brief window of mercy invincibility, meaning you can easily be stunlocked by these guys and never get a hit in edgewise.
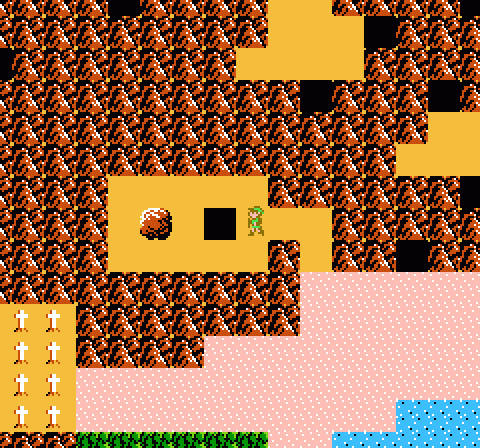
Once you do at last make your way through the cavern network, the only thing you can really do in your old stomping grounds is duck into Spectacle Rock. Inside waits the largest, most hazardous cavern yet — but your reward for surviving its perils is nothing less than the Hammer, an essential item for overworld traversal. The Hammer allows you to smash the boulders that appear here and there across the game’s map, opening new passages and revealing secrets. You can smash the other Spectacle Rock, for example, to reveal a small cavern containing a Magic Container. A blocked cave near the opening palace yields another Heart Container.
More importantly, though, the Hammer opens up shortcuts. By smashing certain boulders at key points, you can bypass the more laborious routes you’ve traveled thus far. You can almost completely bypass the Death Mountain cave network now, or reach the Swamp Palace from the opening area in a matter of seconds rather than traversing the cave with the high ledge. The irony here is that the Zelda I map area makes Hyrule seem far larger by comparison, yet the Hammer you acquire there makes Hyrule much smaller in a functional sense.
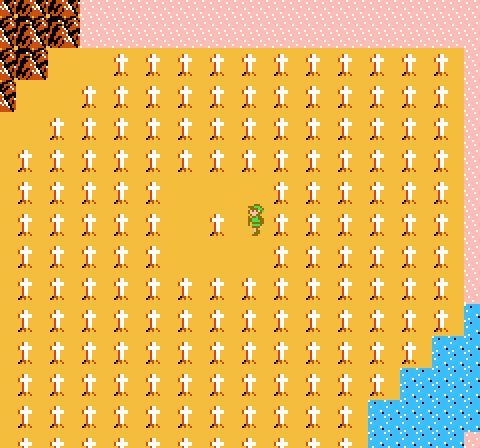
It also opens up multiple objectives: Some obvious, some less so. For example, there’s the King’s Tomb here standing alone amidst a vast cemetery; it’s incumbent on you to figure out what should be done here.
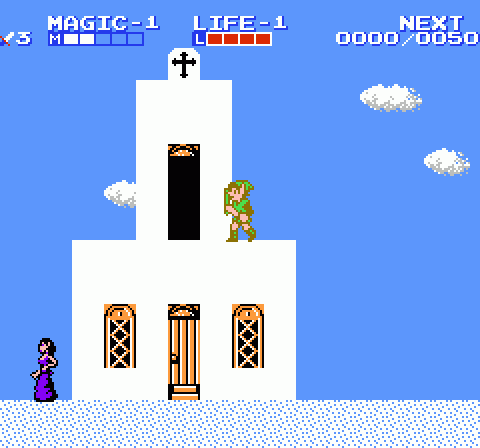
The town of Mido has a much more valuable secret to be uncovered. Use Jump magic to reach this beckoning door on the upper level of Mido’s church and you meet this guy….
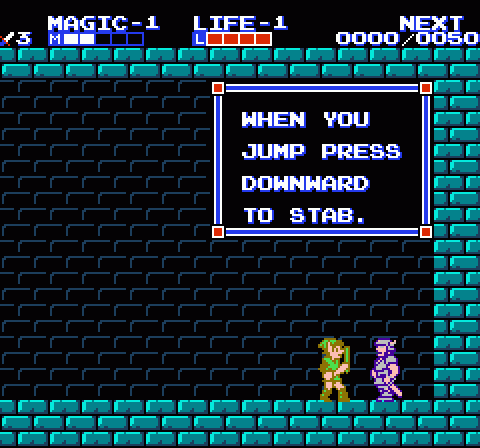
….who teaches you the most essential combat skill in the entire game.
There are quite a few other things to do once you have the Hammer; at this point Zelda II opens up somewhat after funneling you invisibly toward Spectacle Rock. And once you complete your next objective, it’ll open even further. While the game can at times be maddeningly opaque in its goals and requirements, on the whole it does a really solid job of creating finite spaces for exploration that then unlock larger areas to attack while giving you reason to revisit previously conquered sections of the game. This, of course, is a key principle of “metroidvania” games, but as you can see: Zelda II mastered this design technique long before either Castlevania or Metroid had sorted out how it should be done. This really was an amazing game.
The reduced scale predecessor is such an awesome trick. When I first saw it in both DQ2 and in Zelda II (admittedly probably in one of those Nintendo Power Player’s Guide hand-drawn walkthrough maps), I was blown away: all it took was a little bit of tile work to make the game seem so epic.
Wow. I never made the connection with Zelda 1’s overworld. Unless you’re paying attention, it just seems like any other desert / beach area of the game. I guess I just wrote it off as the geography being different but with similar location names as in other Zeldas.
I do think Death Mountain is one of the most memorable sequences in the game (along with the path to the Great Palace and the Great Palace itself), and the point where many people gave up on the game. It definitely feels like you’re making a harrowing trip through the mines of Moria. I guess that makes the red axe-throwers the balrog.
Wow! This is the first time I noticed that similarity. When did you first notice it? (Or if you didn’t notice it on your own, where and when did somebody point it out to you?) It certainly would be amazing if the entirety of Zelda 2 was dozens of times larger than Zelda 1, but for that to be true then each side-view area would have to be dozens of times larger. It’s kind of weird thinking that even the side view areas are just representational and symbolic.
Whoa. I never really noticed that. Of course, I played Zelda II first, so that may be why I missed it, but it’s an impressive revelation nonetheless.
Just out of curiosity, shouldn’t you have the life spell for Death Mountain? I think you get it in Saria, and it’s the only way I could ever have hoped to survive the brutality of those caverns.
(That’s no Lizalfos, son. What Death Mountain’s got is a Daira.)
Don’t blame me, blame those danged Zelda wikis.
And this is why i love zelda 2 so much. that immense sense of scale and purpose, and the feeling of exploration is unmatched in any of the other zeldas i’ve played.
I started replaying this and just learned something I bet nobody else knows: If you open a locked door the same instant you get enough experience for an upgrade, the door makes the unlock sound four times, like a boss dying.
Yessss, I love this part of the game so much. As a kid, my aunt owned this game and I would only get to play it when she visited. I’d always start from the beginning and try to get the hammer before she’d leave. It feels so grand compared to anything else in the game.
OMG
OMG OMG
I never, ever noticed or knew about this.
I’ve been saying for many years that this game is under-rated. You’re doing a great service to the uninformed people of this land by playing and writing about it.
Sarge is right. You can pick up the Life spell in Saria. Of course at this stage in the game it completely wipes out your magic bar to cast it.
I’m really surprised this is such a revelation to people, but hey!
Those who don’t know this obviously didn’t spend every night of their childhoods re-reading the current issue of Nintendo Power.
Head asplode (was reading RUN Magazine at the time instead of Nintendo Power)
This has long been one of my favorite and most disappointing parts of Zelda II.
Favorite because it made the scale so grand, of course; basically everything you describe above.
Disappointing because Nintendo hasn’t done a damn thing with any of it since; near as I can tell, every Zelda game to take place in Hyrule since has done so in some variation of the Death Mountain Area here. While those have indeed yielded some good games, it nonetheless pains me to see such a vast world of potential be squandered for decades.