Fun fact: According to my in-game clock, the content covered in the previous four entries of this series on Metroid Fusion comprise the first eight minutes of the game. That’s ever the way of well-made games, though; they tend to be dense with mechanical information and ideas in the opening moments as the designers lay out the rules and workings of the adventure ahead.

Observant players can already get a taste of the backtracking mechanics in Fusion once they’ve acquired the Morph Ball power: The lab zone’s main hub had a single inaccessible chamber that can only be entered by rolling into it. Your reward is another missile upgrade — a nice but inessential reward for taking the time to search.
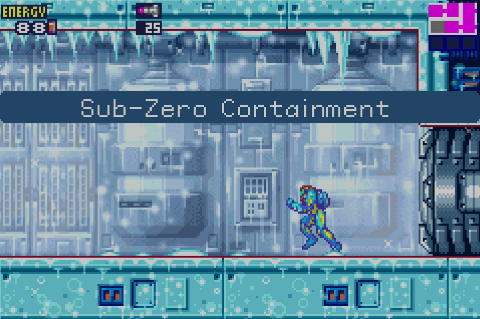
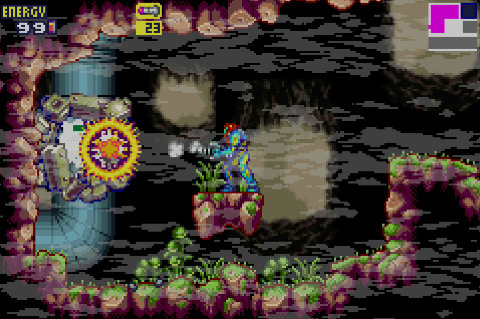
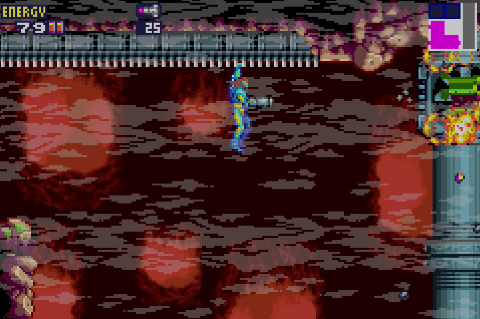
For the more adventurous, there’s the Sub-Zero Containment at the bottom of the map. You’re able to open this now that destroying the Arachnus parasite has restored power to the area, but the moment you step into it Samus begins to bleed health. Her metroid-enhanced DNA renders her vulnerable to cold — an important game mechanic, eventually, though here it simply serves as a warning not to linger in this room. However, the health drain happens slowly enough that you might feel compelled to take a chance and see what you can find here…
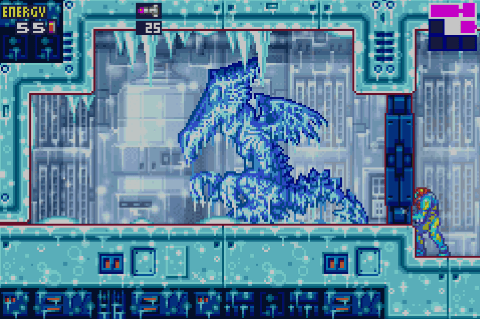
Ah. Well, there’s that. Scientists just can’t resist the temptation to put dead villains on ice. First Hitler, now Ridley. He’s frozen solid and secure behind an impenetrable wall, though, so you can’t snap off his brittle head with a well-placed kick, unfortunately.
Newcomers to the series might not get the import of this particular scene, but this room is still great — it demonstrates one of Samus’ weaknesses while teasing the possibility that there could be something nasty to deal with in the future. And it’s not compulsory, so its discovery is left to player discretion.
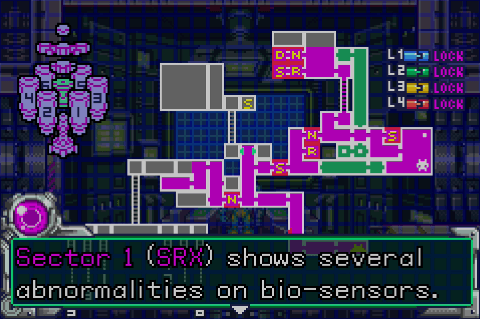
But of course there’s only so much you can do before the computer dictates you next move, giving you an explicit objective and revealing the entire map of one of the space station’s six sectors.

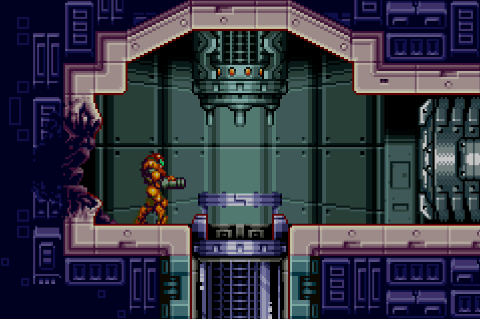
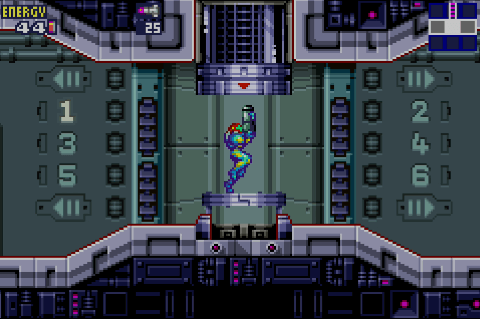
There’s nothing else to accomplish or find in the research lab, so it’s down the elevator for now.
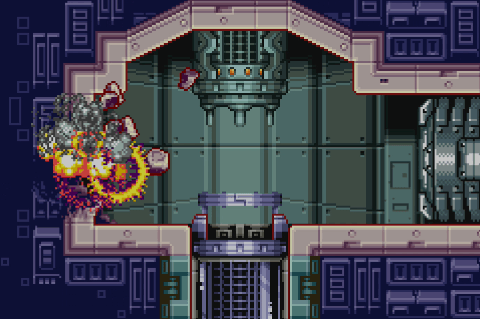
Which proves to be a one-way trip, since your descent is immediately followed by a massive explosion that shuts down the elevator.
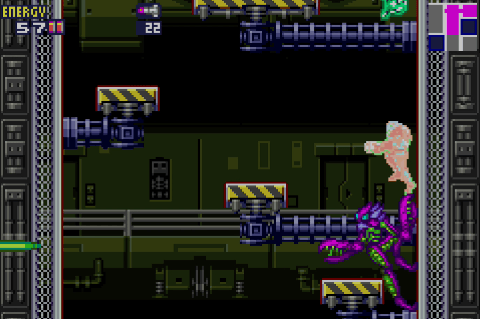
The explosion, it turns out, was caused by… Samus. Pre-X Samus, standing upright and holding her arm cannon the old-fashioned way.

She (?) breaks the fourth wall and turns to face the camera…
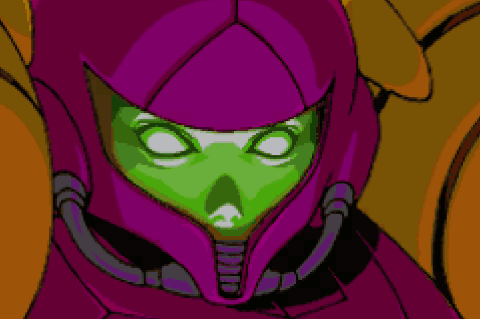
…revealing the face of some sort of Samus-like monster.
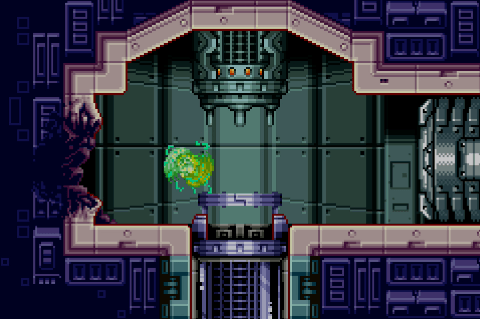
This fake Samus takes a flying leap over the elevator shaft, revealing the fact that it possesses the Screw Attack…
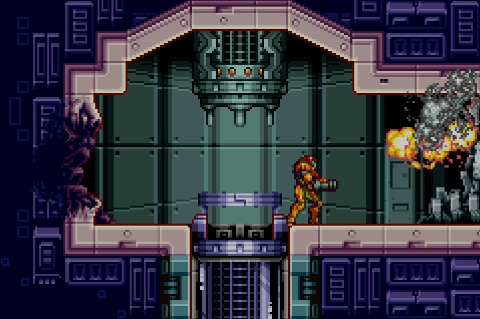
…then switches to Super Missiles and blows open the hatch to the next area.
So, basically, not only is Samus devastatingly weak now, there’s an imposter walking around the station sporting all of her old powers, cutting a swath of destruction in its path. While Fusion‘s tendency to shut doors behind the player and cut them off from the option to backtrack remains a point of contention for many fans of the series, this instance at least works incredibly well. You can’t go back because some sort of imitation Samus is smashing up the station; even if you could go back, you clearly wouldn’t last long, armed with a single Energy Tank and two dozens missiles.
The elevator shuts down once you reach your destination, and the shaft back to the main deck is too high for you to wall jump up. So you’re stuck here in this hub, which leads to the six different sectors of the station.
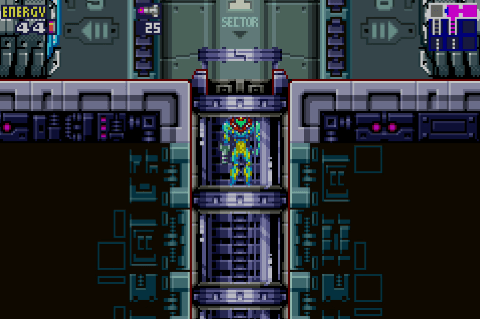
Literally all you can do here is descend to Sector 1, following Adam’s orders like a good little soldier.
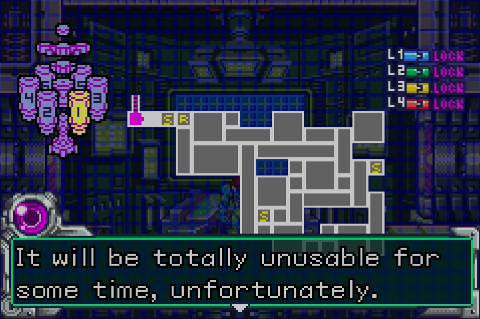
Adam gives Samus the bad news about the elevator, though the player has a somewhat more omniscient perspective than the characters, so this simply reinforces what you (the player) already know. The entirety of the Sector 1 map unfurls here, leaving few surprises for this leg of the trip.
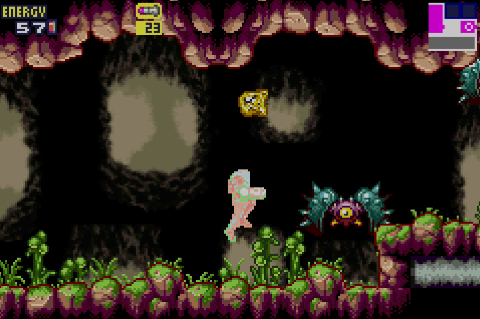
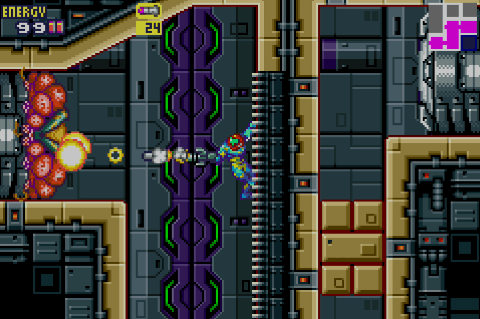
Which isn’t to say you won’t experience anything new here: As soon as you exit the Navigation Room, you meet a new kind of X — a sort of proto-boss core. Individual Xs agglomerate into hard-shelled blobs that cling to Samus in an almost metroid-like fashion. You can destroy them, but the small parasites will continue to zip into the room and fuse together ad infinitum.
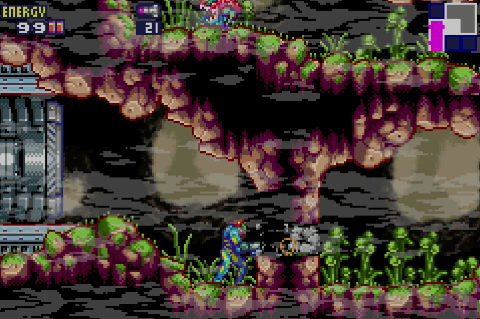
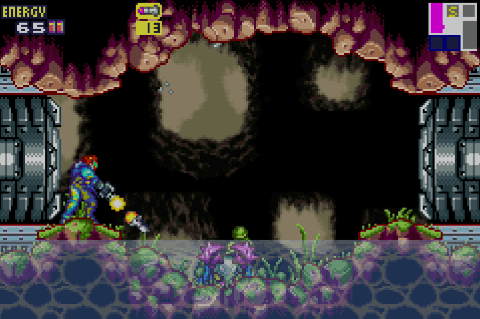
The task for this sector is to destroy the parasites clogging up the air filtration system. While it’s not a particularly challenging task, it does serve as a sort of progressive tutorial for many of Samus’ new combat capabilities. The filter “barnacles” can be cleared away with a few missiles easily enough, but each one requires a slightly different technique. The first (and it is the first; this sequence is entirely linear) can be killed by simply standing and blasting it.
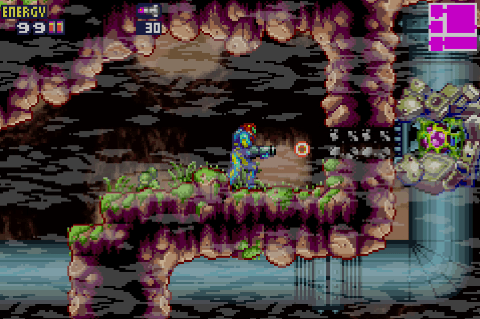
In between tasks, you can enjoy seeing the world of Metroid II and its monsters rendered in 32-bit color. The X-creatures use more varied attacks than they did in their first appearance. Interestingly, the X parasites copy some wildlife completely (meaning that they’re destroyed entirely) while others are merely possessed and become passive elements of the environment once the parasite is destroyed.
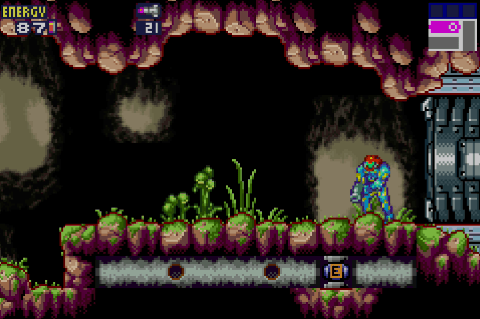
A second Energy Tank sits ready to be collected in the floor, accessible but not available for effortless pickup like the first was. You need to puzzle this one out. The solution is “the grey cylinder encasing it is a tube that you can access and roll through by shooting the stone next to it,” so it’s not exactly rocket science. But it’s a step toward more bedeviling puzzles later on.
The room immediately after the Energy Tank puts an unavoidable destructible wall immediately in your path, reminding you that some walls can be whittled away with cannon fire. It’s also a gentle nudge that maybe you should go back and try doing something like this to pick up that Energy Tank, if you hadn’t already figured it out.

The second “barnacle” can only be destroyed by aiming upward.
Station break! The simulation of SR388 is briefly interrupted by a service shaft between the environmental sim chambers, occupied by a small army of Space Pirates. Their presence acts as sign that the X contamination has spread beyond the zones reproducing SR388, and beyond the content bounds of Metroid II.
This small room filled with water contains a single enemy, but more importantly it introduces the physics of water — running through the submerged depression creates a drag that slows Samus’ movements. This works exactly as it did in Super Metroid, with her underwater movements basically being identical to movement on dry land at 50% speed, and her jump height after breaking the surface of the water being greatly reduced.
Next up: Overhead ladders, another new feature in Fusion.
And a “barnacle” that can only be destroyed by perching on a vertical ladder and firing away from the wall, a new addition to Samus’ skill set, required here for the first time.
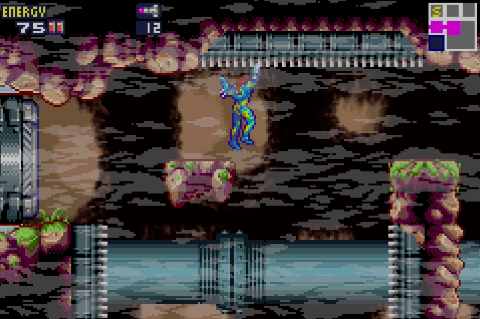
Samus can also attack while hanging from an overhead ladder, as the process of destroying the fourth air purification parasite reveals.

An optional room, and currently a dead end, grants you a missile expansion for climbing out over this lake of magma. Like cold air, magma saps Samus’ health steadily. Unlike cold air, though, it works far more quickly — and moving around while in the molten liquid functionally works the same as water. So Samus is moving half as fast but losing energy twice as quickly, meaning that attempting to venture beyond this missile expansion (even with a full 299 points of health) is a guaranteed way to die in about 10 seconds flat — not nearly enough time to do any exploration.
Look at this journey up Bloom’s Taxonomy. Already we have synthesis happening: Samus has fought one of those boss door eye things, and she’s engaged in combat while hanging from a ladder, and here she is doing both at once.
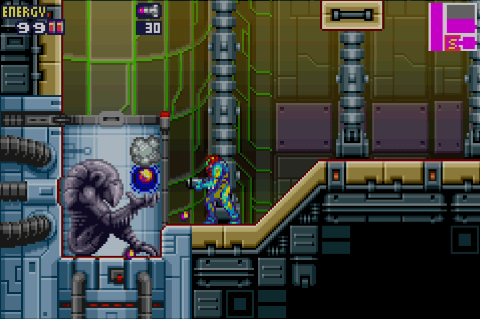
Inside the boss room, however, there’s no boss — just a Chozo statue holding a power-up.

Before you can collect the power-up, however, the entire statue transforms into an advanced X parasite core. This raises a lot of questions! Are Chozo statutes actually alive? Sure, there were the Torizo statues in Super Metroid, but apparently they were alive rather than just sentry robots? That’s pretty weird! Does that mean the decapitated statue at the end of Metroid II was straight-up murdered?
It’s interesting to observe the little narrative design choices happening in these sequels, because the designers often recontextualize the older games with non-incidental choices. I mean, this Chozo statue occupies what appears to be a stasis chamber consisting of unique sprite tiles, so there’s something happening here. But despite all the surface exposition about Samus’ mission, much of the underlying Metroid universe mythos, the deeper backstory, is never addressed in text. Even as the game leaves nothing about your mission to the imagination, there’s plenty for the invested fan to chew on.
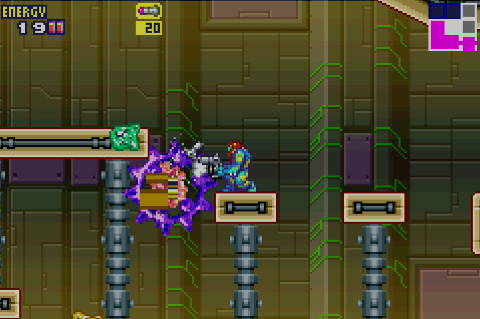
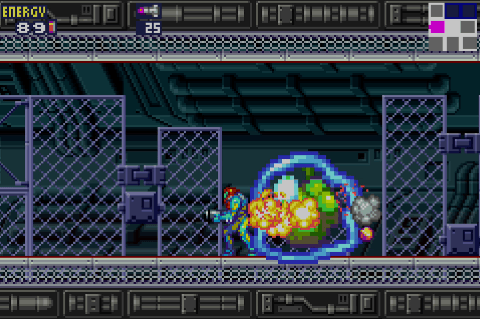
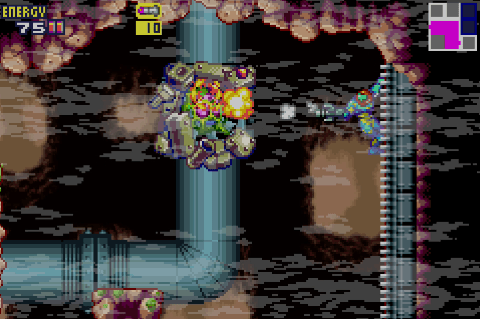
Anyway, the X core here is more like the ones Samus has to deal with throughout the rest of the game. Where the first one simply allowed you to pepper it with missiles, this core has a much more durable shell. You can see Samus’ missiles deflecting harmlessly away here. In order to damage this core, you need to wait until it generates an orifice of sorts, which centers on Samus’ location (tracking her as she moves) while it charges up an energy blast. It’s only vulnerable in this opening for a few seconds at a time, and you have to strike quickly in order to avoid being hit by the core’s own projectile attack.
To balance this battle’s high difficulty and more exacting rules, this core moves more slowly than the first and occupies a much larger room than Arachnus did. You have plenty of freedom to move around and lead the core back and forth, with high and low platform routes to enable you to move around without it drifting into you.
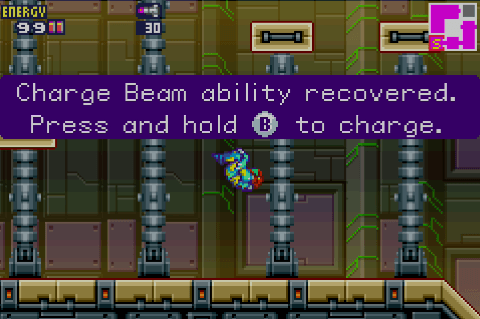
Upon its defeat, the core restores Samus’ Charge Beam. This allows you to fire a powerful blast of energy by charging up, like the X core did, but it also doubles the strength of Samus’ basic attack.
However, you don’t actually need the Charge Beam to take out the last air filtration parasite, making for something of an anticlimax.
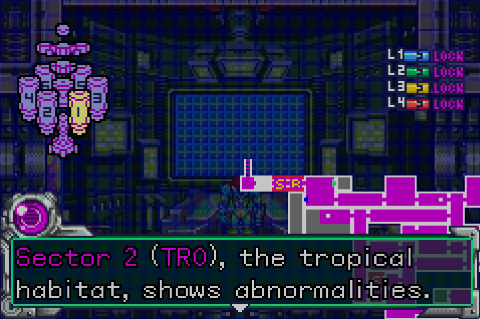
No worries, though, because Samus doesn’t get coffee breaks. It’s on to Sector 2 — and you can’t actually leave Sector 1 until you receive your briefing, since Adam locks the exit door on you. What a jerk.
Also, for those keeping track, this entry’s time took us from the 8-minute to 24-minute mark. It’s decompressing!
I love how the infected air filter devices have a Gamecube built in. Nice little Easter Egg for the observant gamer.
I always wondered about that Chozo statue. The one in Super Metroid struck me as a robot of sorts; I never thought of it as alive or anything. And later in the game, you find out that the X aren’t limited to purely biological interactions (Varia), although they don’t infect anything that doesn’t have some kind of biological component.
This is one of the more fun areas in the game to screw around in. The classic Metroid II enemies really are nice to look at when you’re not limited to 4 shades of gray and pea green.
“The X-creatures use more varied attacks than they did in their first appearance. ”
While this is a common trend over returning enemies (desgeega -like throw spikes so you dont simply engage them from far away and are force to approach from the air towards melee range), it should be noted that most metroid 2 fauna was just minding their business and not being actively hostle towards you, while their x-clones are far more aggressive, like the plate faced guys no ramming at you, the side shelled guys dropping to the ground, and so on.
I like that Fusion forces the Charge Beam on you. The Charge Beam can be used to hurt enemies that can otherwise only be hurt by missiles, so this effectively prevents you from being unarmed against any bosses to come. Zero Mission let you skip it (as part of its intriguing “Clear the game with <=15% completion" challenge) but you still had to kill the boss, so it was just hanging in the air waiting for normal players to grab it.
Nice observation!