On to Zelda‘s third dungeon, assuming you’re going in the order God intended and not sequence-breaking. Which you can totally do up until this point.
Not that sequence-breaking is necessarily a good idea for the third dungeon, Manji, given that it’s specifically designed around two weapons: The White Sword and the Bombs.
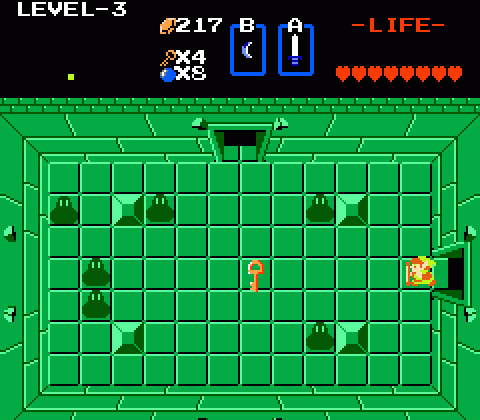
The level nudges you more and more overtly to find the White Sword — subtly at first, but eventually outright asking you, “Hey, did you find the White Sword?” You need to have five hearts to equip the White Sword, which means that if you’ve been clearing the dungeons in order, you can upgrade that pitiful little Wooden Sword to something twice as powerful even if you haven’t found any free-range Heart Containers to beef up your health.
It’s interesting to see how the game hints at this. When you first enter Manji, the enemies actually seem easier than those of Moon. The first few rooms are filled with Zols, Zelda‘s equivalent of Slimes. You can take them down pretty easily, they move slowly, and they have no particular attacks to speak of. OK, but here’s the thing: If you hit a Zol with the Wooden Sword, it splits into two Gels. When you kill the Gels, you get bupkis. But if you hit a Zol with the White Sword, it’s instantly defeated and usually leaves behind some Rupees. So, if you go in with the weaker sword, you’ll have a tougher fight and get less for it. March ahead with the better weapon, on the other hand, and the dungeon is not only easier but more rewarding as well.
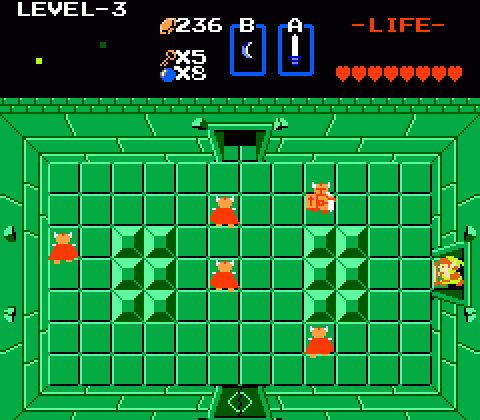
A little ways in, Manji starts hinting at the need for the White Sword a little more urgently. Here, the deadly Darknuts make their debut. Darknuts are the worst. They move about erratically, hit hard, and cannot be injured from the front. You have to hit a Darknut from behind or from the side to damage it, and they take quite a beating before they go down. The Boomerang does not stun them. A Darknut can absorb two hits of the White Sword, or four from the Wooden Sword. You really don’t want to be in a room full of deadly, unpredictable, 25% invincible enemies when it takes you four hits to kill them. “Get the White Sword!” the game urges.
The other tactic for beating a Darknut, of course, it to drop a Bomb. A single Bomb blast will destroy a Red Darknut outright if you manage to strike from behind, and even if its shield absorbs the blast you’ll still inflict some damage.
Bombs come heavily into play this dungeon. Destructible walls appear frequently (you can even bomb your way into the boss’ lair), Darknuts are susceptible to their power, and the boss itself is most easily dealt with through bombing.
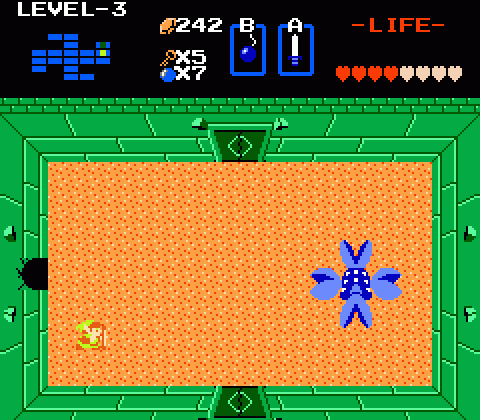
Manhandla (uh, that name) is basically four Piranha Plants fastened to a spike bracelet, and it soaks up sword hits. A single Bomb blast will destroy any one of its heads, and a really well-placed Bomb will wipe out all four at once. It’s pretty rad!
Interestingly, you can make more or less a beeline for the boss and clear this dungeon in a matter of moments. There’s a path you can bomb to create a small shortcut, and the game blatantly hints at its presence (even though it never overtly tells you that bombing walls can create doors). A room full of Darknuts, once defeated, will yield a Bomb as your prize, spawning it right next to a blank wall where a hole is just waiting to be blasted open. It’s about as close as Zelda gets to flat-out telling you, “Hey! Blow up this wall!”
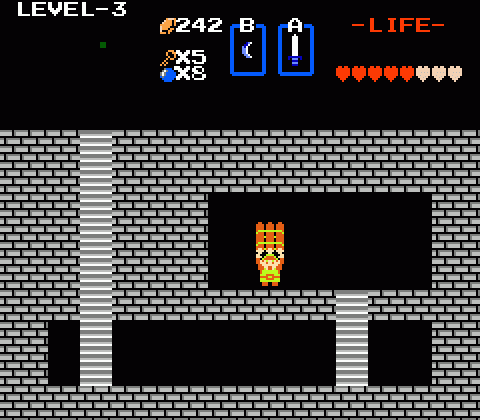
The boss resides in the northeast corner of Manji, and it’s pretty easy to take down. Meanwhile, the southwest corner of the dungeon is crazy hard — there’s a room with something like eight Darknuts in it! — which is your hint that the real objective this time around is located far from Manhandla. It’s all well and good to get your Triforce nugget, but what you really want is the raft. You can’t advance any further into the game without it.
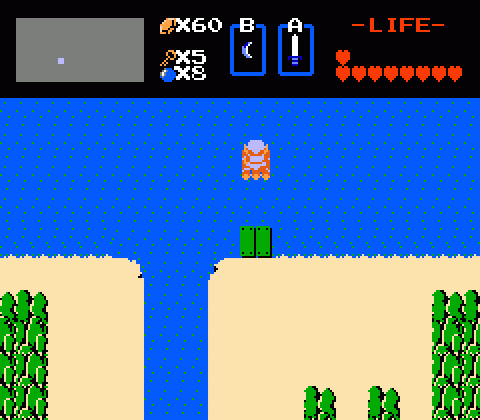
See? You have to sail to the next dungeon on the raft. And there’s a key item in dungeon four that you’ll need to get through just about every other dungeon in the game. This is pretty much the choke point for progress. You don’t get the Raft, you can’t get the Ladder. You don’t get the Ladder, you’re pretty much boned, yo.
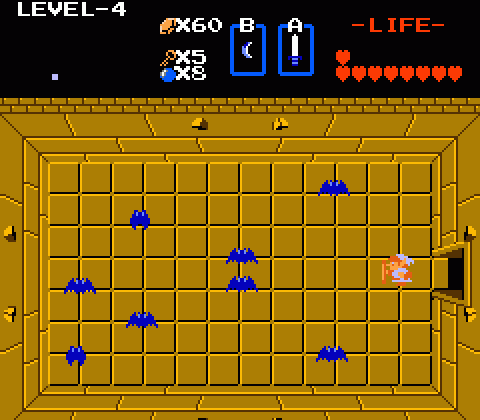
Dungeon four, Snake, revolves around two key elements: Demons and darkness. The demons take the form of Vires, which are big bounding monsters that look very silly but are a real pain in the butt to fight. The White Sword causes them to split into a pair of orange bats, and — unlike every other enemy in the game — they reappear as soon you return to the room. (Other bad guys respawn on something of a timer, allowing you to explore a bit before showing up again.) In almost every case, it’s better just to dash through any room that they appear in. Because they split into smaller creatures when struck, they (like Zols) don’t offer any loot drops when you mop up their spawn.
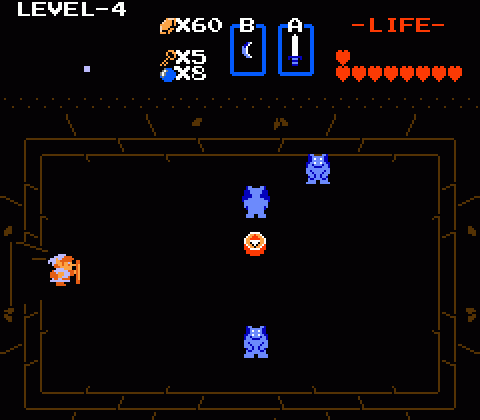
That’s more easily said than done, though; about half the rooms in Snake are soaked in darkness. At this point you really need to have invested in the Blue Candle, which will illuminate a room until you leave. The Candle’s flame fires slightly ahead of Link and burns there for a moment, which makes it kind of useful against Vires: If you do it right, you can damage a Vire and take out its Keese spawn with a single use of the Candle.
The first few dark rooms you encounter are pretty easy to navigate. They either have no permanent obstacles, or else there’s just a block or two in the middle of the room. Before long, however, the room layouts become fairly convoluted — more or less impossible to negotiate safely. Some recurring floor patterns debut here, such as the narrow paths over water and the diagonal block-divided lines.
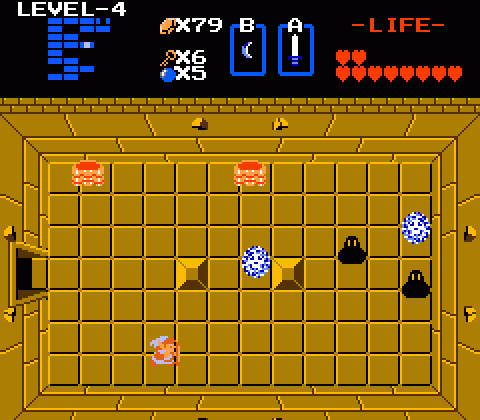
Also here is the part at which you realize Nintendo isn’t as nice as they seem but rather that they hate you and want to torture you. The things that look like stacks of steak are Like-Like, which take a ton of hits to defeat and dissolve Link’s fancy shield if they manage to bump into you. No problem, except for the presence of the other new enemy: Bubbles (also, apparently, colloquially known as AIDS viruses), which cause Link to momentarily lose the ability to swing his sword. Usually, that’s just long enough to allow a Like-Like to hop on top of you and destroy your hard-earned Magic Shield, which costs a minimum of 90 Rupees to replace. This room sucks, and it’s only the first of many.
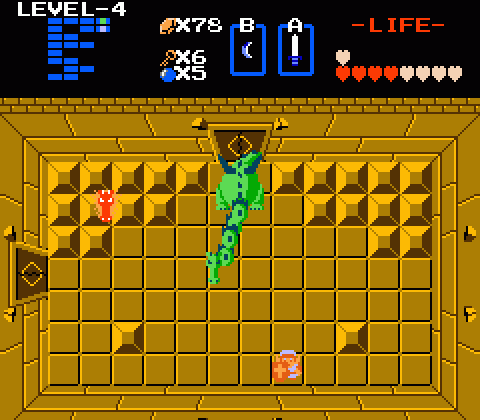
The boss here is a two-headed Gleeok, which peppers you with fireballs you can’t block anyway, so I guess it doesn’t matter if a Like-Like gets you or not. Unless you’re going for a low-health run, you can pretty much win by standing in place and stabbing like hell. When a head is defeated it detaches and floats around the room, but otherwise this guy’s pretty easy.
Besides being a great tool overall, Like Likes are one of the biggest reasons why the Magic Boomerang’s my preferred side arm in The Legend of Zelda. Some later versions of them in the series are much nastier to deal with, but here you can boomerang smack ’em to keep them at bay while picking them off one by one or waiting for your sword button to work again.
The raft itself is the initial example of a Zelda tool that’s just a funny shaped key for a funny shaped door, in this case being used at all of two docks in the game world to automatically travel to the fourth dungeon and an Idiot Test* room. It has no use beyond that, but the Ladder in Level-4 is by far one of the most vital tools for progression.
* The “Pick any one you like” with the Heart Container and 2nd Potion, of course. One permanently increases your life by one heart; the other is just two full life restores that can be bought from the old lady once you give her the letter from the old man in the mountains.
For a long time I believed the stepladder should be brought back to the Zelda series, but then I realized that the winged boots in Ocarina were an update of that same idea.
Does anyone else think that the level 4 map looks like E.T.?
I’m glad you mentioned Piranha Plants when talking about Manhandla, because I only found out a few days ago through Legends of Localization that the Japanese manual explicitly refers to it as one.
Level 4 was the first mean dungeon in the game. Not just for the Like-likes or Bubbles, but also that the Vires were introduced before you could obtain the Master Sword, depriving you of the ability to kill them outright for items without resorting to bombs.
Missed the Golvellius writeup. Boo. Fun take on the formula, but also lacks 8 directional movement, and the sidescrolling segments were oddly limited not only to forward scrolling, but facing. Would like a remake. At least it’s back on iOS.
Should I be worried that your second paragraph reads like an excerpt from Rorschach’s journal?
Does anyone else think that, in retrospect, the fact that the raft can’t do what the ladder can seem silly? I always thought that the raft should be able to get Link across a single water tile just fine, raft-dock-be-damned.
Though, I just realized that maybe LoZ is intending the ladder to be used for climbing up to a higher area, like maybe the other side of a river always happens to be higher/lower than the other side. Also, there’s the possibility that LoZ intends for all rivers to be like a very deep ditch that would make raft use impractical or even impossible.
Ah, Gleeok and Manhandla… two of my favorites. Darknuts, too- I love fighting those guys.
I also dig the White Sword, for some reason… I kind of miss having the “intermediate” swords instead of just your starting sword and the many forms of the Master Sword, though Twilight Princess did deliver on that…
I thought it was cool that they crafted an origin for the White Sword to make it seem more significant and powerful in The Minish Cap, but unfortunately, Zelda Wikis make it sound like that isn’t quite the case…
Then again, Zelda timeline, lol, etc.