You know what I miss about games of late? That sense of finality, of crossing some threshold of no return. Say what you will about the ending of Mass Effect 3, but for me its most disappointing aspect was that it lacked a sense of trepidation. You hit a certain point after which you had no choice but to march in a line straight ahead so the designers could tell their story. A forced march can be stressful, but it lacks that certain stomach-churning sense of player agency — it’s “Well, here’s the end,” as opposed to, “Oh god, am I ready to do this?”
Zelda II has that tension; indeed, it drips with it. Once you plunge into the lava shaft, you’ve arrived at the end of the game. Yet you still have some freedom of choice, some personal discretion about when to initiate the final battle. The question is, when will you work up the courage to face it? The ultimate showdown waits to your right, but you can instead go left into a room of stone matrices where the bricks contain a lottery: Will they drop a couple of full magic refills to top you off for the final battle, or will they instead generate Red Fokkas to put you into an even worse state than when you arrived?
I like the uncertainty of this situation, the way the designers give you fairly even odds of things going horribly wrong here at the very end. It forces you to take a chance. Then again, I can also see where you can make a case for it being an instance of hostile design. The Great Palace is so daunting, so huge, so wearing on your resources, fraught with so many perils that can bring a strong run to an unceremonious end, that attempting to top off your magic in order to have sufficient MP to use a costly, mandatory spell against the boss only to get a face full of deadly monster seems rather unsporting.
Zelda II is a game about hard choices, particularly in the final Palace. For example, there’s a 1UP hidden along the shorter route to the final showdown. But you can only collect a 1UP once ever, and then it’s gone for all subsequent attempts. Once you take the 1UP, you’ve used your one shot to battle through the Great Palace with an extra chance unless you reset your NES… but if you do that, you have to fight your way back to the Palace again. Zelda II offers stakes. It demands commitment to your choices.
And that holds true for the final battle itself. The fight takes place across two phases, the mysterious Thunderbird and Link’s vicious Shadow. You can duck out between the phases and possibly undertake the magic refill lottery if you like, but you have to complete both phases in a single life. If you die against the second form, you have to take on the first one again — despite the fact that they appear to be two separate and distinct entities.
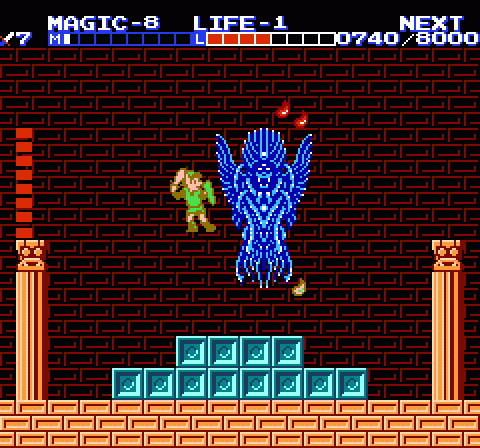
So, the question becomes how much magic to invest into your fight against the Thunderbird. You can take a chance afterwards that you’ll get a refill rather than a fatal Fokka stab, but there are no guarantees. The Thunderbird is invulnerable until you use the Thunder spell, which burns half your magic meter if you’re at Magic level 8 and have found all four Magic Containers. You really need to cast Jump to be able to reach the small, vulnerable gem above its face, Shield to dull the potency of its spew of flames, and Reflect the block as many flame projectiles as possible. If you choose any one of these support spells, you’ll no longer have sufficient magic to cast Life if you take a beating. If you cast all three, you won’t have any magic left over at all against the Shadow.
So what do you do? Despite being a brief, sudden encounter, the Thunderbird demands considerable planning… and even then, a single unlucky misstep could undermine your entire strategy, because this portion of Zelda II requires deft twitch skill above all.
The Thunderbird appears without preamble from the right side of the screen and drifts back and forth above you. Its chamber contains a raised platform in the center, which is Link’s ideal launching point for attacks: The only vulnerable point on the entirety of the boss’ body is its gem, which hovers at the top of the screen and only rarely dips low enough to be reached without the Jump spell (and no, the upward thrust does nothing). Further complicating this situation is the fact that the Thunderbird launches its attacks — a fountain of fireballs — from a point a few pixels above the gem. To strike its weakness, you need to jump headlong into the most dangerous point on the screen, which is moving constantly along two axes. And the more damage Thunderbird takes, the more quickly it sprays fire.
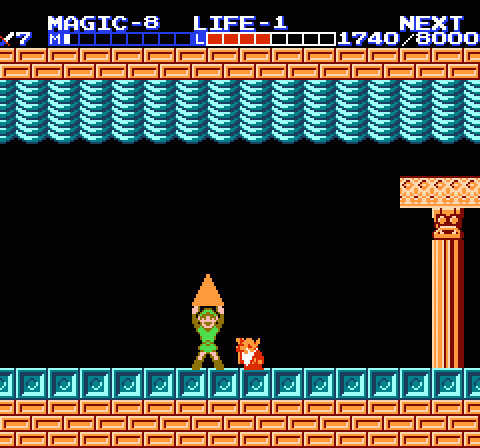
Should you manage to triumph (it’s a battle won by conservative play and well-timed jumps), it explodes and allows you to advance to collect the final Triforce. But before you can claim it, a small creature (or possibly a wizened old man drawn in the Rumiko Takahashi style; he looks for all the world like the guy who gives you a sword and other aid in the original Zelda, but smaller and with pointier ears) casts a spell and causes Link’s shadow to separate from his body and spring to life.
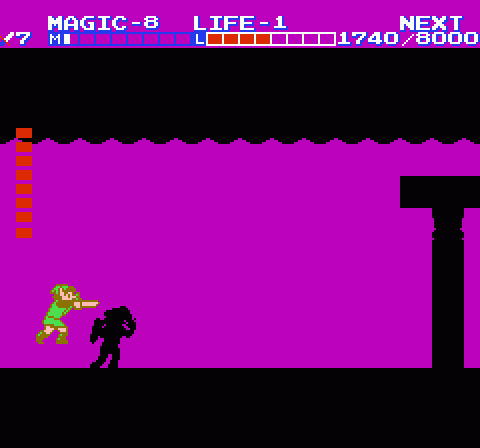
Link’s Shadow here makes for a much different sort of battle than in subsequent games. Unlike, say, Ocarina of Time‘s cinematic showcase encounter, the showdown in Zelda II is short, brutish, and nasty. Link’s Shadow has, ounce for ounce, exactly the same physical capabilities as the hero himself. And while he uses no special techniques and has access to no powers Link himself lacks besides the ability to inflict damage with a touch and a backward defensive leap, his standard tactic (going for the jugular with a frontal sword assault) absolutely does the trick. It’s an incredibly difficult battle.
Amusingly, the best defense against Link’s Shadow is to retaliate in kind and go hog wild. With the Shield spell active, chances are good that an offensive strategy will give you just enough of a defensive advantage to outpace the shadow in a pure toe-to-toe battle. Of course, that assumes you make it through the Thunderbird battle with enough magic and health to hold up — or that you get lucky with the magic jug spawn in the room to the left.
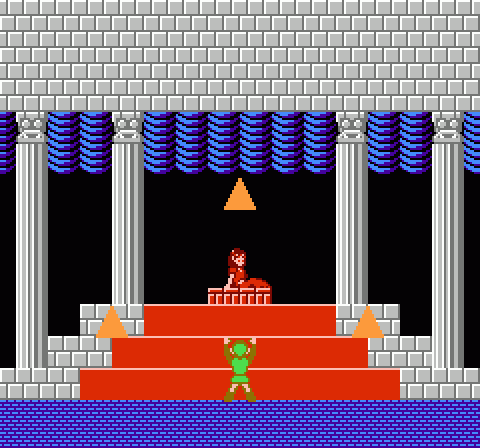
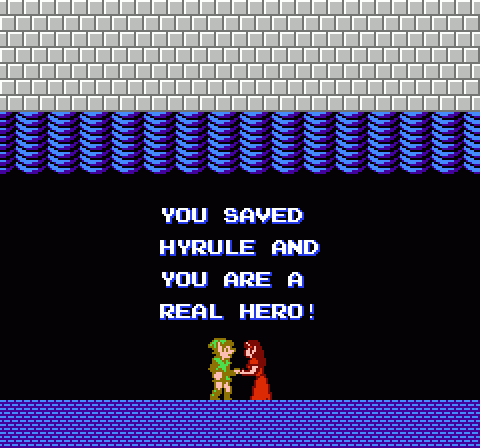
With the battle won, Link acquires the third Triforce and uses its power to raise the sleeping Princess Zelda. This raises further questions, of course: What happens to the Triforces once they’re all united for the first time in millennia? Isn’t bringing that power together again kind of dangerous? And what happens now that Hyrule has a superfluous princess, both the modern-day one Link saved the first time and the sleeping one who just rose after countless years of slumber? We demand answers, Nintendo.
From here, players can launch into a Second Quest, which interestingly enough is much easier than the first playthrough since you retain most of your abilities. Where the original Zelda‘s Second Quest completely reshuffled the world and dungeon layouts, Zelda II keeps everything the same but gives you more tools with which to conquer it from the outset. In effect, it’s a New Game + mode, long before we had a term for such things.
Hey! Am I first?
I remember fighting Thunderbird (or the Angel, as we called it), and at first I thought “Hey, this is easy”, but with the ever-increasing amounts of fire spewed I rarely ever got through without hearing that ominous beep-beep of low energy levels.
The shadow can still be beaten, though, by using the old NESMax-trick of crouching and using an autofire controller to just stab low all the time. Or rather, having no such controller, I crouched and pressed the B button like crazy. It actually sufficed, and beating Zelda II, even by chickening out, is probably my greatest accomplishment as a gamer.
Though a friend of mine beat Zelda I, II, Castlevania, Metroid, Snake-Rattle-and-Roll, Megaman and Kid Icarus in a few days each at the tender age of ten or so… He is still a legend among my mates.
Thanks for writing this series, it’s been a lot of fun to read over the last few weeks. I haven’t played Adventure of Link in years, since the NES days when I had to bring my cartridge over to a friend’s house and beg his older brother to do Death Mountain for me because I could never summon the skill or agility to pull off getting the hammer.
Even after that I didn’t get very far. As you described in your posts, the game is way too obtuse, and at that tender age I just couldn’t make the logical leaps that were demanded to overcome some of the puzzles. (And there was no way in hell I was going to get permission to call a toll line for answers.)
I’ve been meaning to pick up the game on my 3DS for a while now. I think this gives me the push I need to finally lay some old demons to rest.
Again, awesome writeup.
To follow up on my last comment, on Zelda II as a game partly about purification: I like to think that Link’s Shadow represents the residual taint of Ganon still within Link—the taint he took on at the end of Zelda I, and what would make it possible to revive Ganon in Zelda II by killing Link and casting a spell over his ashes. (So is the reason why Ganon keeps coming back in all the historically-prior sequels that someone actually killed the protagonist or a descendant of his?)
One cool implication here is that when Link beat Ganon in the first game, he took on a really horrible burden, which he couldn’t have expected and didn’t asked for. In Zelda II, the newly adult Link is the most dangerous person in Hyrule. He’s a walking time bomb: one false step or mistimed parry and he plunges the world back into darkness, as the game reminds you again and again. Maybe this wasn’t intended as a metaphor for the painful responsibilities people have to assume when they grow up, but it sure works as one.
So on this reading, the old man at the end is doing Link a painful but necessary favor. He’s giving him a chance not only to make himself pure enough to handle the Trifore, but defeat Ganon once and for all. So the way the whole Zelda story ends is through Link overcoming himself, in the toughest and most cinematic fight in the whole series (and among the toughest and most cinematic fights in all of video games). Link has grown up, the ur-Zelda (rather than Ganon) is finally revived, and the curtain falls with the two (maybe) starting a life together.
Again, maybe I’m reading too much metaphor into this, but you gotta admit it is a really cool metaphor, in a lot of ways.
Nah, I dig this.
Thunderbird scared the crap out of me initially. But once you figure out the trick, it’s alarmingly easy. It almost lulls you into a false sense of security for the Shadow battle. And that one is tough, again, until you figure out the trick. I personally used Shield and Jump (if you have a full magic meter, you should have enough after Thunderbird for them), then got at the left edge of the screen and stabbed him on coming down. Sometimes you hit, sometimes not, but being able to jump well outside his hit radius is very useful indeed.
I still couldn’t believe it when I beat the game. Even though the game doesn’t hold the same level of difficulty it once did for me, I still find myself succumbing to the same sense of dread I had all those years ago. Truly astounding.
I was surprised to see that the Shadow battle was considered so difficult here, given the whole “crouch in the lower-left” bit. It’s sort of clever, in a way, insomuch as that Link can’t defend while walking, so using it against a near-perfect double just makes strategic sense.
“And what happens now that Hyrule has a superfluous princess, both the modern-day one Link saved the first time and the sleeping one who just rose after countless years of slumber? We demand answers, Nintendo.”
I’ve been asking/saying this for years. =)
By the way, was this scheduled ahead of time? The notification I got for the post had it come up right in the middle of today’s Nintendo Direct! =O
As a kid, fighting Link’s Shadow was one of the most difficult battles in gaming history. To date, I don’t think there has been anything close to what this fight was like. I spent dozens upon dozens of tries, making my way through the Great Palace and trying different strategies, eventually using the strategy described in this post to finally beat him and win the game. It wasn’t until around The Legend of Zelda’s 20th anniversary that I learned of the trick to beating the Shadow, thanks to the Duane and Brando song. I played through the game again, moved to the left side of the screen and crouched down, constantly stabbing. Shadow Link continuously hopped into my sword thrusts and victory was mine on the first try. I couldn’t believe it! This cheap tactic made gaming’s most difficult battle cheesy. I’m glad that I was able to experience victory over this game the “right” way as a kid. It was immensely satisfying to do so.
When I first bought this game, I was disappointed by the changes and the immense difficulty. Death Mountain and the Hammer were a block that I couldn’t hurdle initially. I would put the game away for weeks, then come back and try again. I finally obtained the hammer after restarting the game a couple of times and trying new strategies (to include grinding, leveling stats in a non-uniform fashion, and trying different routes). But then the game got harder. Thankfully, the skills I had picked up from Death Mountain adequately prepared me for later difficulties. I still hated blue Ironknuckles (especially the third boss) and don’t get me started on Fokkas, but this game taught me that when things get hard, whether in games or in life, it pays to take a step back and rethink your strategy when attacking a problem.
Thanks a million!
Is there anything in that story in the manual about Hyrule’s royal family that was mistranslated?
A very nice bow at the end of a great series of articles, thank you.
Also, thanks to Ben B for the summary on the possible lore of the game. Gives a lot of sense to the game during its play and the ending.
Actually, I still have one final wrap-up piece to go.
Enjoyed this immensely. Completely agree about crossing that point of no return. I was especially shocked the first time I saw how big and threatening the Thunderbird actually was. You kind of went through the game with hushed mentions of it, and while I never was able to defeat it (my nerves got the better of me as a kid) the thought of fighting your own shadow was somehow more terrifying and really made the player think long and hard about taking that l-o-n-g trek through the final palace just to reach hell.
It took me a few tries to beat Link’s Shadow my first time, yes, but for some reason it seems a little easier now, and I almost never die to the Thunderbird anymore. The real challenge is the Great Palace itself, which is _gigantic_.
A trick to the bottle spawns, that works throughout the game: if you strike a bottle spawn point and it makes an Ironknuckle or Fokka, leave the room and come back. So long as you don’t kill the enemy, the spawn point will remain, and you can trigger it again. You can do this repeatedly until you get the bottle.
One cool thing about the Great Palace: any time you travel through a room that’s just an elevator shaft, feel around the left wall. There should be a place where you can walk through there. Many of those side rooms will have a statue (you can only reach it though with Jump) that produces a red bottle or Fokka when you strike it; using the trick I mention above you can keep trying until you get the refill (or until you run out of magic for Jump).
Loved the music in this level, always felt that it had an epic “last battle” feel to it. Not too many games imo got that part right.