Before we delve any further into the design of The Goonies II, it’s important to take a step back and talk about one of the most curious fundamental concepts behind the game: The idea of front and back. When you pause the action, you’re taken to a Zelda-esque menu screen.
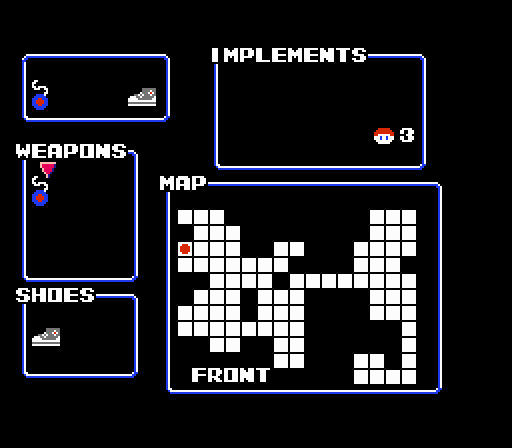
Say, this is a pretty cool addition for a 1987-vintage action game. Even Metroid didn’t have one of these, as much as an auto-map would have come in handy. Actually, “auto-map” isn’t the right term here; the map doesn’t fill out as you explore but rather gives you a rough idea of the shape of the Fratellis’ lair from the beginning. Each grid of the map corresponds, roughly, to one screen’s height and about a screen and a half’s width, so it’s a fairly accurate representation of how much territory you have to explore.
You also get a sense of the inventory you’ll be collecting throughout the adventure, which breaks into two active selection categories (weapons and shoes) and one passive ability boosting group (implements). The lattermost of these are the sort of things that appeared hidden throughout the original Goonies, like the helmet to resist falling objects and the raincoat to protect you from steam geysers, as well as some new gear. This is also where you’ll keep count of your adventure scene tools like the hammer and keyring you found in the first area.
All told, your inventory screen will eventually look like this:
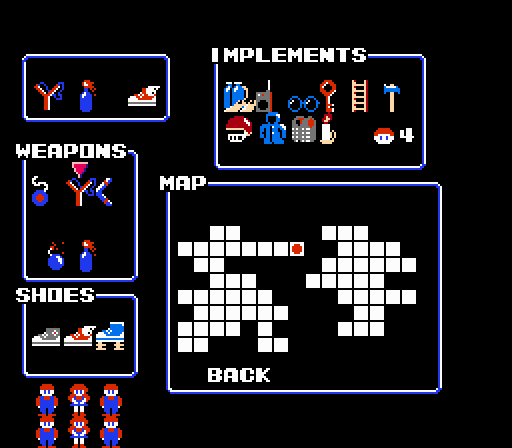
So you get a pretty solid sense of the total scope of the adventure right from the outset. But hey, wait. That second map is different than in the first screen…
Depending on where you are in the game world, you’ll see one of two different map layouts: One labeled Front and the other, obviously, denoted as Back. This is actually something carried over from The Goonies for Famicom, though here it’s presented as much more of a concrete mechanic than in the first game. Before, you’d duck into a door (often shaped like a skull’s mouth) and come out some other place in a level; here, your movements line up between two sides of a map. Note that “Front” and “Back” are not reversed from one another — if you move to the left edge of the Front map before switching to the other area, you’ll be at the leftmost side of the Back map as well. Basically, you’re viewing both maps from the same relative direction, and one literally sits in front of the other. It’s a little weird, but even if the real-world logistics of it don’t quite make sense it makes practical navigation a lot easier.
The Front and Back maps of the hideout actually line up quite consistently, once you figure out how they correspond (the restaurant has an attic that rises one screen higher on the Front side, so the top left row on the Back map is one row lower than the top left row on the Front map). The one wrinkle that complicates things comes from the Warp Zones that lead you to entirely different points of the other map, but generally those connect self-contained areas that line up with a similar region in the same vicinity on the reverse map.
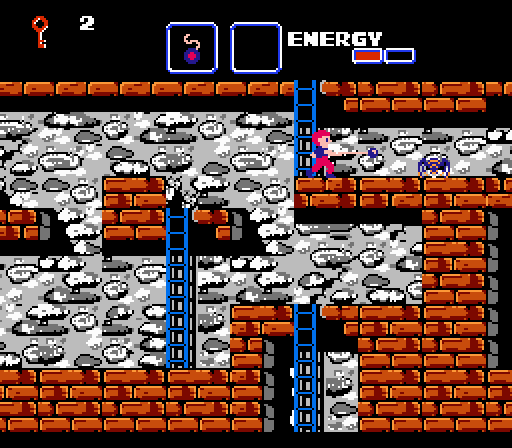
Anyway, all of this is good to know, because as soon as you climb down the ladder leading from the opening restaurant area, you immediately find yourself at an intersection leading in several possible directions. You can climb down another ladder, move left, or go right. As with Metroid, The Goonies II kind of banks on your platformer instincts to take you right immediately. This leads you to a total dead end, though on the other side of the wall you can see an extension of this cellar area just out of reach. You won’t actually be able to traverse that area until the very end of the game, but from the very beginning it’s there, tantalizing you, provoking you to wonder what’s over there and how you can reach it.
Should you choose to go down, you’ll see more of that out-of-reach endgame territory as you travel to a door that takes you to a Warp Zone. That’s not really what the developers intended for you to do here, but they allow it; The Goonies II is pretty well completely open to you to explore from the outset. You can only get so far until you collect the critical Implements you need to navigate the Adventure scene pathways, but unlike Metroid, there is no real sense of linearity at work here. The Goonies II works more like Castlevania II, allowing you to become completely lost before working out the solutions and secrets at hand. Thankfully, the secrets aren’t nearly as opaque here as in Simon’s Quest. The people who give you hints are even kind of helpful! Unless you punch them.
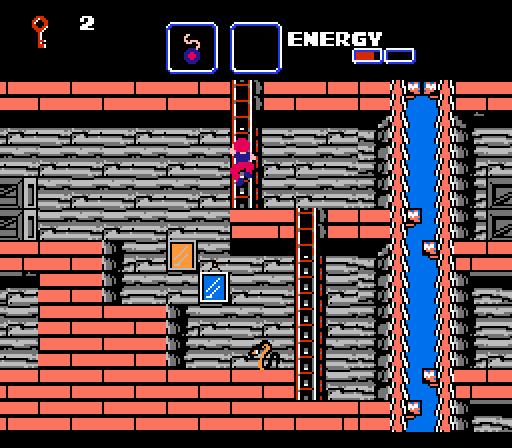
While you’re free to pass through the Warp Zone, you’ll ultimately find dead ends (no doubt after considerable frustration). If you move left at the cellar intersection instead, however, you’ll come to another door — and this one, unlike those in the initial restaurant area, don’t lead to dead ends. Instead, the door passes through from the Front map to the Back. You’ll come out in a cellar similar to that on the Front side, though with an earthier color scheme, and see a ladder leading immediately upward.
The door between cellars doesn’t simply serve as a thoroughfare, though. As you move from one side to the other, you’ll find a Magic Locator Device simply laying there in the open. As the locked-up hint in the restaurant explained, you find your lost Goonie pals with the Magic Locator Devices you find — and sure enough, if you check the map once you enter the Back cellar, you’ll see a blue dot two rows above the red dot that indicates Mikey’s current position. There are seven devices and six Goonies plus the game’s damsel in distress, the inexplicable Annie the Mermaid, so each one you collect will lead you to a different companion in need of help.
Up the stairs you’ll find another hideout like the one where you began the game (though, again, palette-swapped). At the right end you’ll again see more of the game you can’t immediately access; the path leads you to the uppermost level of this building, but it ends with no way down to the other half of this building. The good news is that at the dead end you’ll find a door where the first of the Goonies is locked away. Liberate your friend with a key and you’ll receive both an admonition (said captive has the temerity to complain about how late you are arriving to save his life) and an extra block of health, boosting your maximum energy from two blocks to three. Nice!
So, in the journey leading to the first captive, The Goonies II gives you enough freedom to become temporarily lost, but it also makes the path to this initial objective impossible to miss once you move in the proper direction. We’ll look at some of problems in The Goonies II soon enough, but the game actually does quite a nice job of providing some guidance to get your started without railroading you toward that first goal. It may take you a little while to get here if you don’t pass through to the Back cellar before exploring what lies beyond the Warp Zone, but eventually you’ll have to make it back to this point. All in all, some pretty smart game design.
I’ve owned this game since it came out (and people on the playground swore Goonies II was a real movie and they had rented it) and the front/back thing still confuses me at times, but I think you did a very good job explaining how it works. I remember re-drawing the two maps on overhead projector slides once and laying them on top of each other just to try and understand the connecting points.
I’ve been thinking about this game a lot since it was called Castlevania’s “sister series” on Retronauts and reflecting on how it fits into the evolution of Metroidvanias. I’m very glad this game is getting some well deserved attention from someone who appreciates it for all its foibles.
And here I thought Data said “Pincers of Power”.
I know it isn’t well known in the US, but have you considered playing Maze of Gallious a bit and doing a comparison with Goonies II? It seems like it was released a few months earlier than Goonies II in Japan and being a Konami game, I wonder just how much Metroidvania DNA runs through it. The MSX actually seemed like quite the playground for Metroid style designs back then.
I do not see the appeal of the Goonies games in the slightest, so I’m really excited to read through this series. Hopefully I can try them again with new perspective.
You gotta look at this one in the context of its era. It can be a tough sell now, but it was pretty groundbreaking in its time.
I remember this as the game I owned as a child that for years was just an opaque mystery, then at some point I managed to accumulate the intelligence & free time to beat it. Once.
Then later, in early high school, I came back to it and found a lot of new things to appreciate. I managed to make some real progress on a few long play sessions, but I lost my progress on it twice thanks to a few power losses, and gave up on it forever after that.
I wonder if I played it again today I’d just circle back around to being confused & aggravated by the opacity & repetition of it all. But it’s not without its charms, and is indeed damned ambitious. Unnecessarily so, considering the subject matter.